Moka Recruitment System Operation Guide
(HR)
1.HR role definition and permissions
HR Role Definition:HR can check the candidate information of some positions and part of the report system
HR Permissions:
Permissions/Roles | HR |
Add Team Members | |
Post Position | √ |
Position management | Part (having access to a position) |
Add Candidates | √ |
View Candidates | Part (having access to a position) |
Screening resumes | √ |
Promote resumes | √ |
Arrange interviews | √ |
Fill in interview feedback | √ |
View interview feedback | Part (having access to a position) |
Send offer | √ |
Talent pool management | √ |
View Data Report | √ |
Custom Data Report | √ |
System settings | Part (less) |
• Overview - Important Issues/Recruitment Overview
• Candidate Management
• Interview Arrangement
• Position Management
• Talent pool
• Report Center
2.System login
2.1 Login and registration on the PC
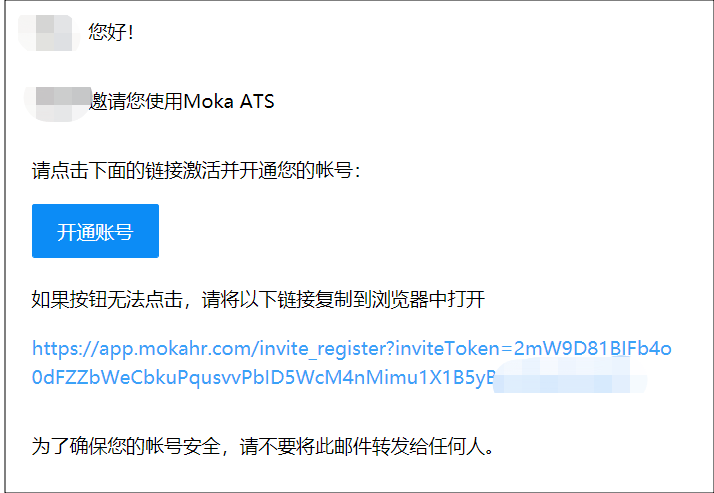
When the super administrator creates an HR account, an activation email will be automatically triggered. Click "Open account" or the link below to activate the account. 360 and Google browser are recommended.
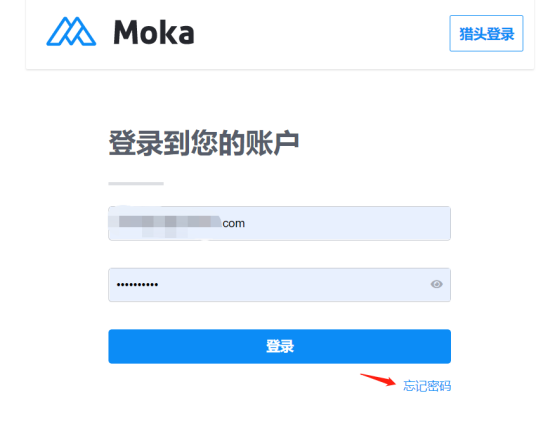
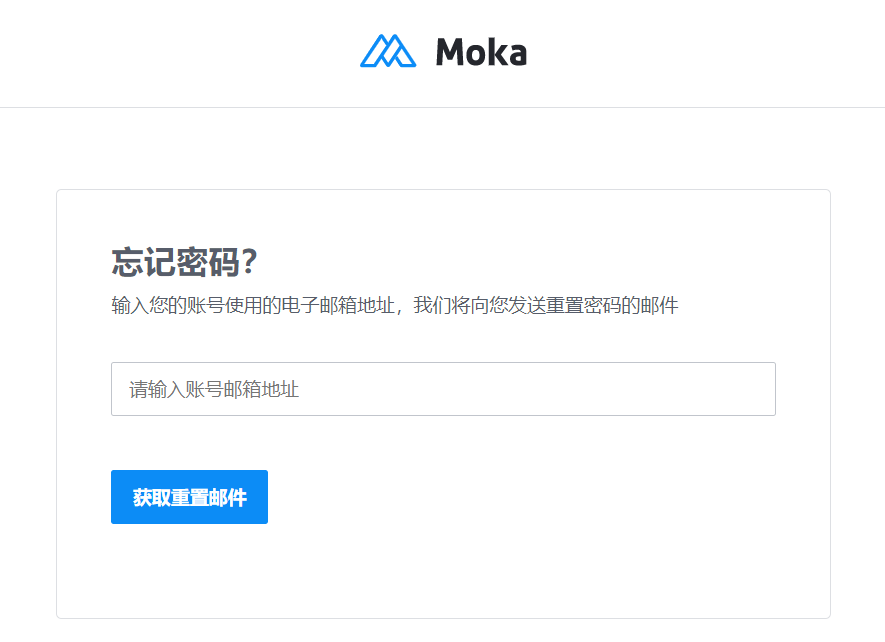
If the password is lost, you can directly click "Forget password" to reset, enter the email account, click "reset email", you can go to the email box as prompted.
2.2Dingtalk login to Moka
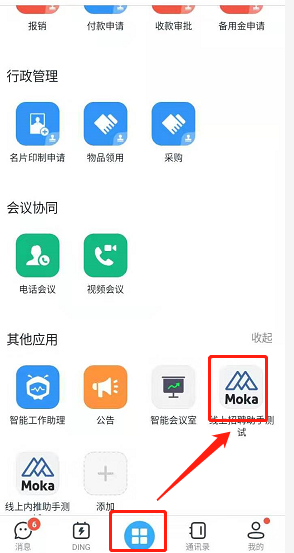
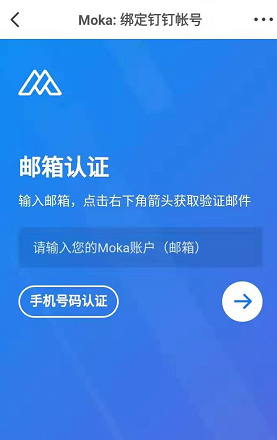
Open Dingtalk APP, find "Moka Recruitment Assistant" on the workbench and click the icon to enter the link of binding account, which can be bound by email account and mobile phone number.
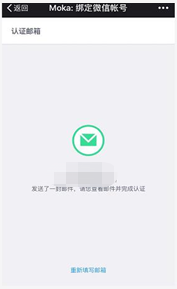
Email binding mode: The mailbox will receive a binding email, click to confirm binding:
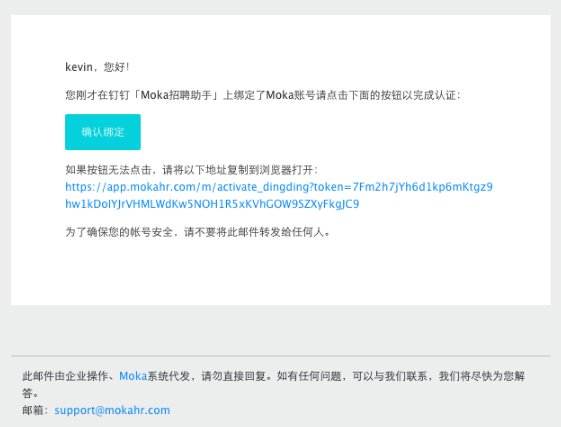
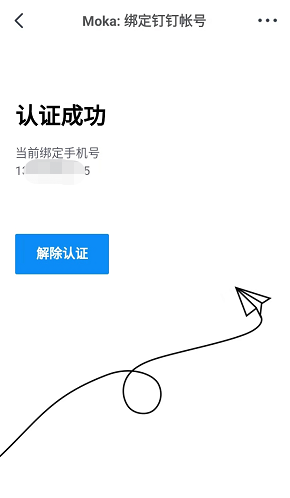
Figure of operation page after login:
Note: When logging in Moka through Dingtalk, the plugin will not be able to capture resumes normally. If you need to use "JianCang" plugin to capture resumes, please directly use the browser to log in through the website https://app.mokahr.com/
2.3WeChat login to Moka
You can log in to Moka on WeChat in the following two ways:
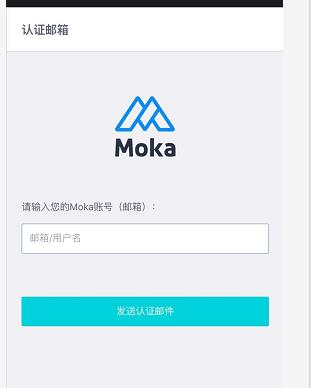
Scan the code to follow the official account "Moka Recruitment Assistant" in the email of resume screening or interview arrangement received for the first time, enter the account (email), and click "Send Authentication Email".

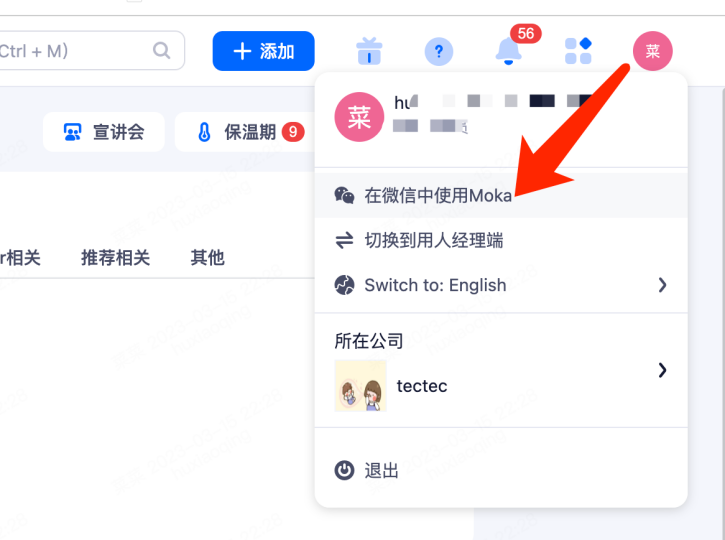
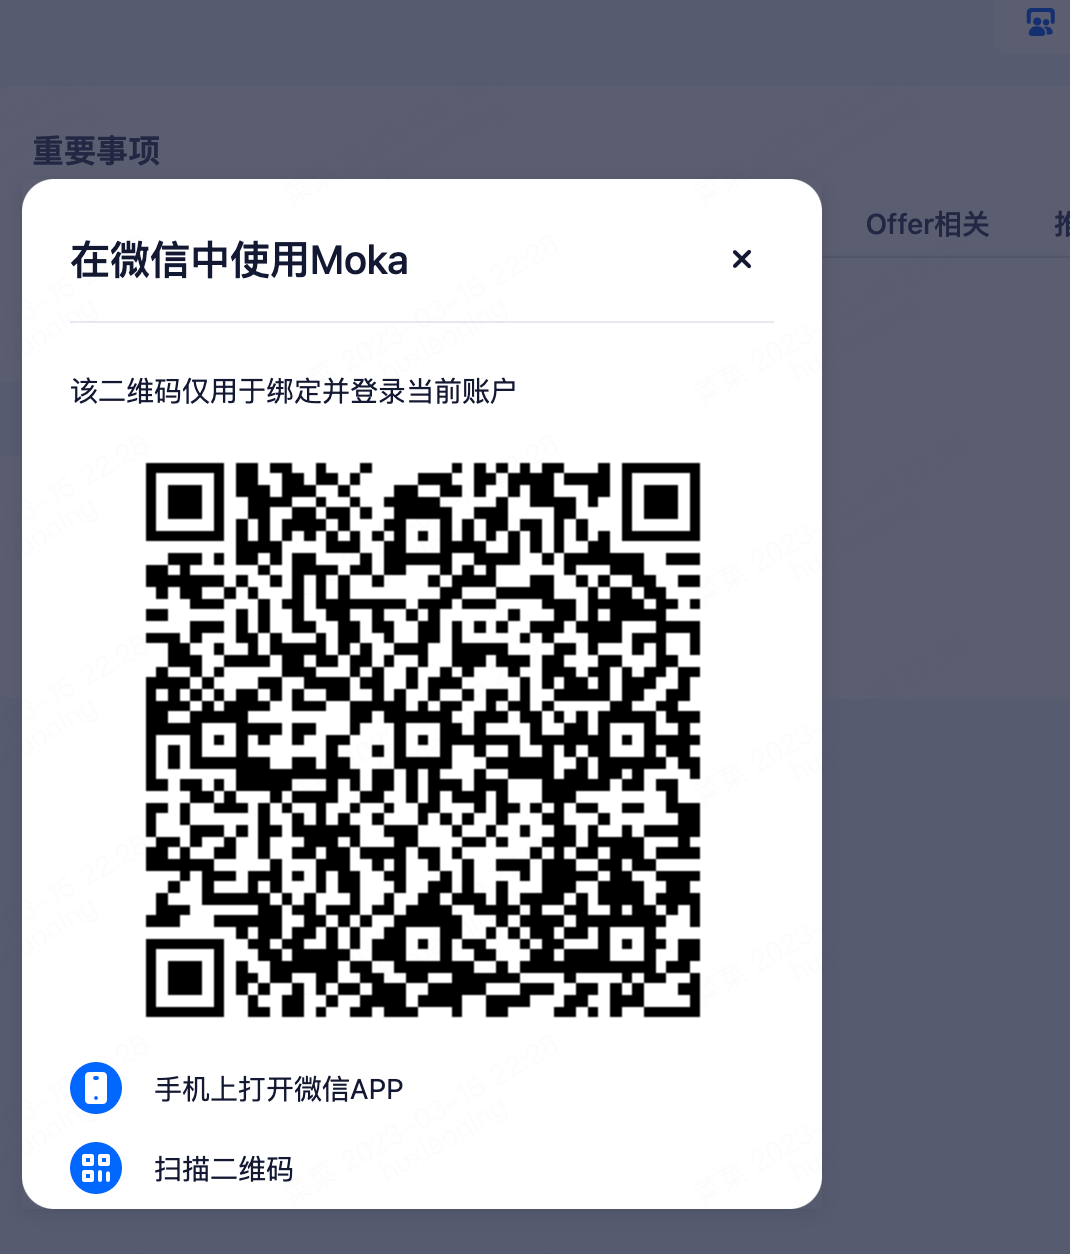
After logging in to the system, place the mouse on the avatar icon on the top right of the system, click "Use Moka in WeChat" in the expanded menu, and WeChat binding QR code will pop up, then use WeChat to scan and bind. If binding has been done, the code will be scanned and you will enter the official account of "Moka Recruitment Assistant".
2.4WeCom PC Adaptation
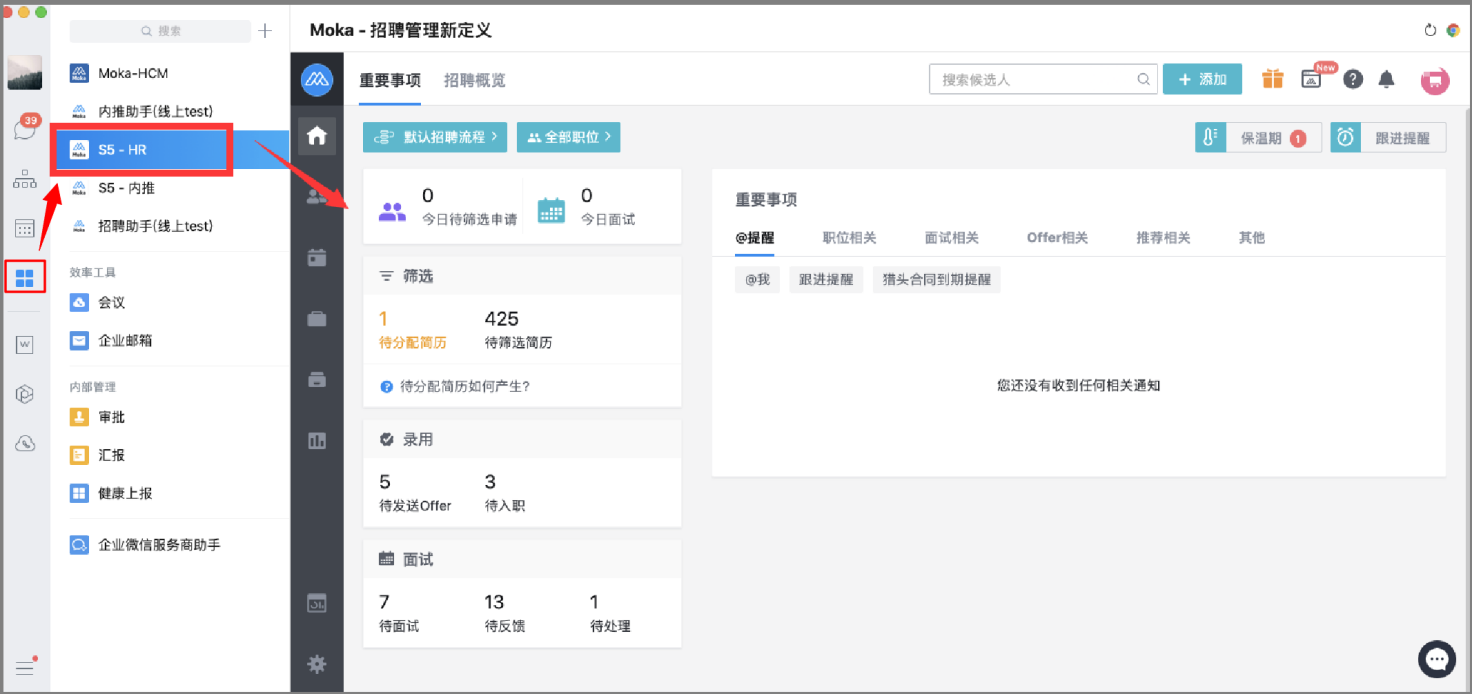
On the PC side, through the WeCom workbench, enter the "Moka Recruitment Assistant/internal push Assistant", the corresponding PC page can be accessed, so that HR can view the same page on the PC.
2.5Lark login to Moka
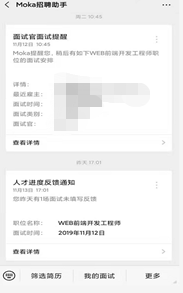
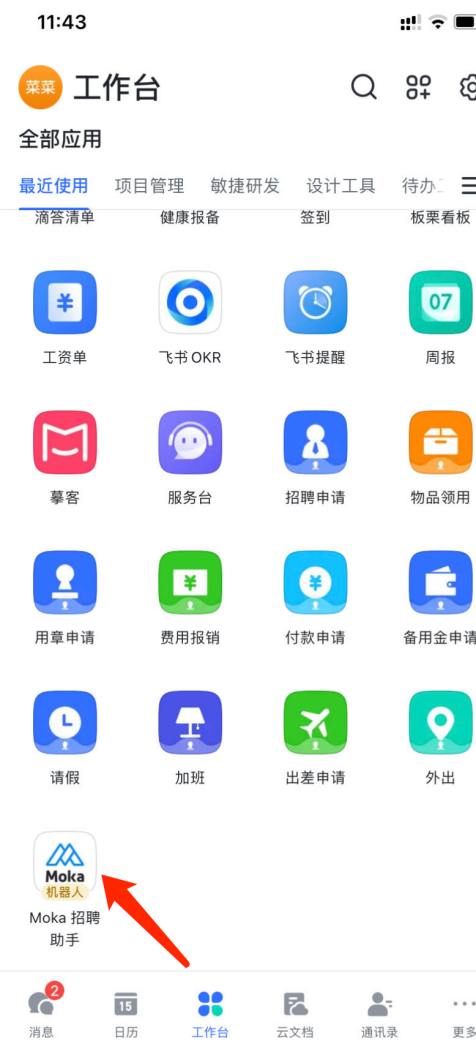
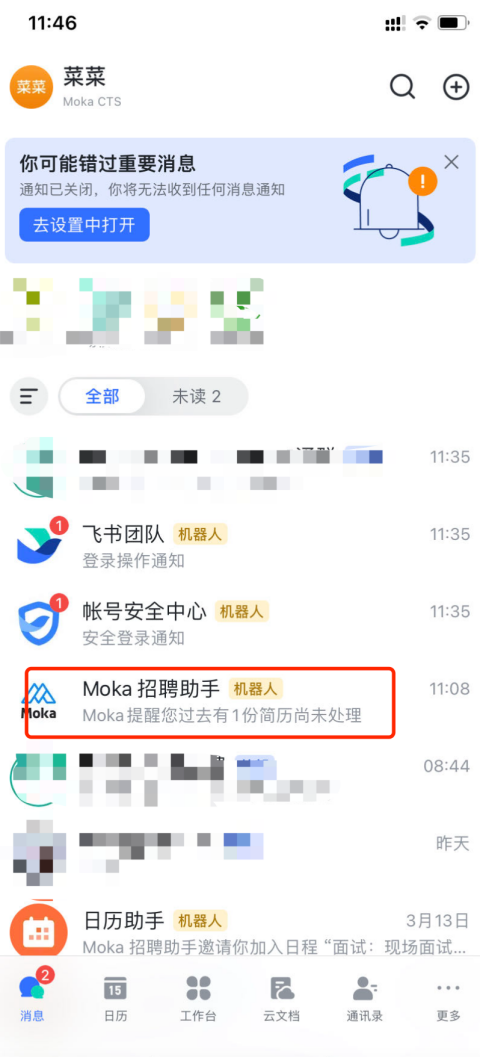
Open the Lark APP to find "Moka Recruitment Assistant" on the workbench (the enterprise can configure the name may be different). Click the icon to enter the binding account link, which can be bound through the email account and mobile phone number. After the binding, the message will be held on the list page, and click to enter to view the screening, interview, approval and other tasks.
3.Set basic data
3.1Personal information management
You can set basic personal information as shown in the figure.

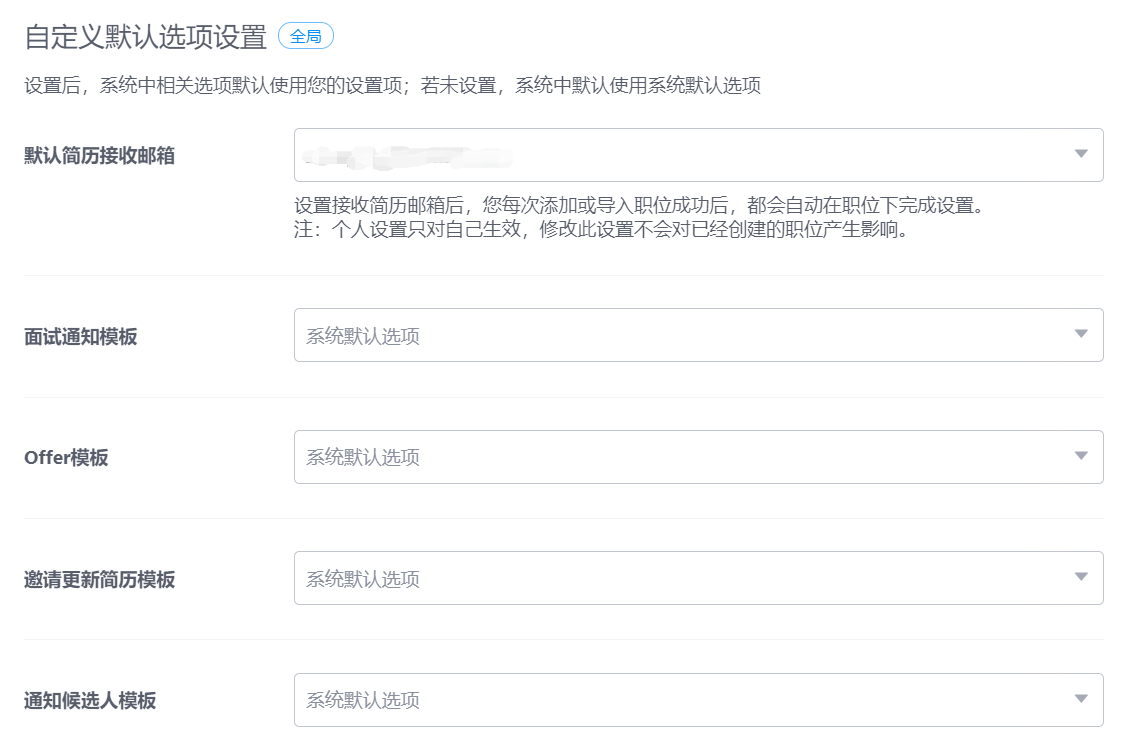
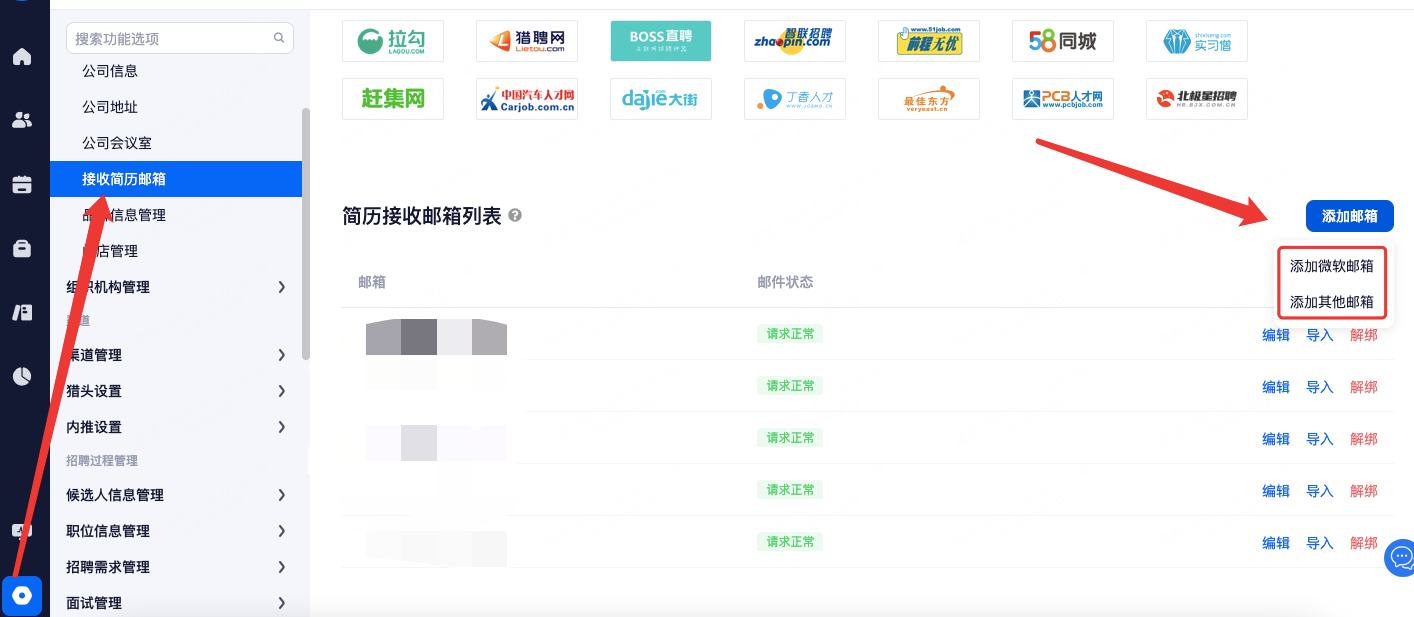
3.2Receive your resume email address
In the Settings - Company Information Management - Resume receiving mailbox, you can add an email, click "Advanced mode" to bind the email.
The function of configuring a resume email address is as follows: Moka is bound to an email address. When the resume submitted by a candidate enters the email address, the Moka system can grab the resume in the email address and enter the position with corresponding association rules.
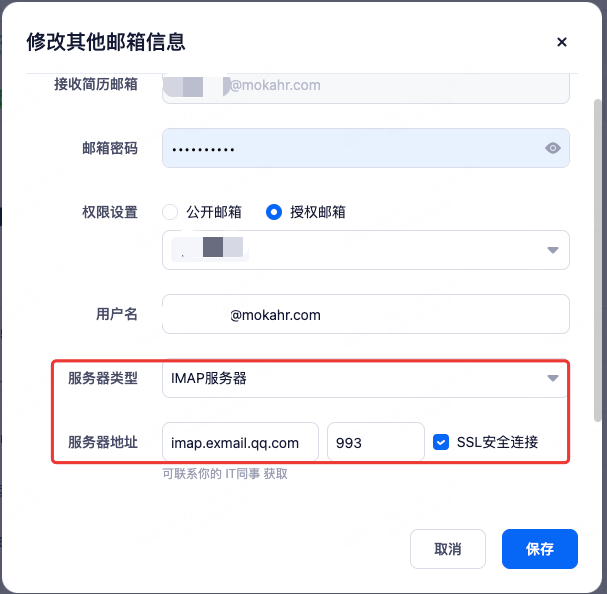
At present, it is divided into other mailboxes (imap, pop, exchange) and Microsoft mailbox (requiring mailbox administrator authorization setting). Other mailboxes require server and port numbers, and you need to confirm with the IT or mailbox administrator that the correct information is successful
Note: QQ mailbox needs to be configured with the authorization password, and the specific location is as follows:
https://mokahr.moyincloud.com/xtyy/jljsyxbd/QQyxhqsqmfs.html?searchId=1630816318839144450
3.3Bind the recruitment website account
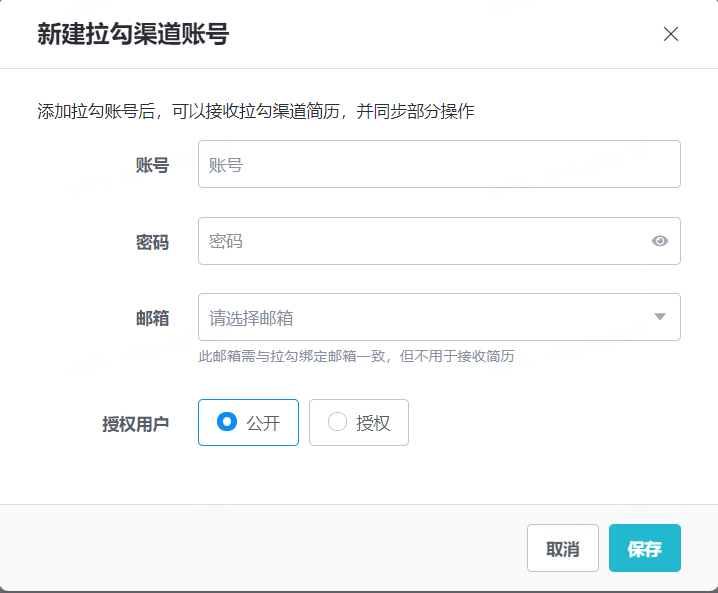
Function of binding a channel account: You do not need to enter the account name and password of the channel account every time you post, update, or remove the channel account. When Posting a job, you can bring the channel account information to the login page and jump to the channel job information page.
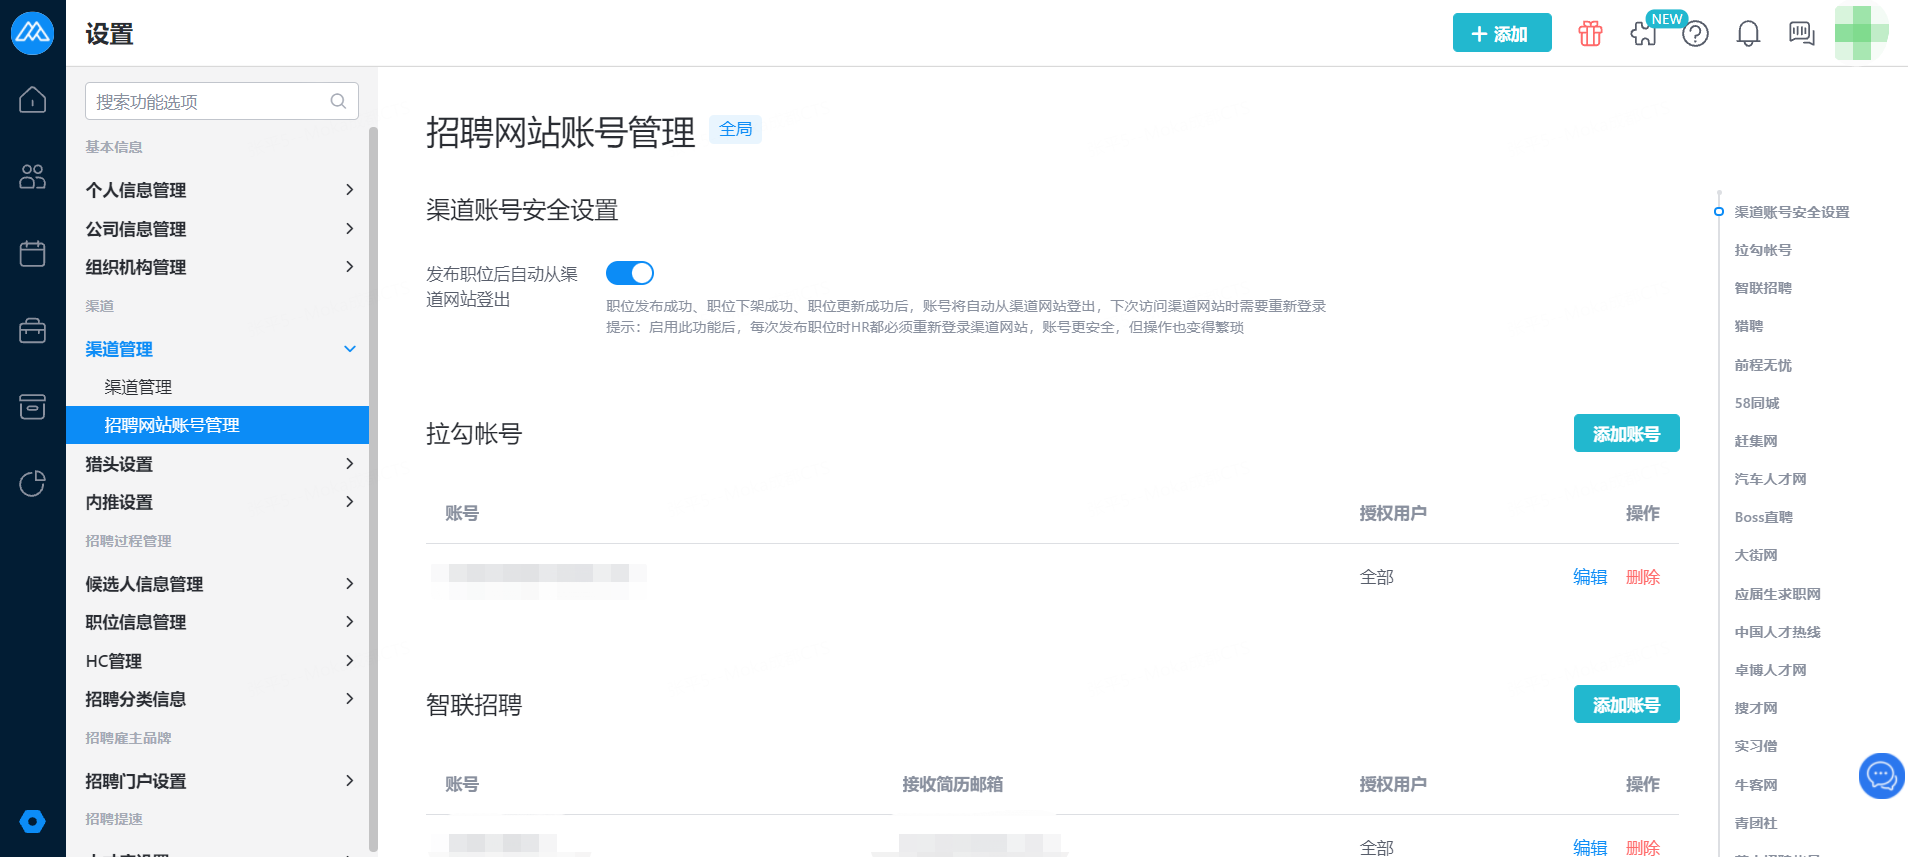
When adding a channel account, enter the information as prompted.
3.4Installing Plug-ins
Function of the plug-in: After the installation is complete, support to refresh and publish the job to the recruitment website, as well as the recruitment website search resume can be one-click into the database. (Please note: the plug-in currently supports Chrome browser, 360 browser and 360 Speed edition browser. You need to download the plug-in by clicking the manual installation method at the location where you downloaded the plug-in. After downloading the plug-in, decompress it into a folder and place it in the extension program of the browser.)
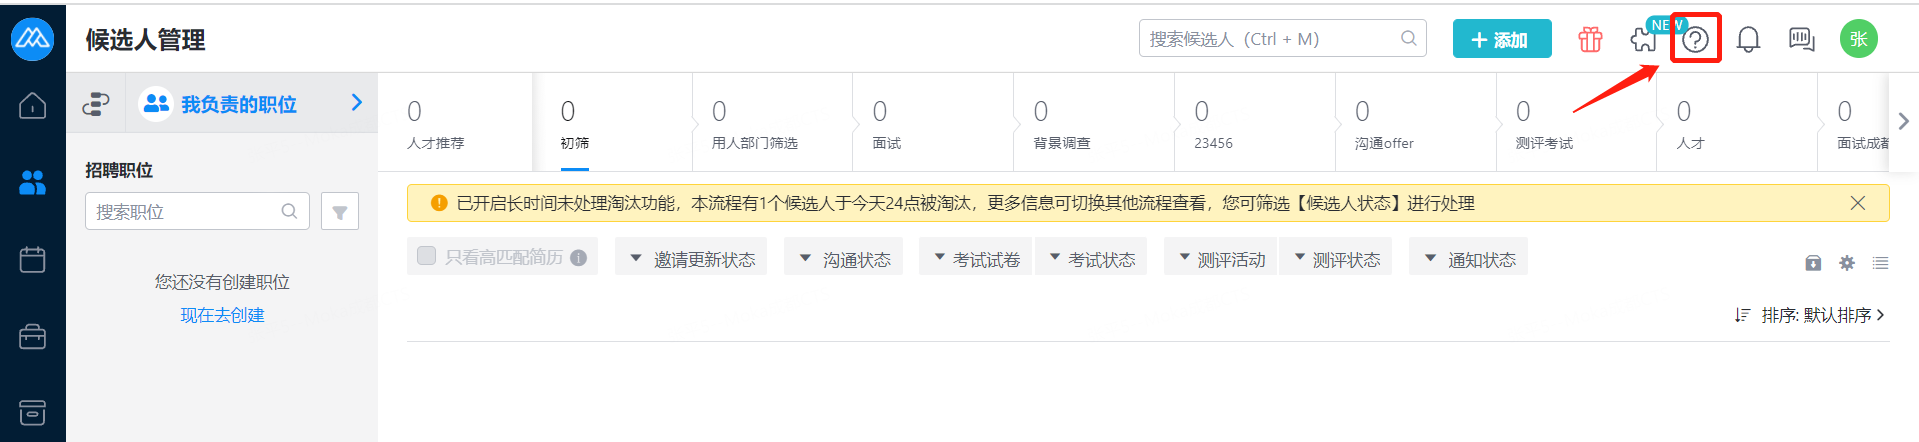
The following figure shows the download location of the plug-in which is called "JianCang". You can click the plug-in icon in the upper right corner of the system to enter the download page:

①How to install a plug-in which is called "JianCang" in Google Chrome:
https://mokahr.moyincloud.com/d/1597432443030278146.html
(MAC hide V3 installation tutorial)
https://mokahr.moyincloud.com/d/1597410803341938690.html
(windows hide V3 installation tutorial)
②How to install a plug-in which is called "JianCang" in 360 Browser:
https://mokahr.udesk.cn/hc/articles/148961
Plug-in which is called "JianCang" installation steps can also be found in the Help Center Top article:
4.Service operation process

4.1Position Management
4.1.1 Post release process
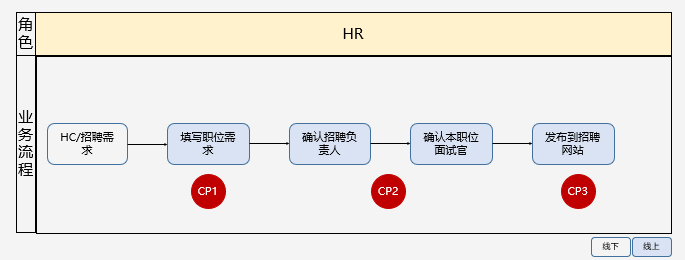
CP1:Determine recruitment process and interview evaluation form;
CP2:Whether the resume is automatically recommended to the Hiring Department;
CP3:Select the channel to be released;
4.1.2Push-in business processes
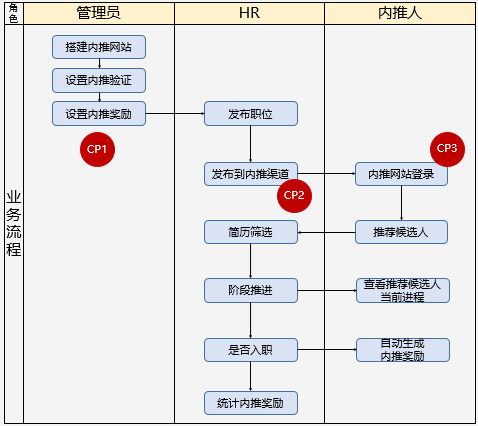
CP1:You must set the basic information related to the internal push in advance before you can use the internal push channel to recommend candidates. Pay attention to the configuration of the internal push registration form.
CP2:In the published position channel, you need to select the position to be displayed on the official website of internal push, and the position can only be seen on the website of internal push; The internal official website can be shared through QR code.
CP3:The internal push website can be logged in by computer and mobile phone, and authentication is required when logging in.
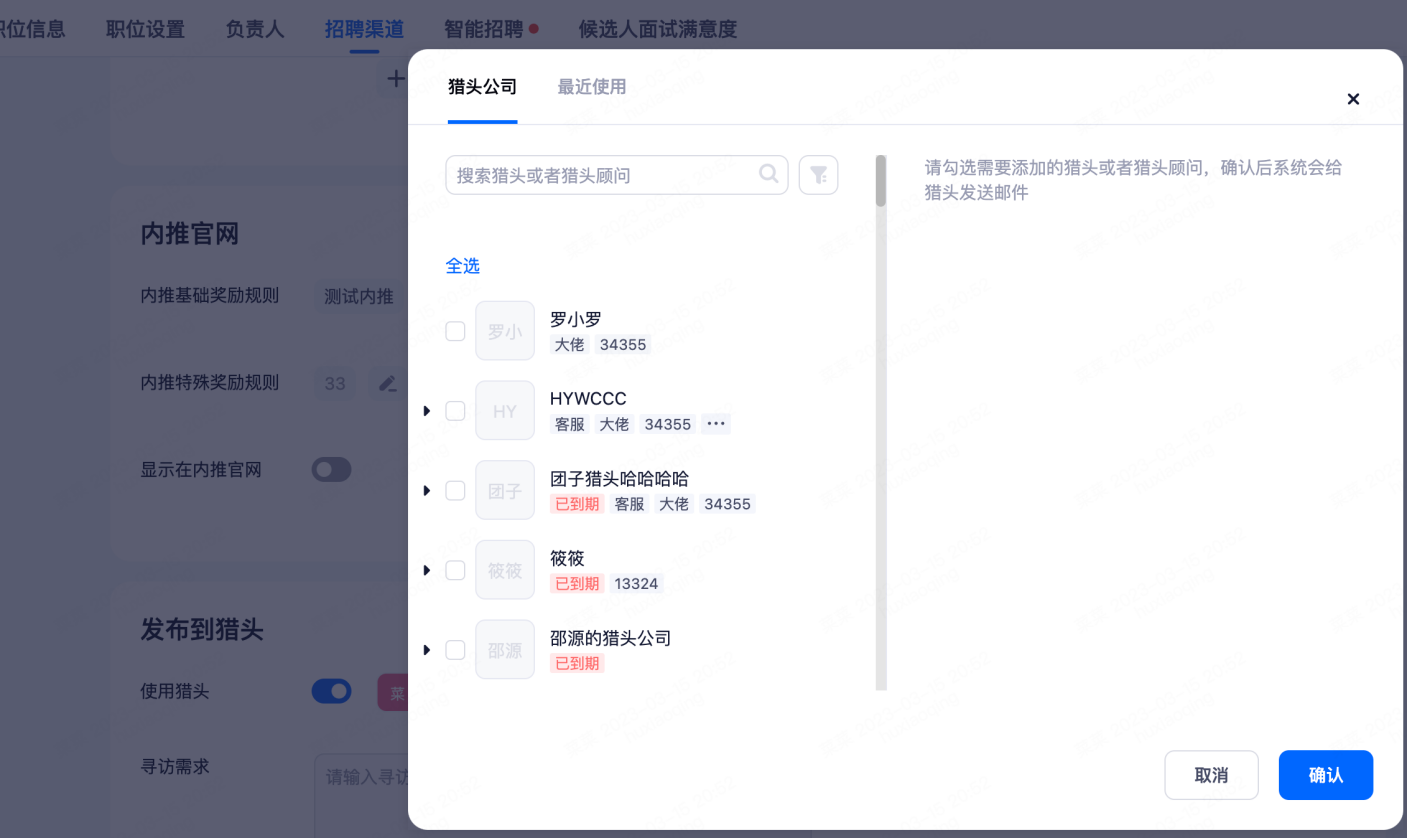
4.1.3Headhunting business process
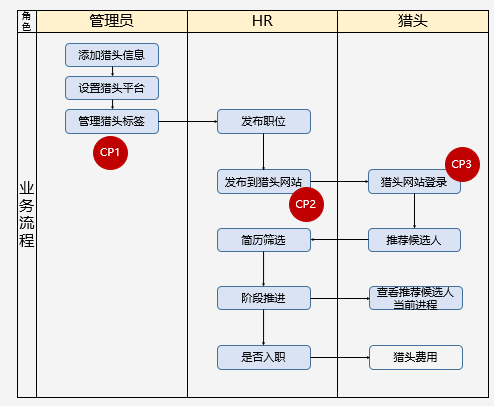
CP1:You must set the basic information related to headhunters in advance before you can use headhunters to recommend candidates.
CP2:The post should be displayed on the headhunting platform in the corresponding recruitment channel setting, and specify which headhunters can view the post; Selected headhunters are alerted by email that the position is open.
CP3:Headhunters can recommend candidates only after logging in to the headhunting website. The first login requires activating the email.
4.1.4Add/import positions
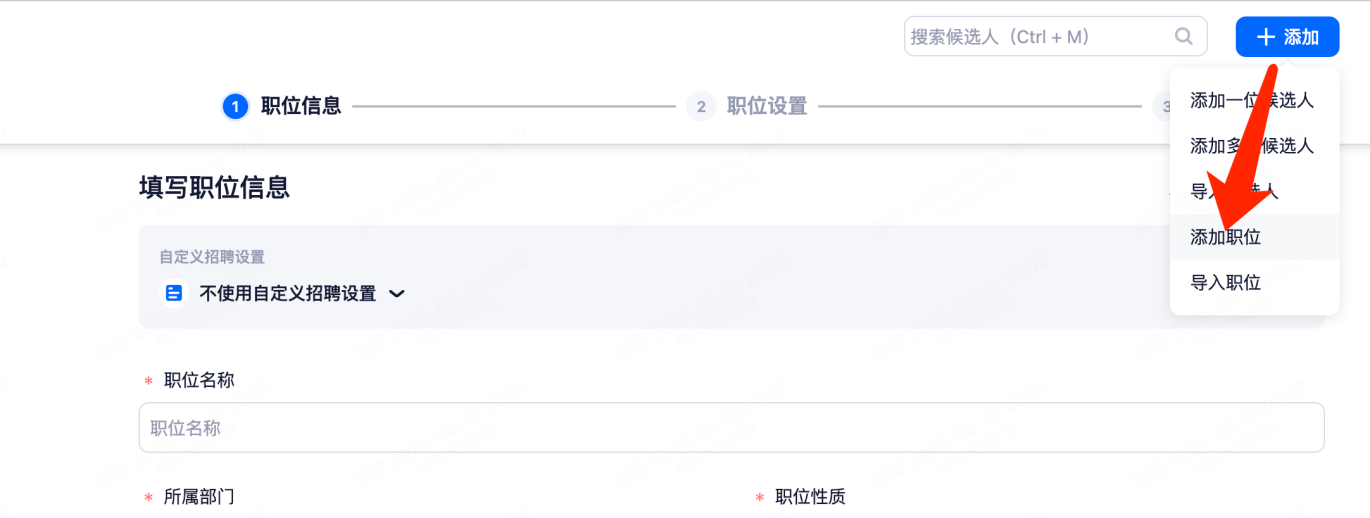
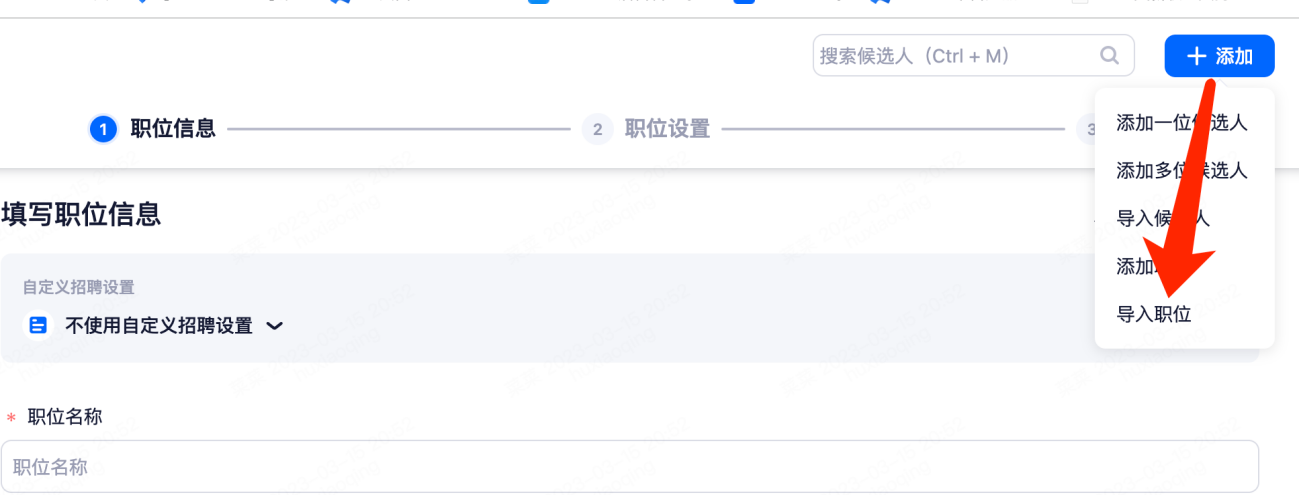
Find the "Add" button in the upper right corner of the page, click the pop-up menu and select "Add Position" to add a position. If you need to add more than one job at the same time, you can select "Import Job" and select external channels to import the job being recruited (import job only supports "Liepin" and "51job.com" channels at present).
• Adding a Position
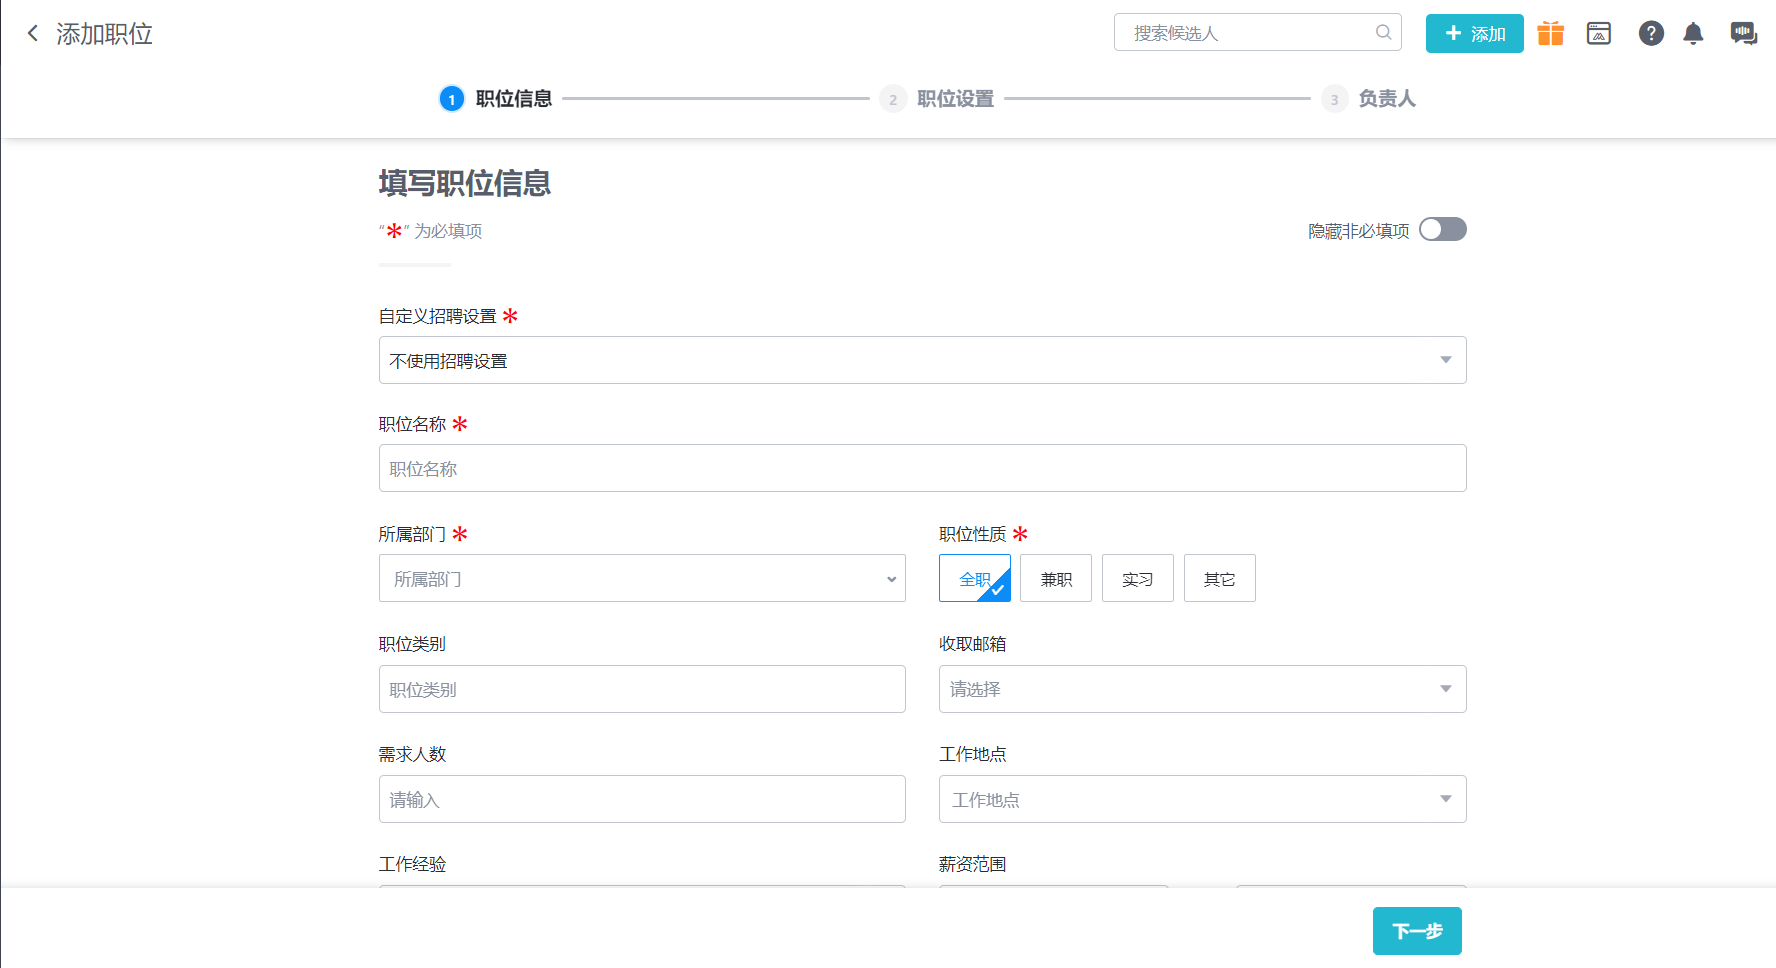
Step 1: Fill out the job information
After clicking "Add Job", you need to fill in the job information first. If you need to add a custom field here, you can customize it in "Settings - Job Information Settings - Job Field Management".
• Step 2: Define the job description
In this step, you can set up the recruitment process, binding HC, interview rounds, screening rules, etc. If you need to customize and modify some content on this page, you can click "Settings - Job Settings Item Management" in the system to select the content you need.

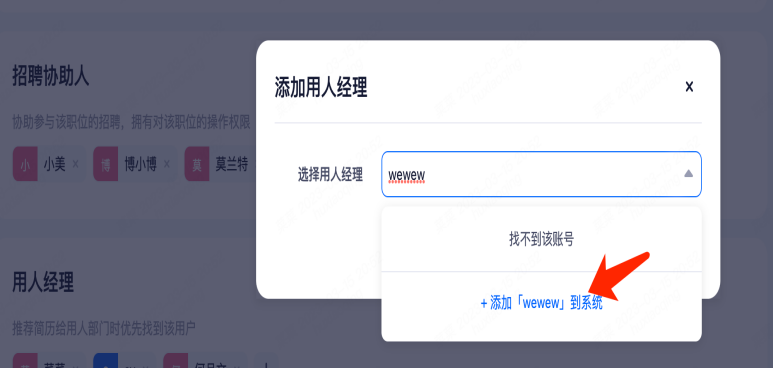
• Step 3: Appoint the person responsible for the position
There can be only one recruitment leader. You can set multiple roles for other roles. Add Supports fuzzy query. If the account you want to add is not in the system list, you can enter an email account and click Add. The account will receive an email and perform operations as prompted.
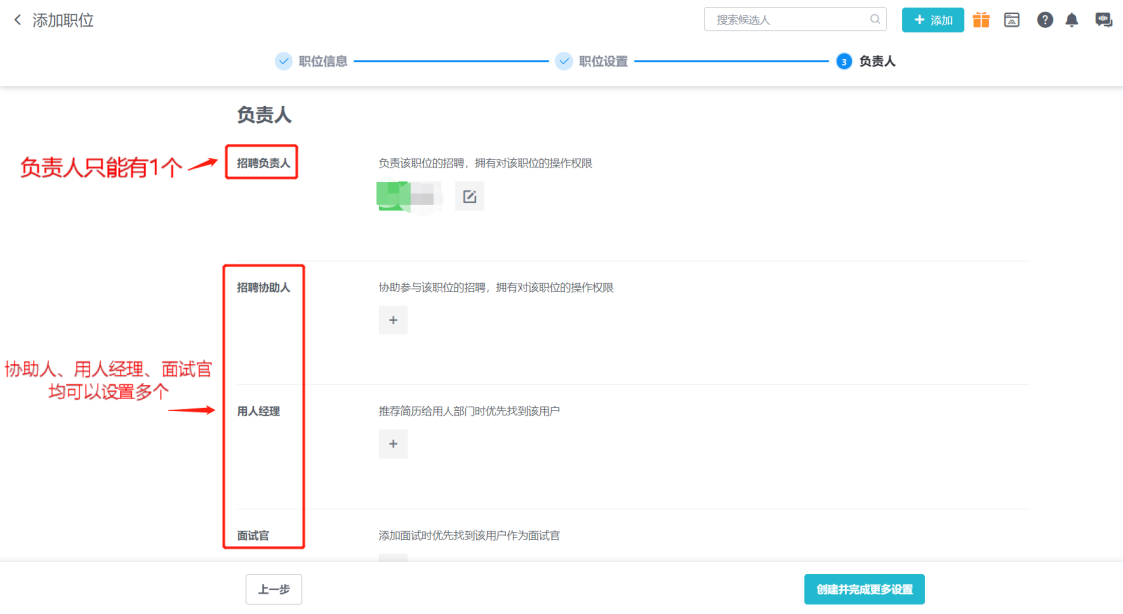

①Recruitment Manager: The default account is the current one.
②Recruitment Helper: have access to the position and the position under the resume of the account.
③Hiring Manager: The recommended resume will select the hiring manager by default, and the progress of the position will be displayed in the hiring manager system.
④Interviewer: The interviewer will be selected by default when you add an interview.
4.1.5Channels of recruitment
After the job is created, click the "Create and complete More Settings" button to set the recruitment channel. Click on the FAQ link to the right for a quick look at how to respond.
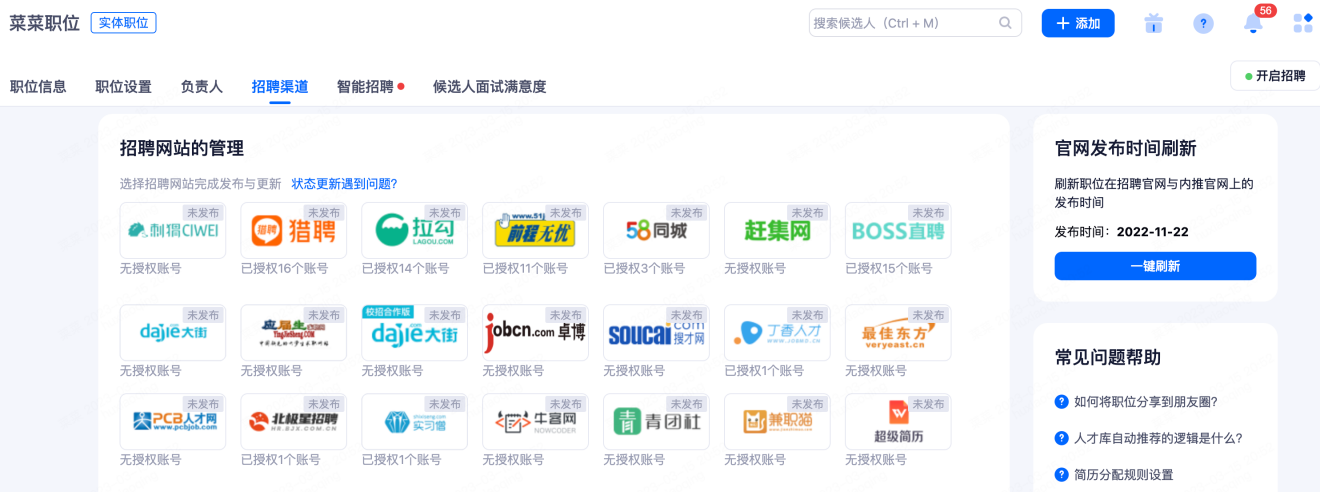
①One-click publishing to the recruitment website: Select the corresponding channel website and release through the plug-in. After successful publishing, the channel will be marked with the label of published.
②Display on the official website of social recruitment: Check the box and display the position on the official website of Moka social recruitment.
③Display on the official website of internal push: Check the box to display the position on Moka official website.
④Use headhunter: After checking, you can select the designated headhunter and open the position to the headhunter.
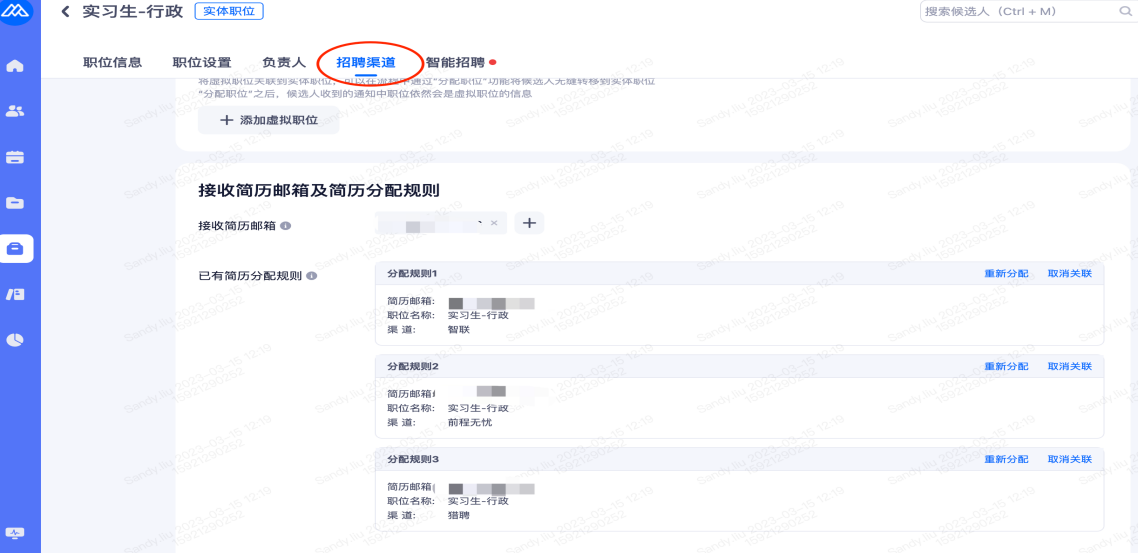
⑤Resume receiving email and resume distribution rules: You can add the resume receiving email set on the recruitment website for this position for more accurate resume distribution; Resumes to be assigned after manual assignment, the resume assignment rule is automatically formed and displayed here.
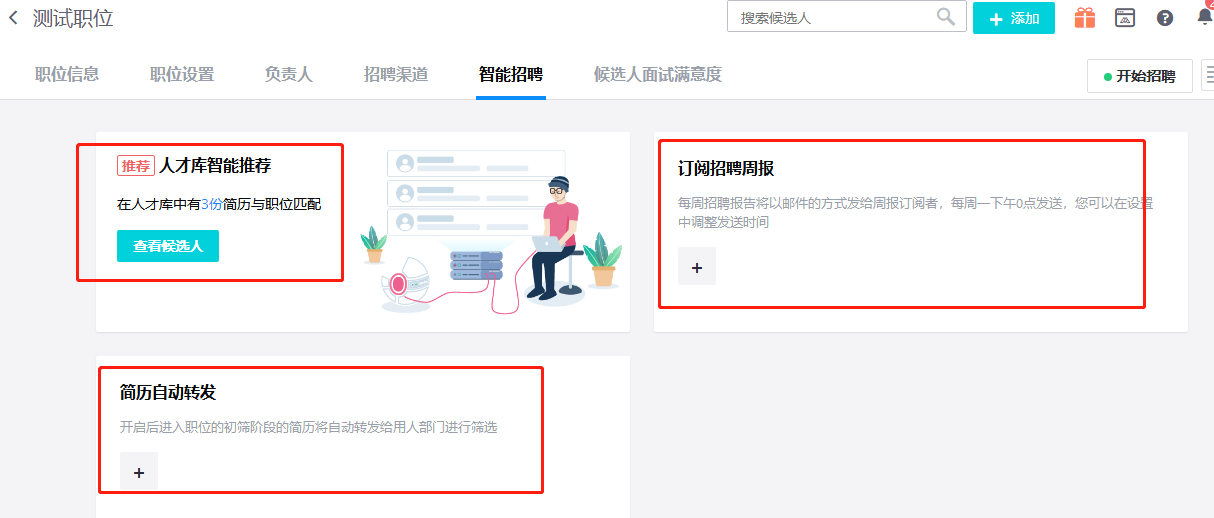
4.1.6Smart recruitment
The system automatically searches the talent pool candidates according to the job requirements, and can subscribe to the recruitment weekly report and set up automatic forwarding.
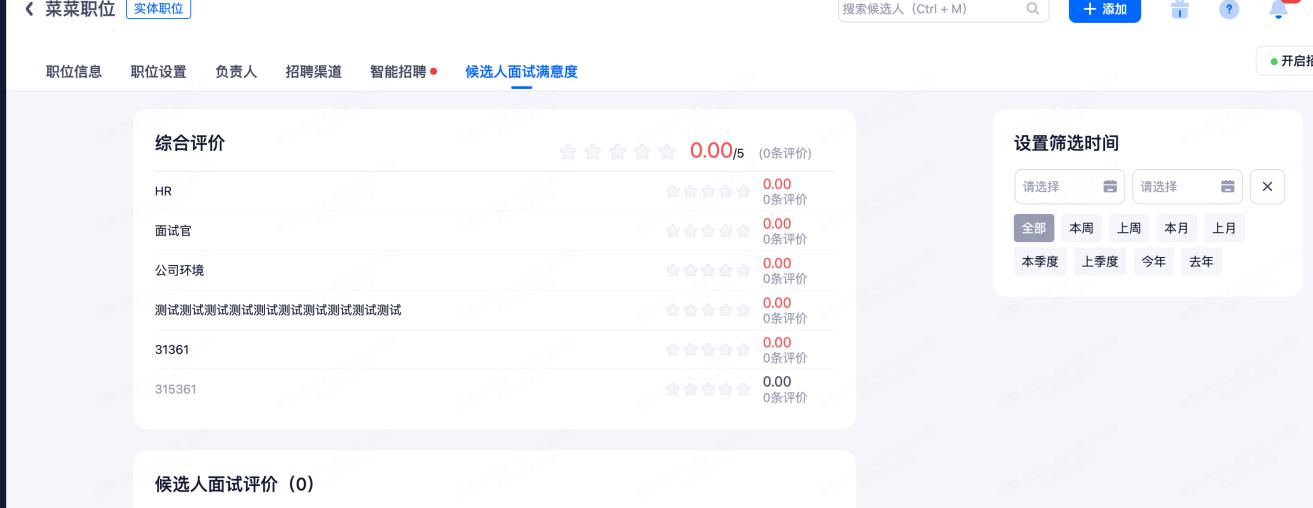
4.1.7Candidate interview Satisfaction
The interview satisfaction of candidates from the recruitment position dimension is investigated as a reference to optimize the recruitment process.
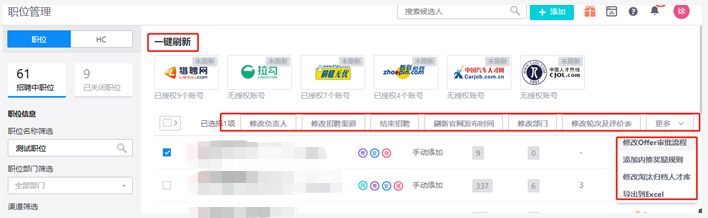
4.1.8Modification of job information
Information adjustment or batch adjustment can still be made after job creation. On the Job management page, select the position you want to modify before the job name. You can adjust the position accordingly.
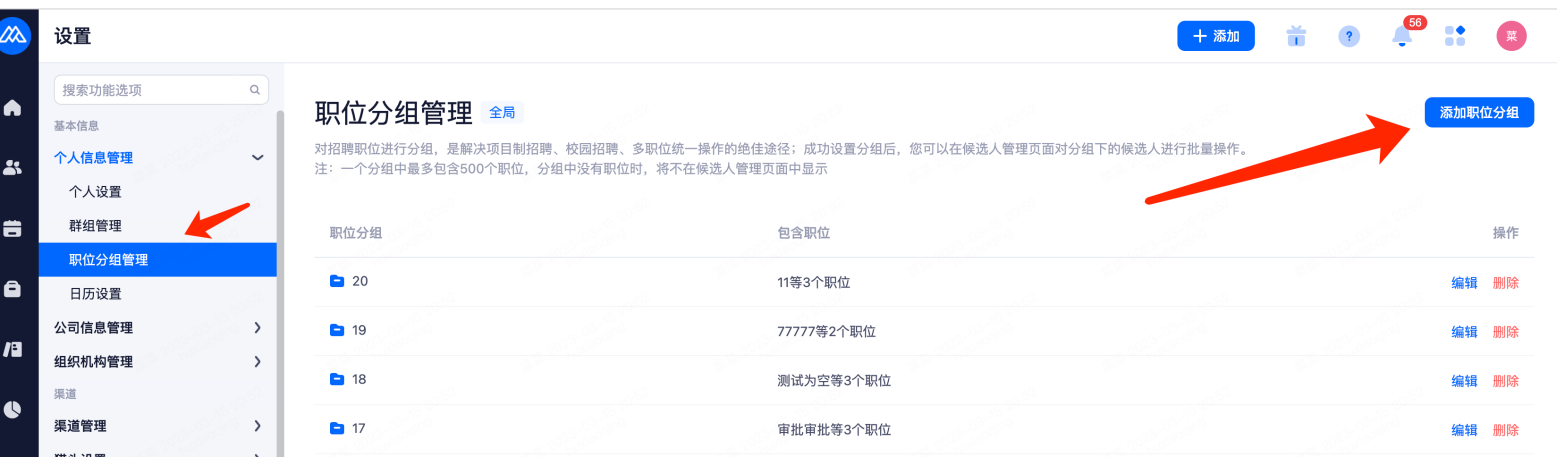
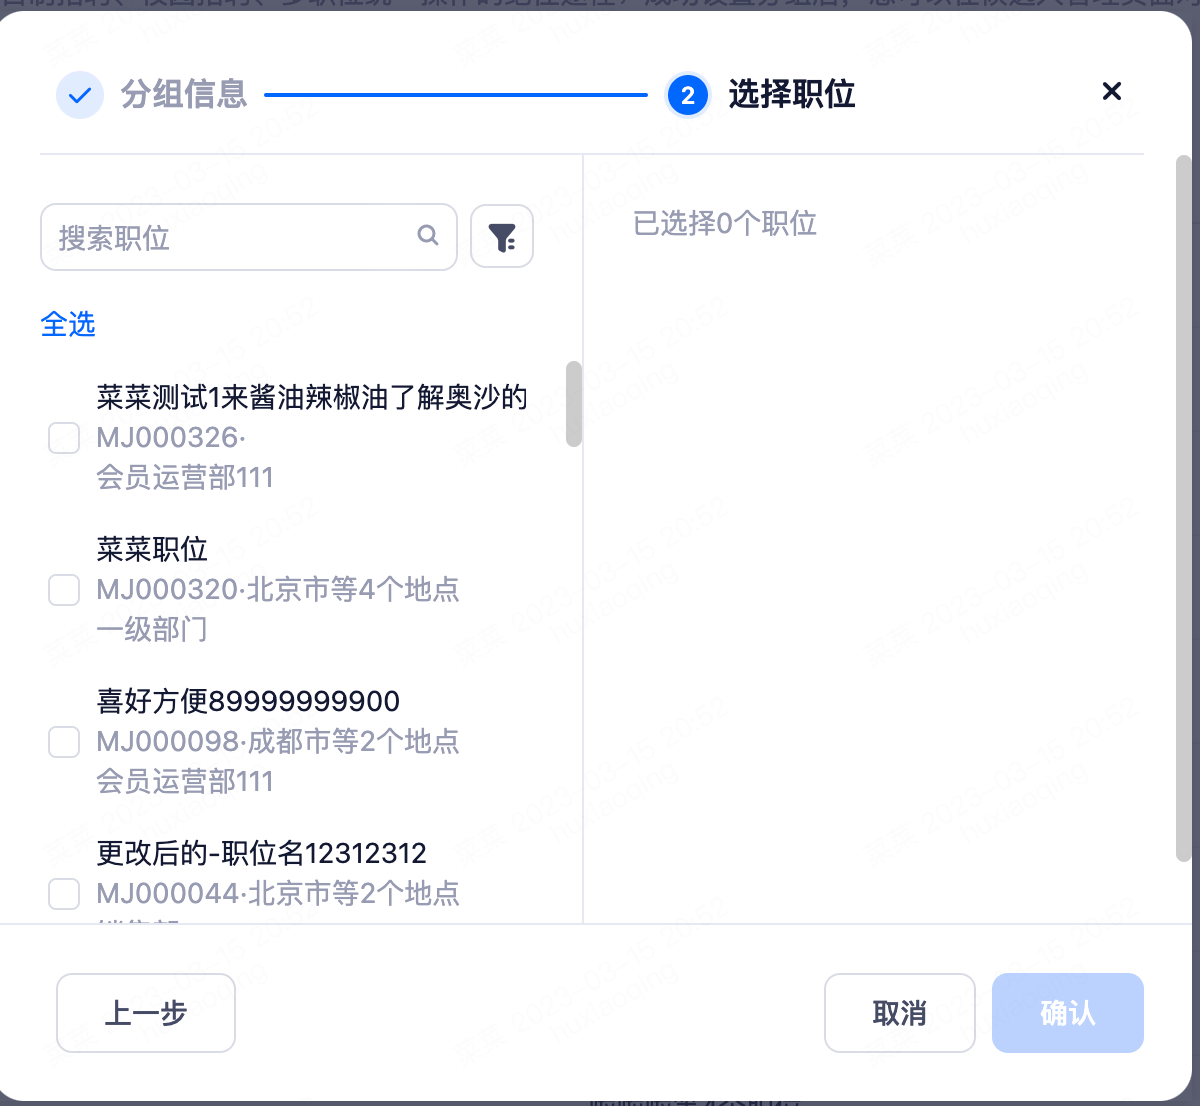
4.1.9Job group management
In the system "Settings - Job group management", you can add job group; When selecting positions, you can set screening conditions and select closed positions, which is convenient for HR to quickly create their own job groups.
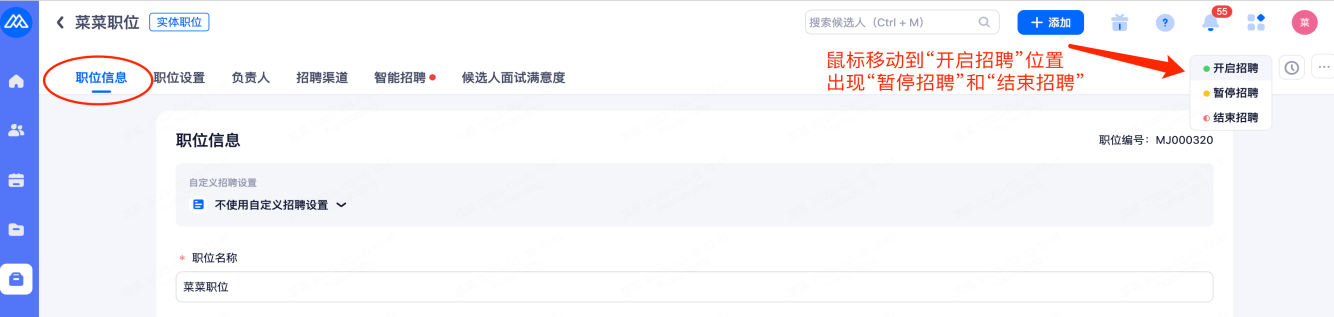
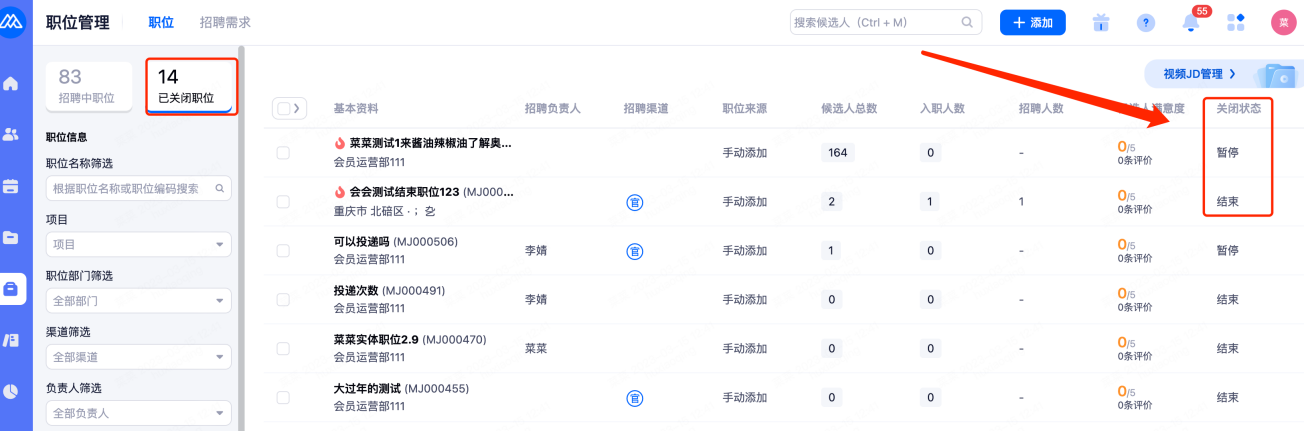
4.1.10Closure of position
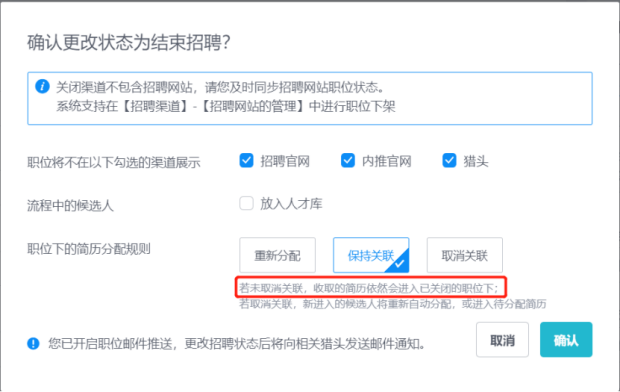
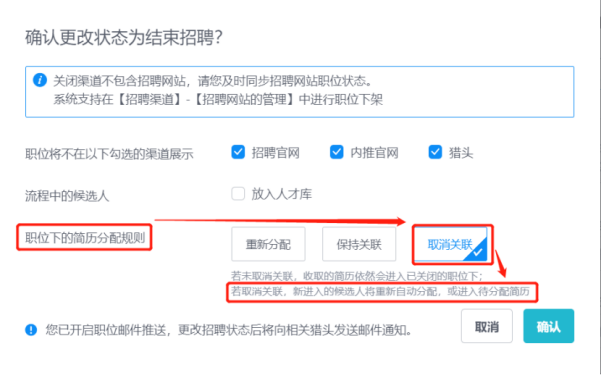
Click to enter the job management interface, click "Enter the job", move the mouse to the upper right corner "Start recruitment" and select "End recruitment" button.Suspended and end recruitment will display under the closed position, difference, in the allocation of resume can be recommended to suspend the recruitment position, closed position is not displayed.
?
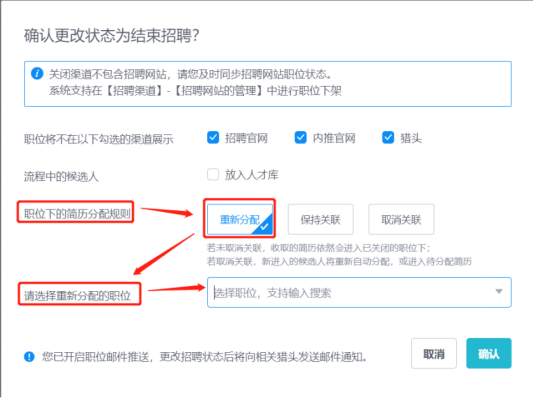
At this time, a confirmation message will pop up. If the position is associated with the resume assignment rule, you can choose to reassign, keep the association, or cancel association. After setting, you can click "Confirm" to end the recruitment of the position.
4.2HC Management
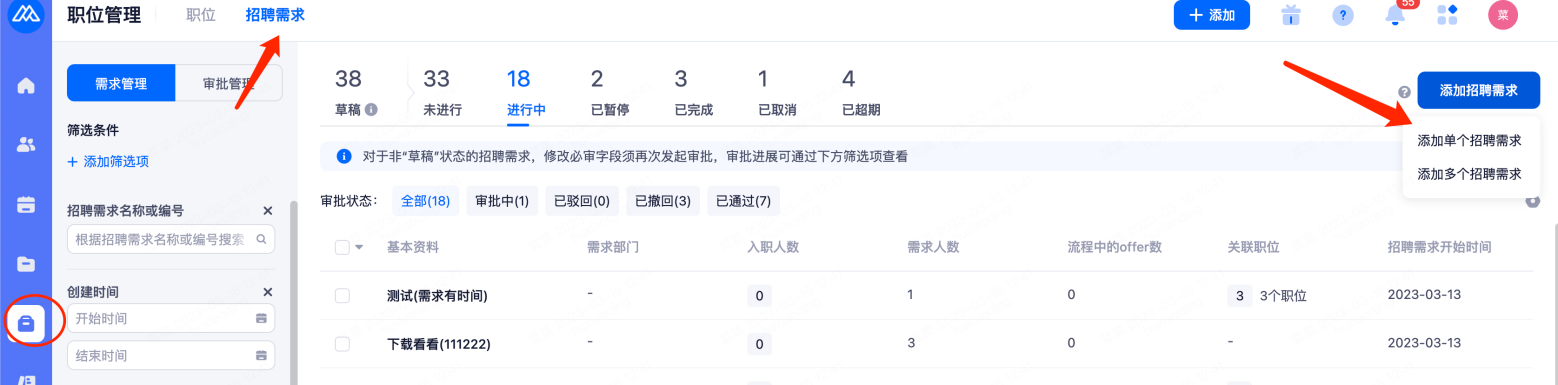
4.2.1Add HC requirements(no add button if automatic synchronization is enabled)
HR maintains HC requirements according to actual business requirements. Select "HC" at the upper left corner of the "Job Management" page to select the mode of single add or multiple batch upload.
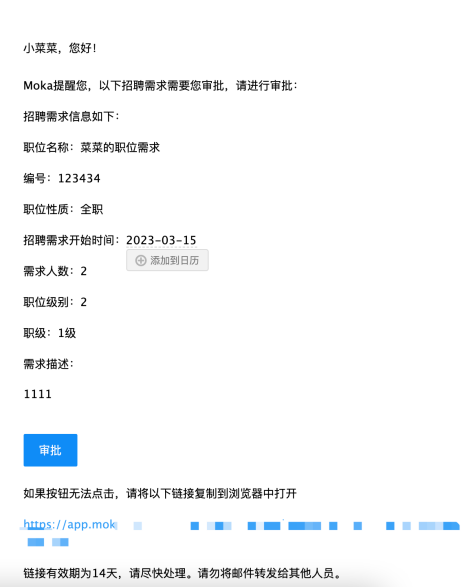
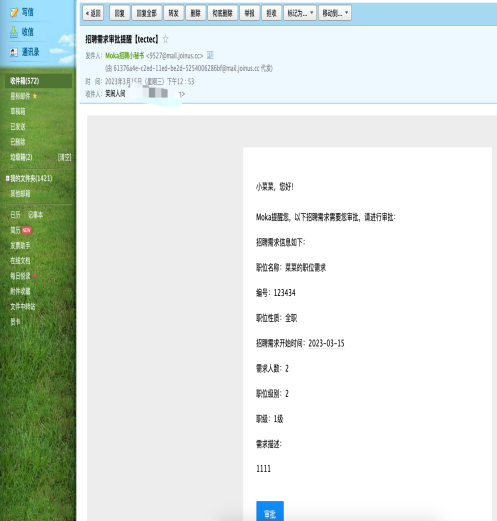
Add requirements background can set whether approval is needed (super administrator setting), the figure below is a screenshot with approval.
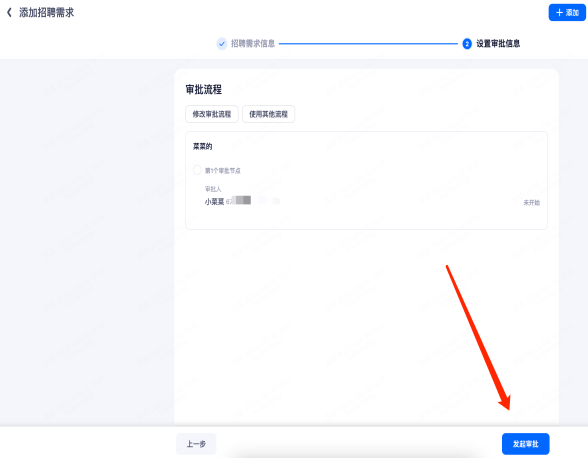
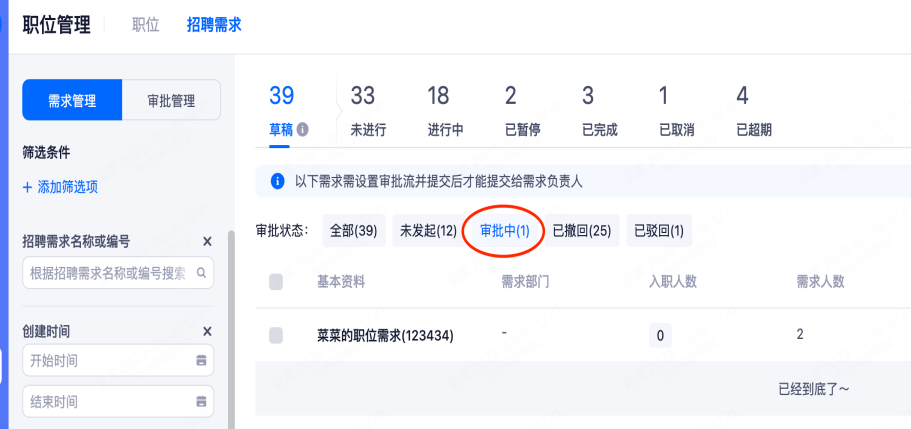
After the approval is initiated, the mailbox of the examiner will receive the approval process and conduct the demand approval. The demand will take effect after the approval of the examiner.
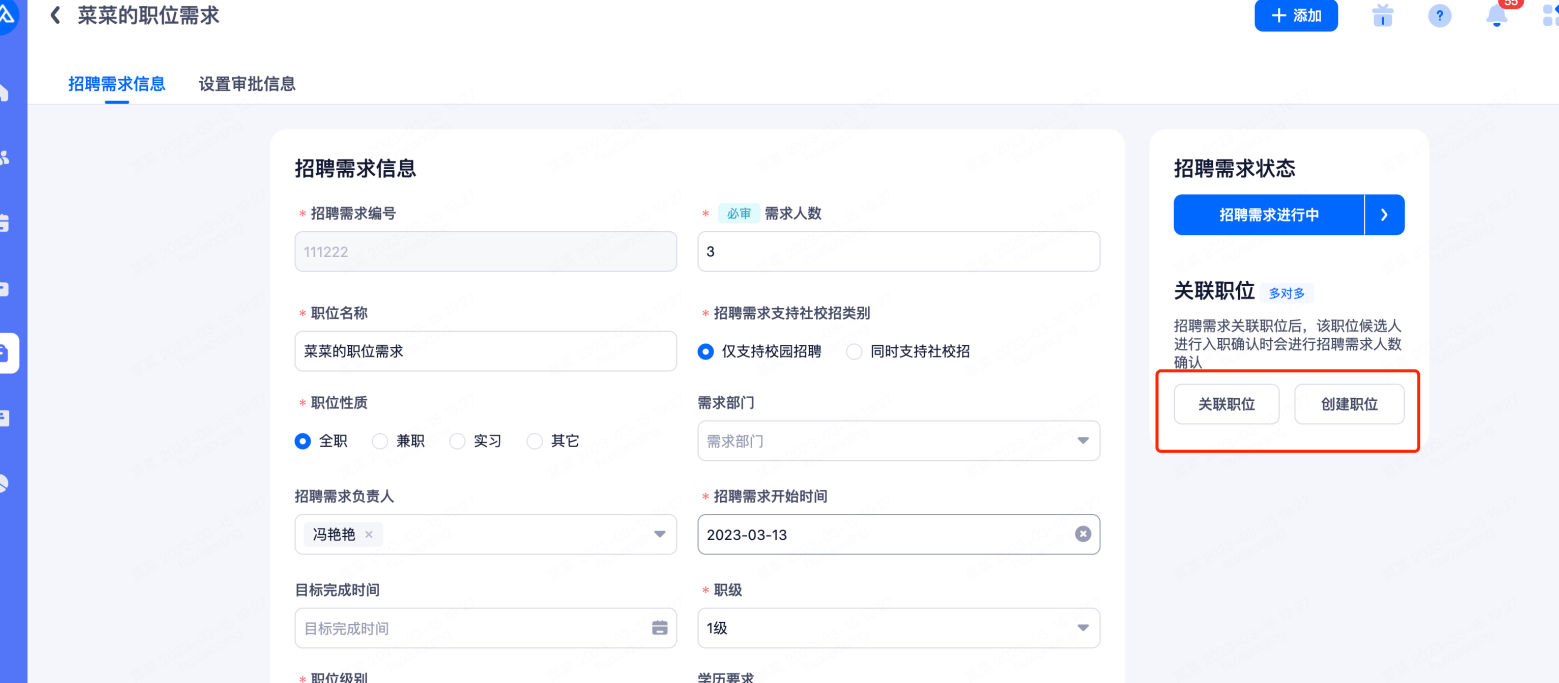
4.2.2 Associated HC position
Click to enter the specific HC, you can add the associated position of the HC or create a new position based on the HC in the right column.
4.3Candidate management
4.3.1Resume screening and interview process
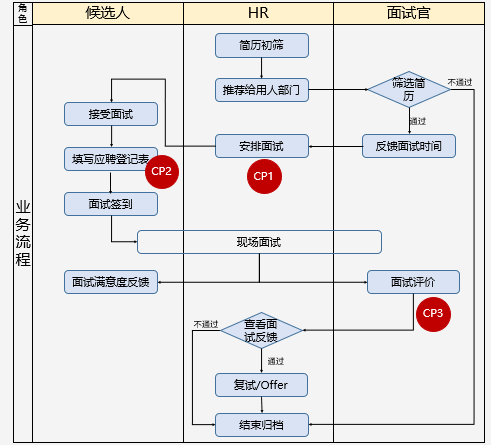
CP1:When scheduling interviews, attention should be paid to the rotation of interviews and the system to send notifications to candidates and interviewers.
CP2:Ask candidates to fill in the application registration form online. On the day of the interview, candidates will print the application registration form after they sign in for the interview.
CP3:Remind the interviewer to make the interview evaluation in time, and fill out the interview evaluation can be completed on the mobile terminal.
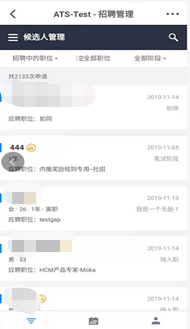
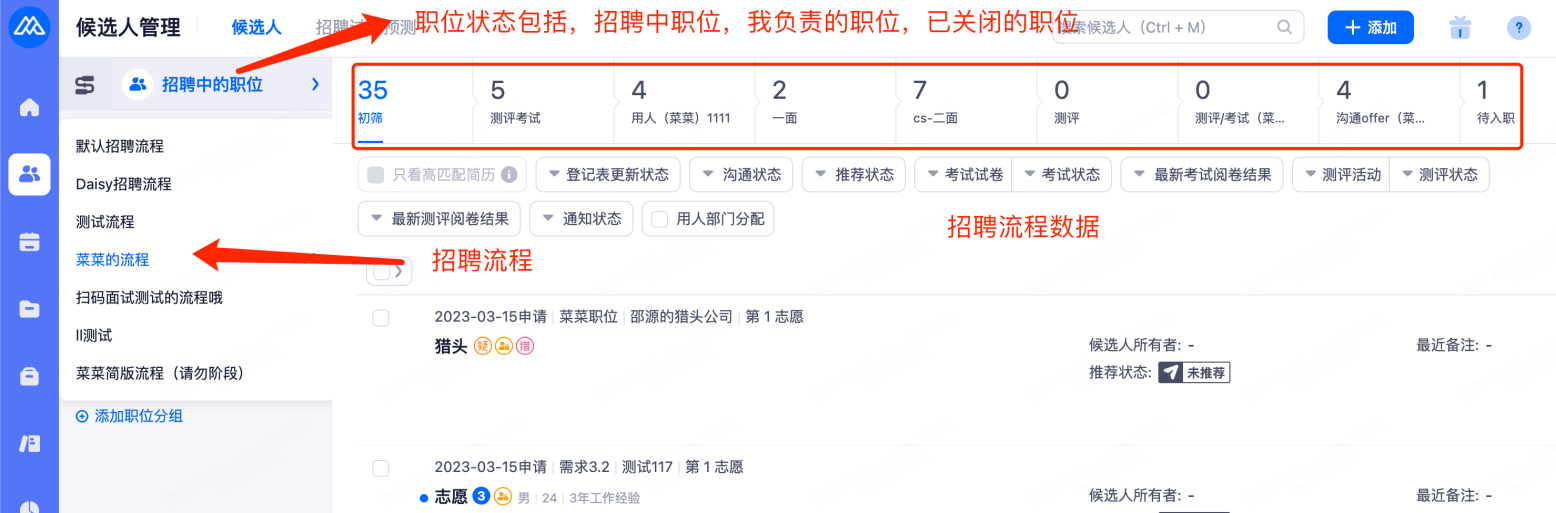
4.3.2Candidate management panel
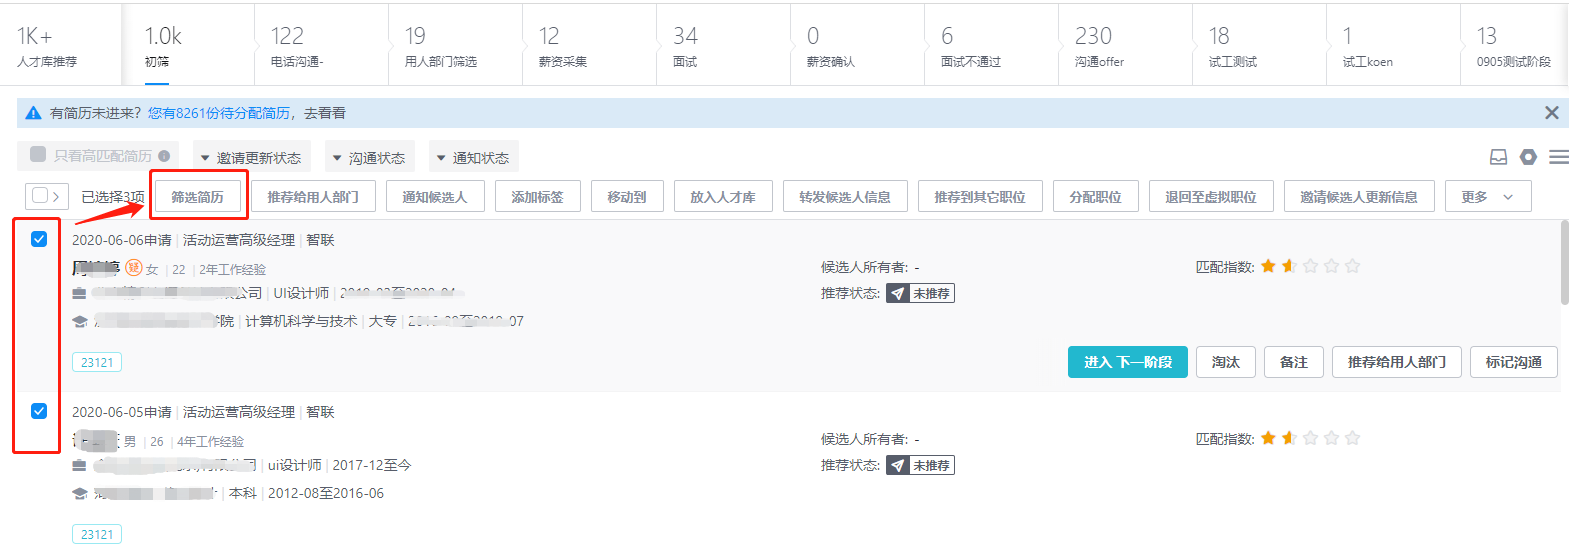
• Click "Candidate Management" on the left menu bar to enter this interface by default. You can set up the recruitment process and position status in the upper left corner for screening.
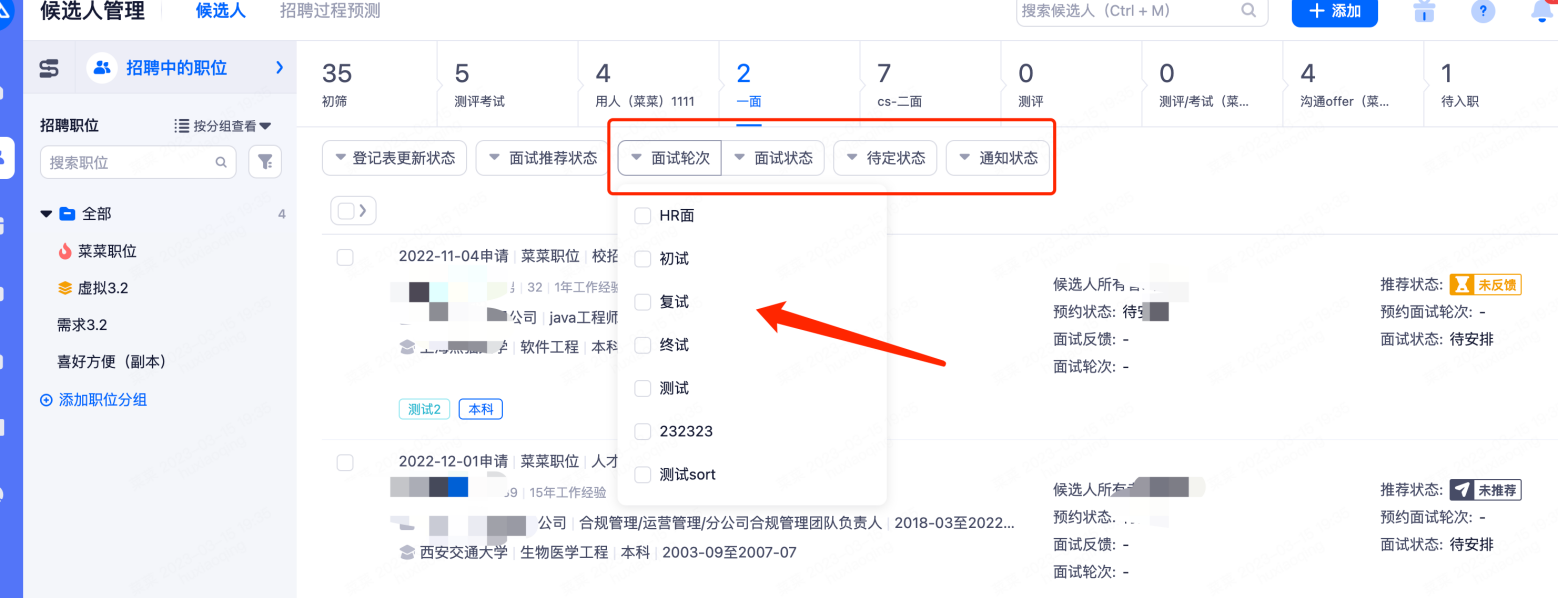
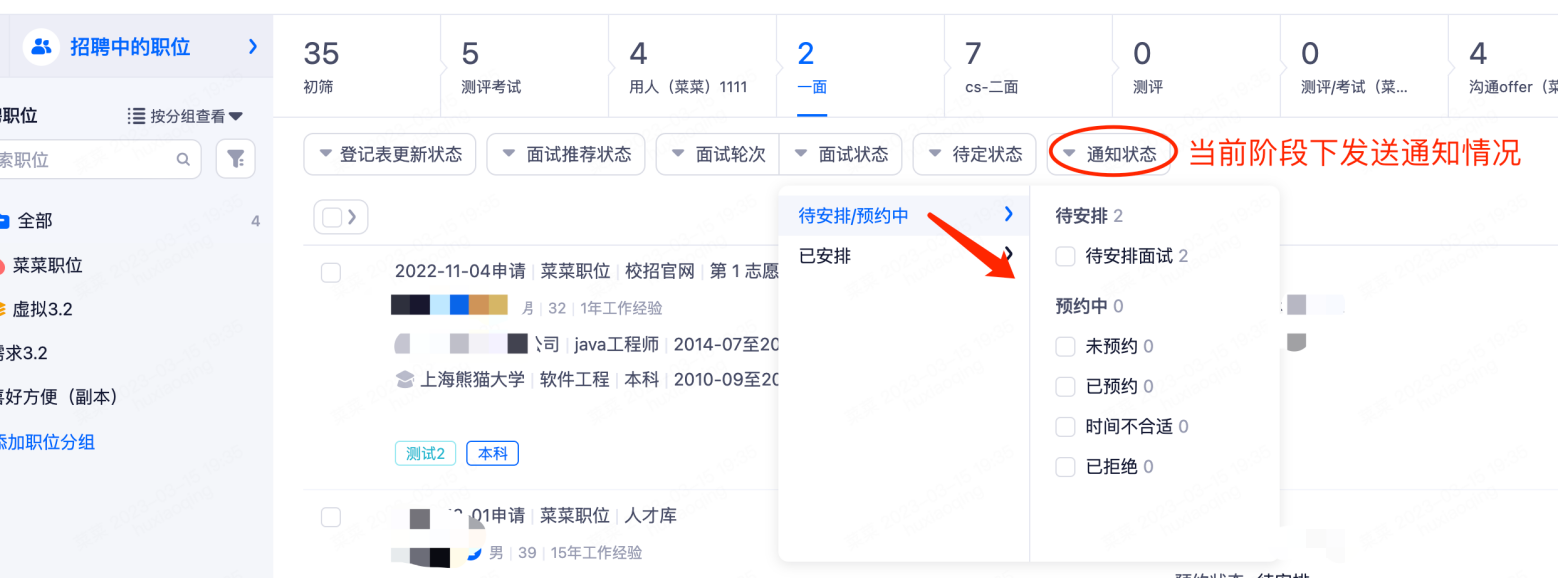
• When the candidate management is conducted in the interview stage, the system supports more detailed screening items, including interview rounds, interview status and pending status. HR can screen candidates more accurately according to the rounds, status and other information.
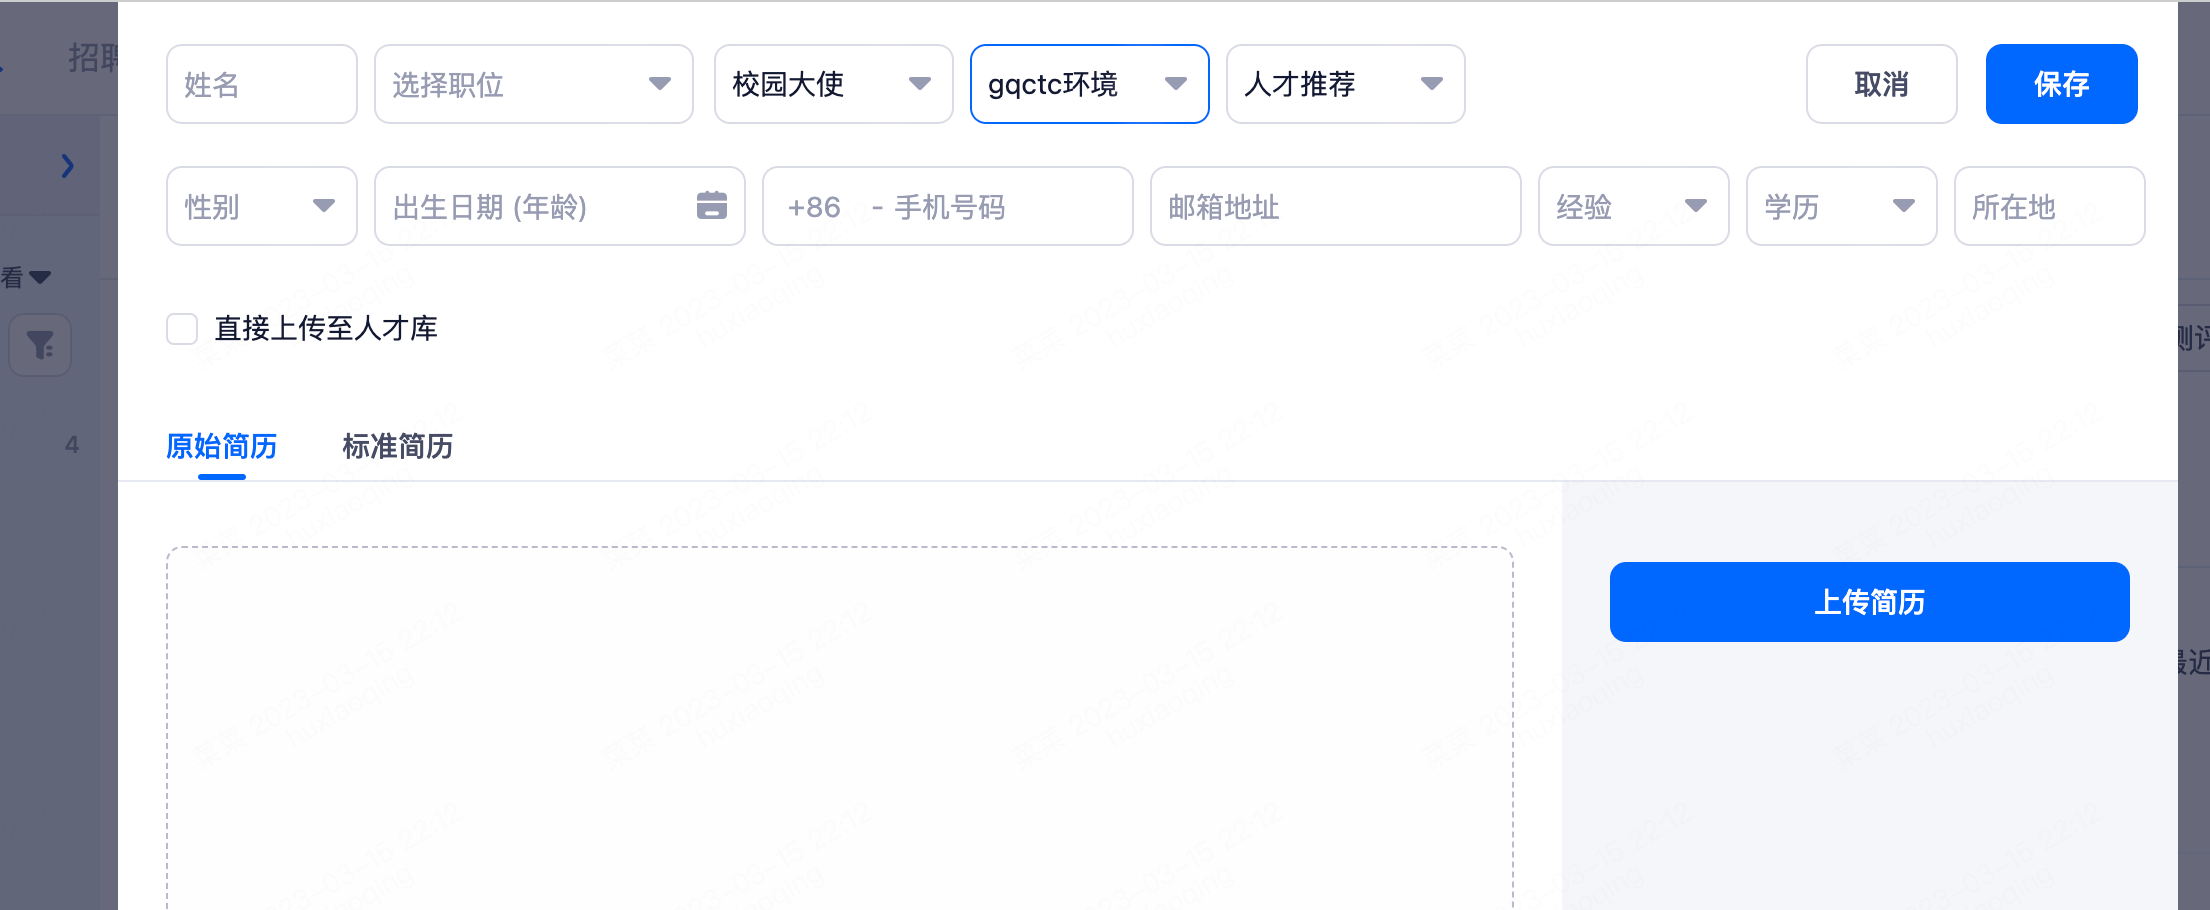
4.3.3Adding candidates
Click the blue button "Add Candidate" in the upper right corner of the page to add a candidate. You can directly drag your resume to the area in the figure to import it, the system will parse the resume, select the associated job name and save it, the resume will enter the process of this job.

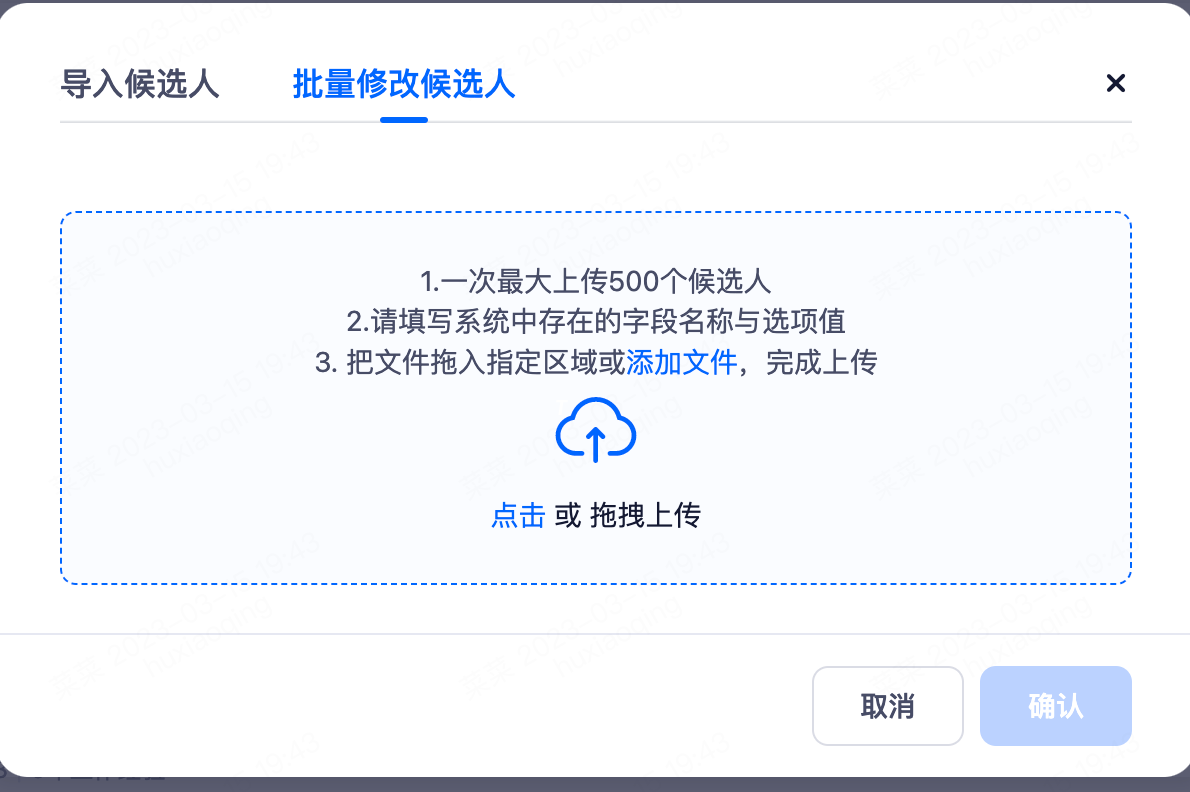
If you choose to add multiple candidates, you can also directly drag your resume to the blank area, noting the upper limit of 300 resumes per time.

You can also choose to import candidates. You need to download the Excel template, add candidates and then upload files batch import system, according to the table head to add candidate information. The table does not support manually adding fields. If there are other fields, you can contact the super administrator to set.

Candidates can also be modified in bulk:
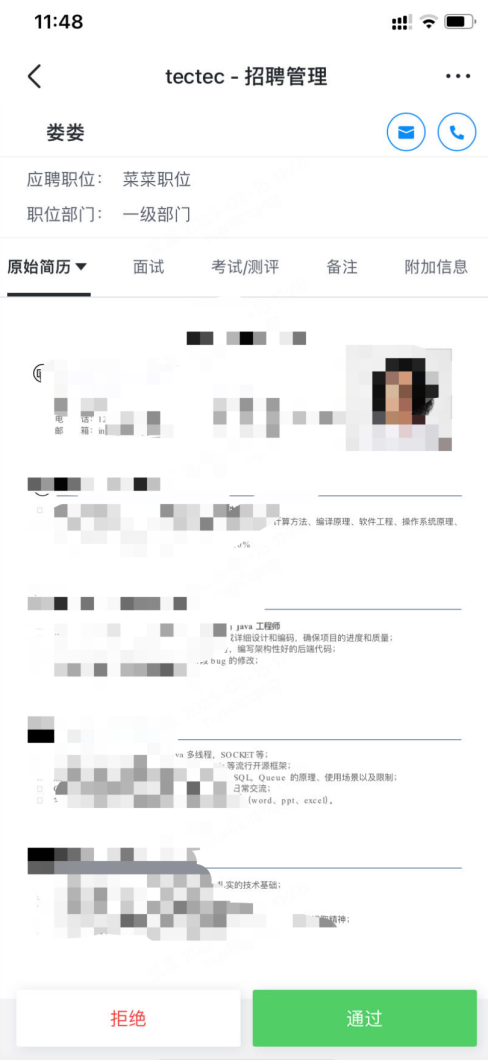
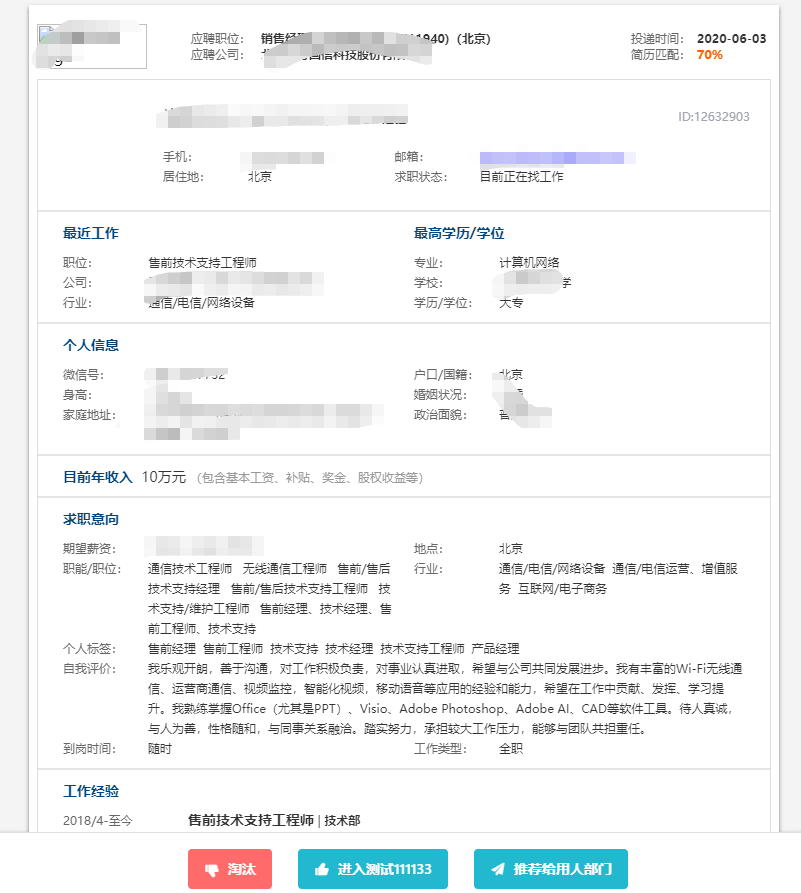
4.3.4Preliminary screening stage
Resumes entering the system are uniformly displayed in the initial screening stage. The initial screening stage can be screened by HR, or the suitable resume can be recommended to the hiring department for screening. The hiring department will agree or reject the application. If they agree, it will go to the next stage. If they reject, resumes will be filed (you can set to move to the next stage automatically or file directly).
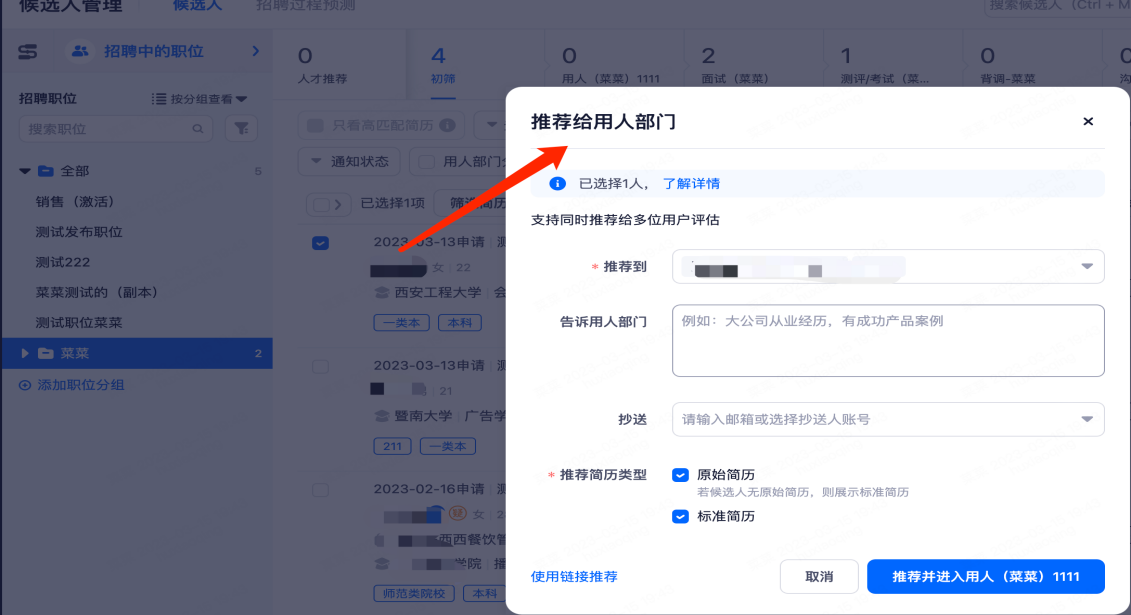
4.3.5Selection stage of Employing departments
HR is manually moved to the employer stage or recommended to the business department.
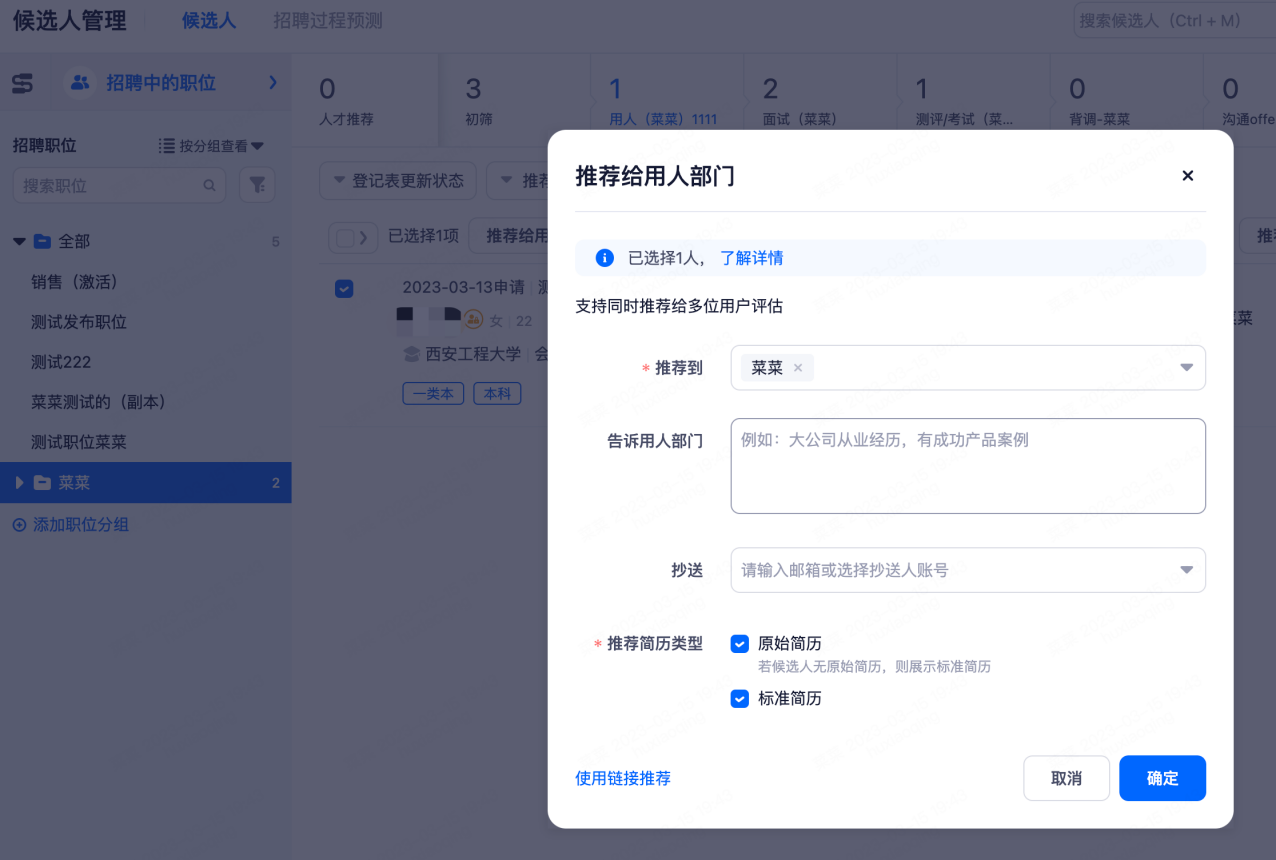
Using a resume: You can choose to have the hiring manager view the resume style, the original resume or the standard resume (the system parsed resume).
Note: If using a standard resume, you can hide the expected salary and current salary of your current resume (you need to do this in the Resume Display and import Settings).
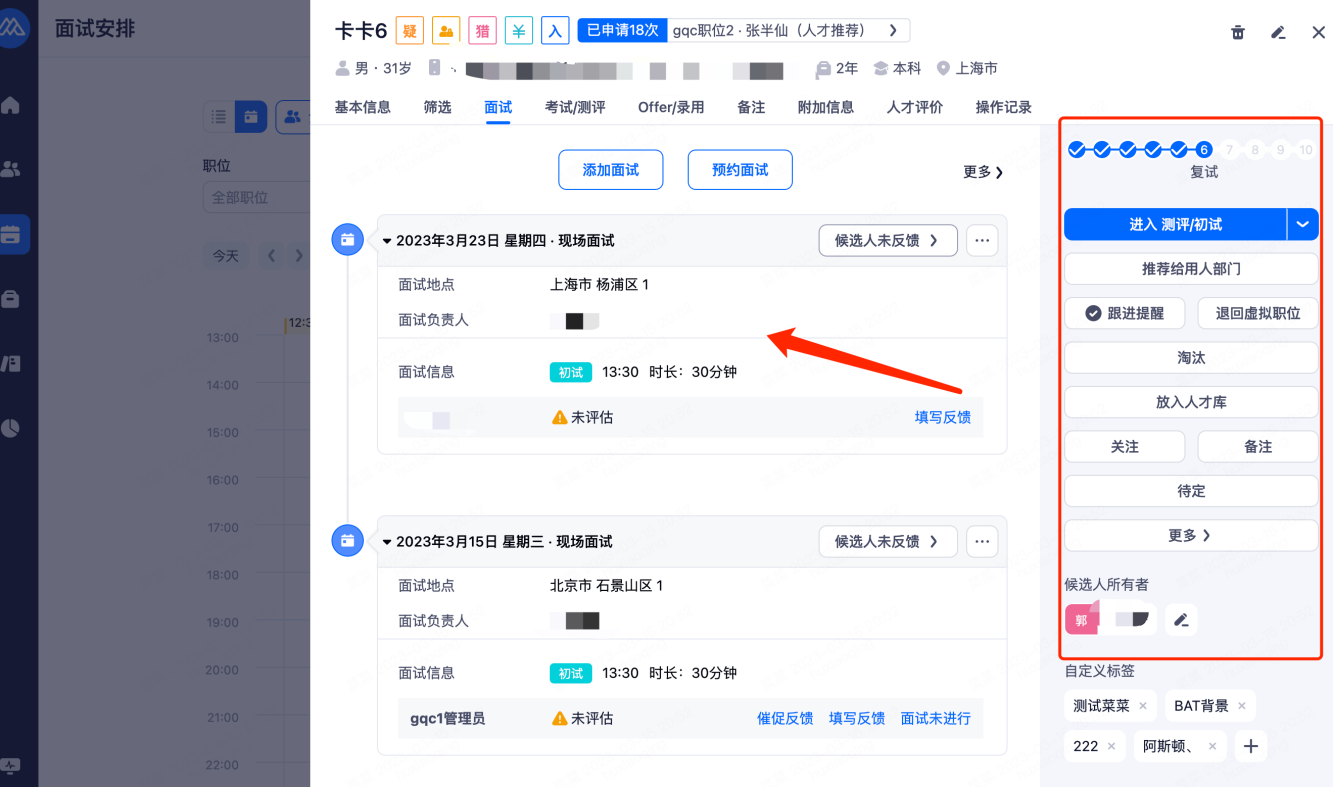
4.3.6The Interview stage
Resumes selected by the employer's department are eligible for an interview. An interview can be arranged at this stage.
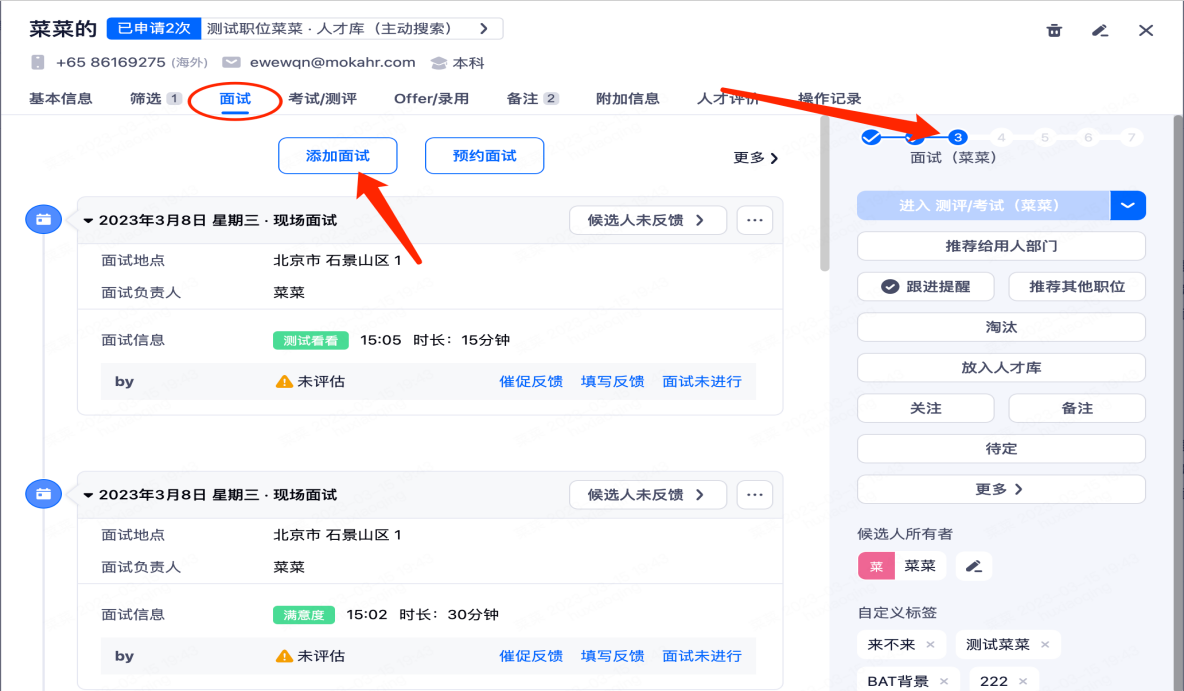
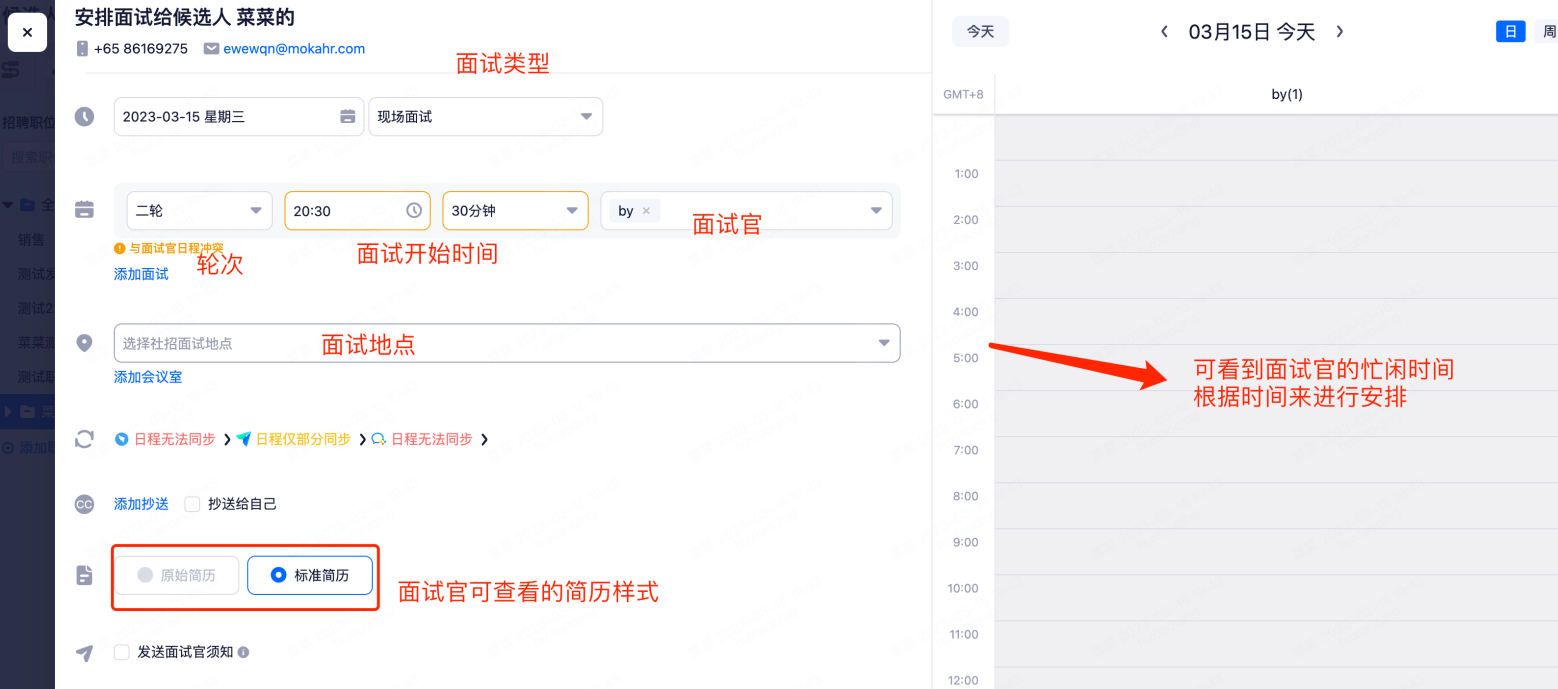
Interview types: divided into on-site interview, telephone interview, video interview (Moka video interview, Tencent conference, Lark interview, other).
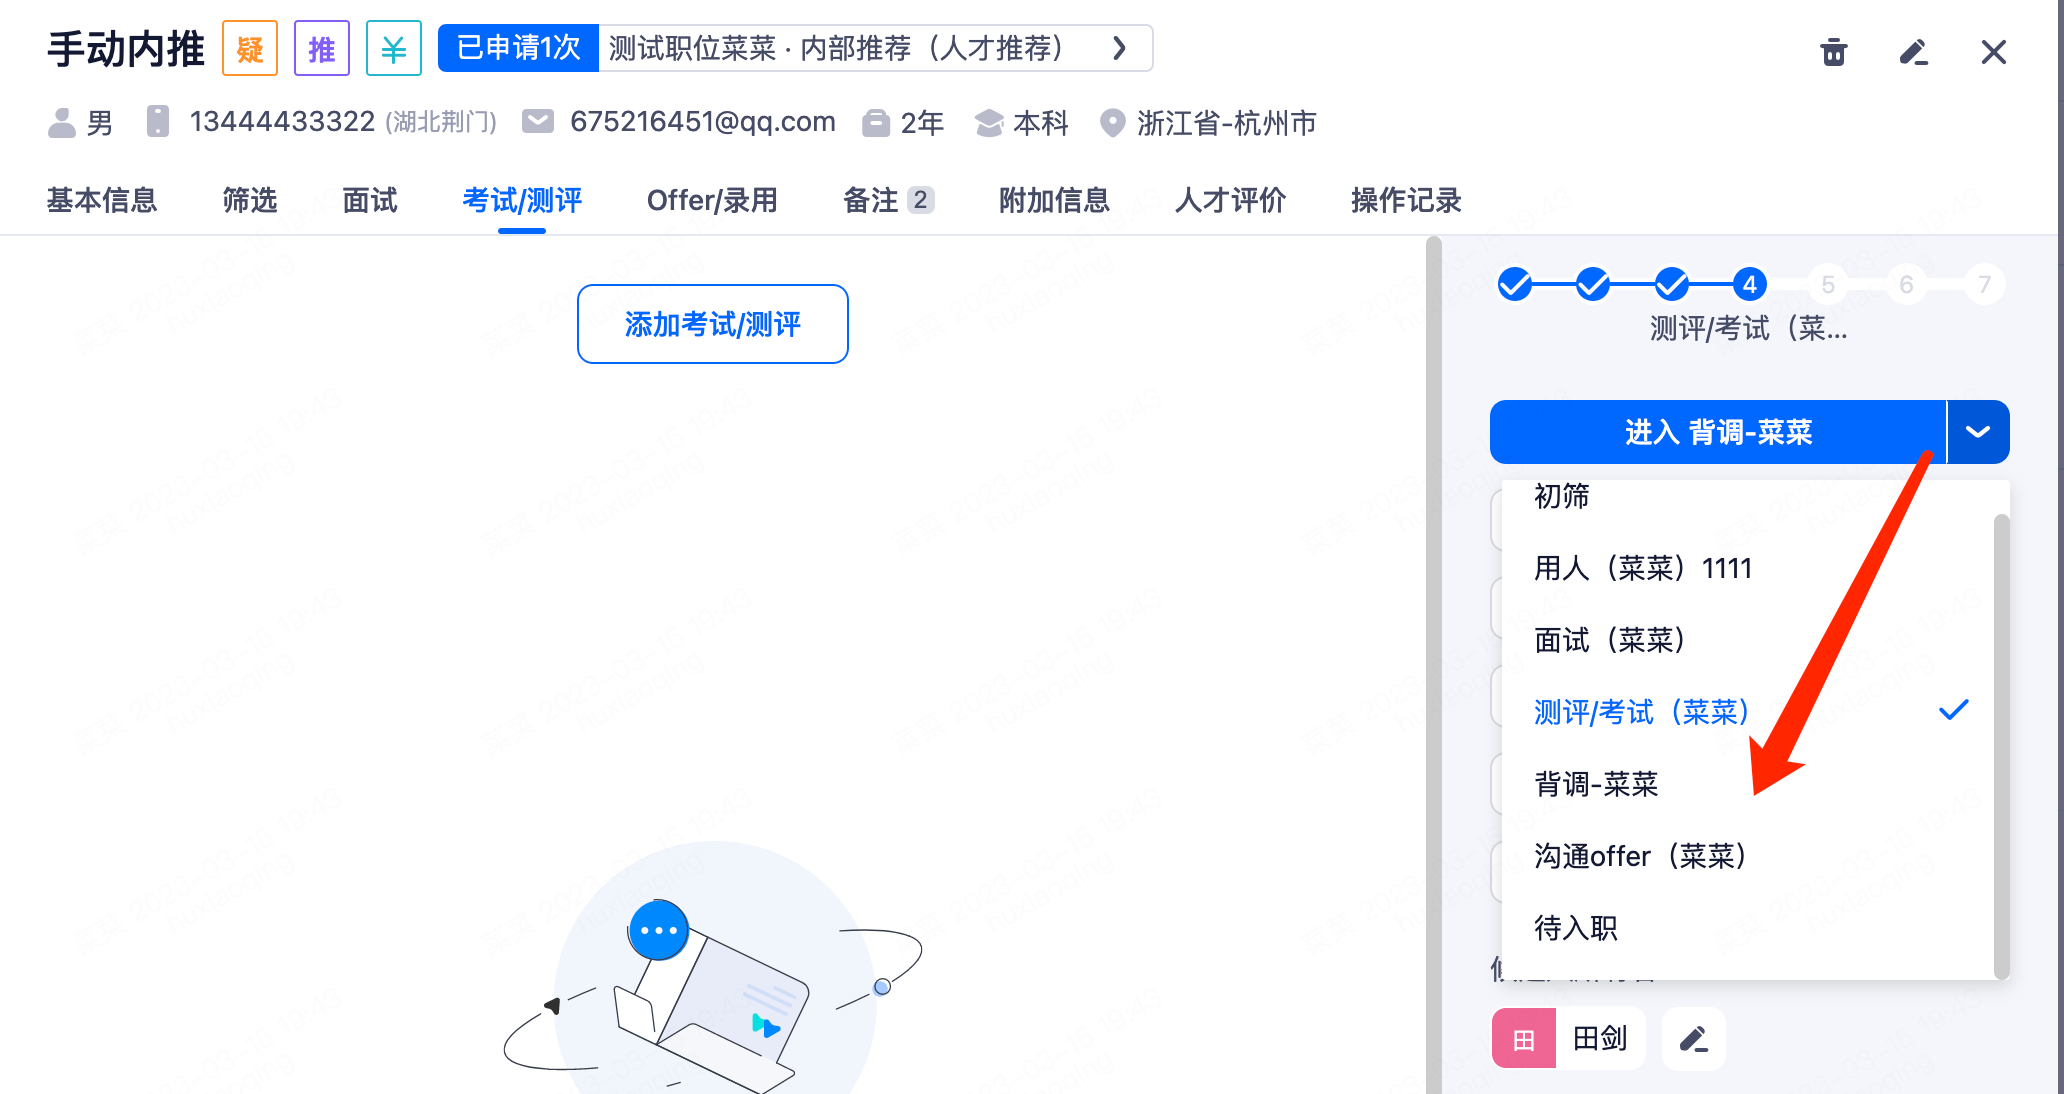
The successful resume can be selected from the menu on the right of the resume details to enter the "Offer Communication" stage.
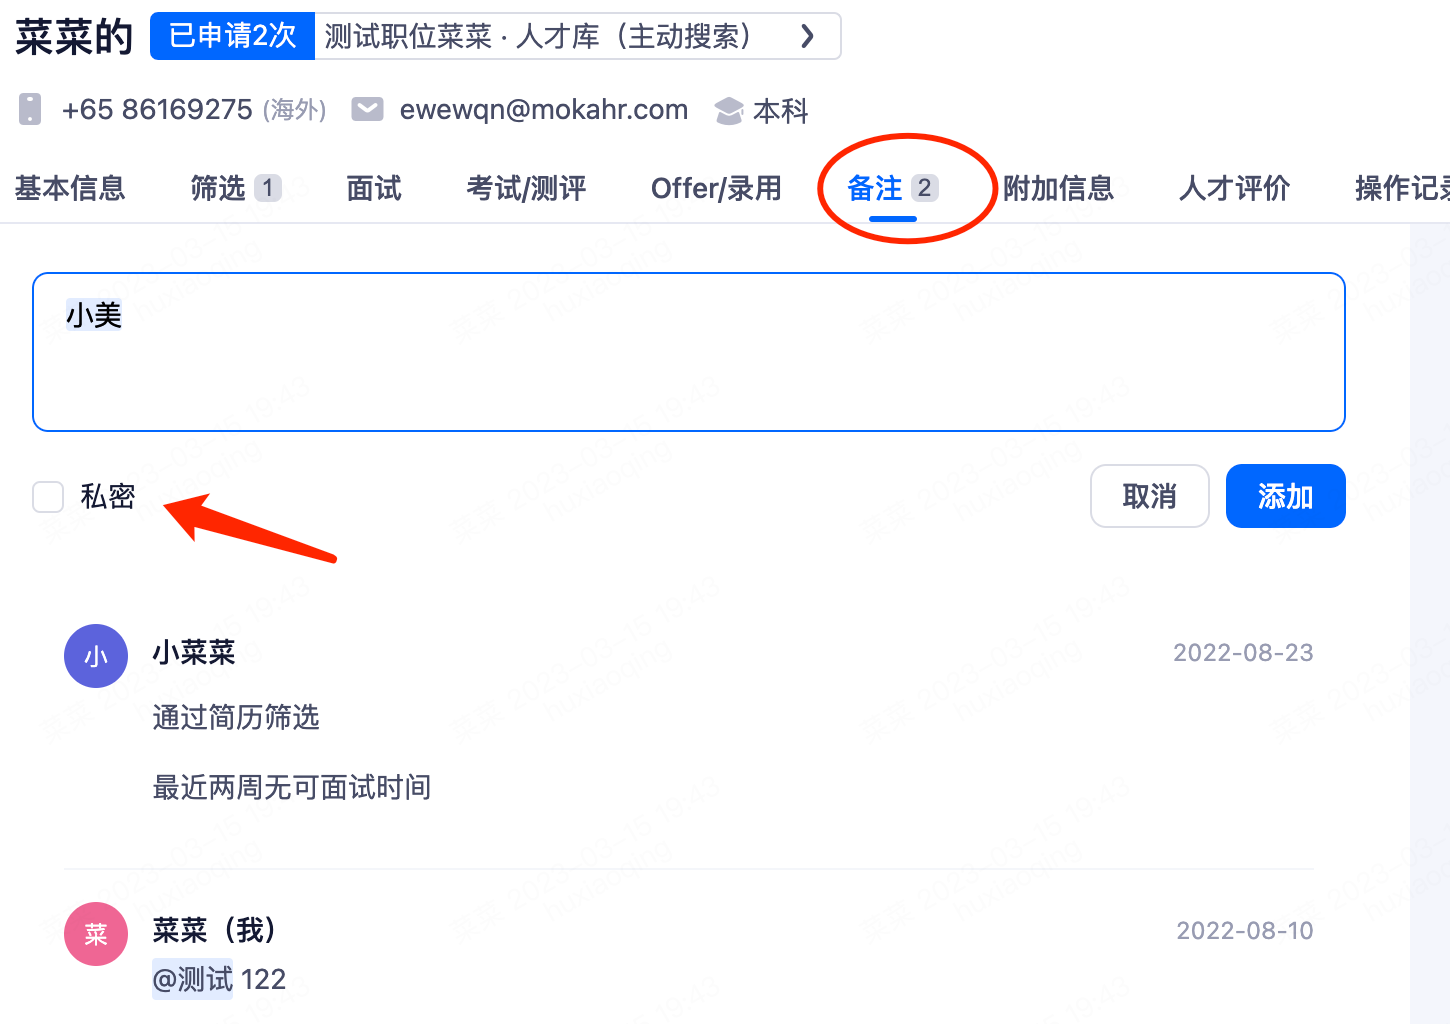
• Note @ function: You can @ a person with a system account (recruiter, hiring manager, interviewer, headhunter, etc.) to communicate publicly/privately in the note.
4.3.7Evaluation stage
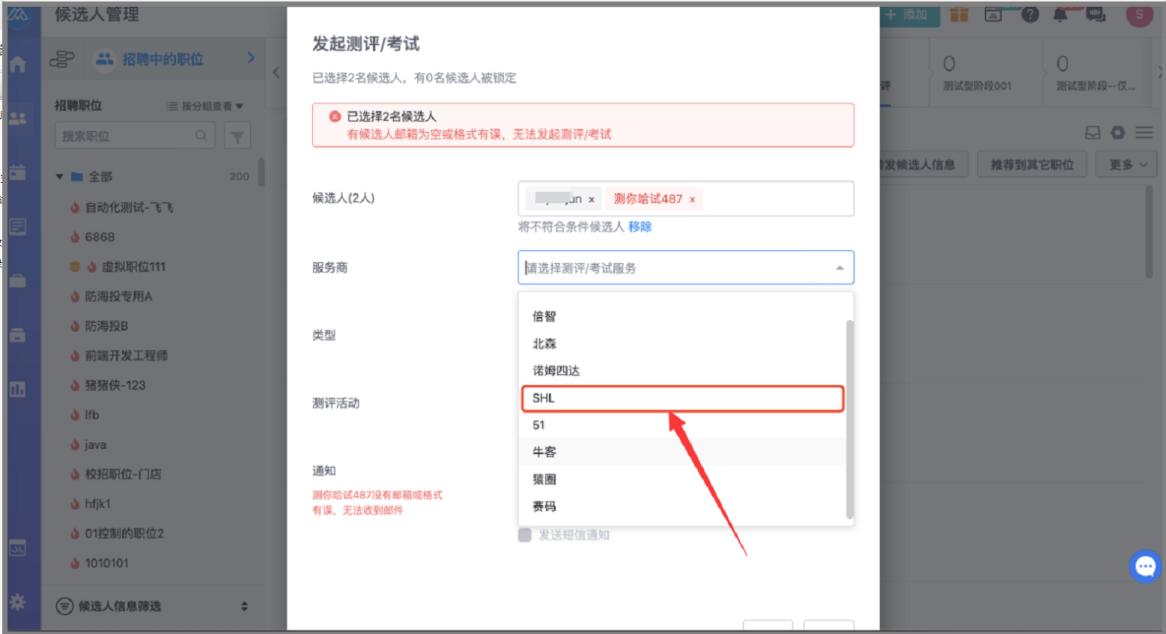
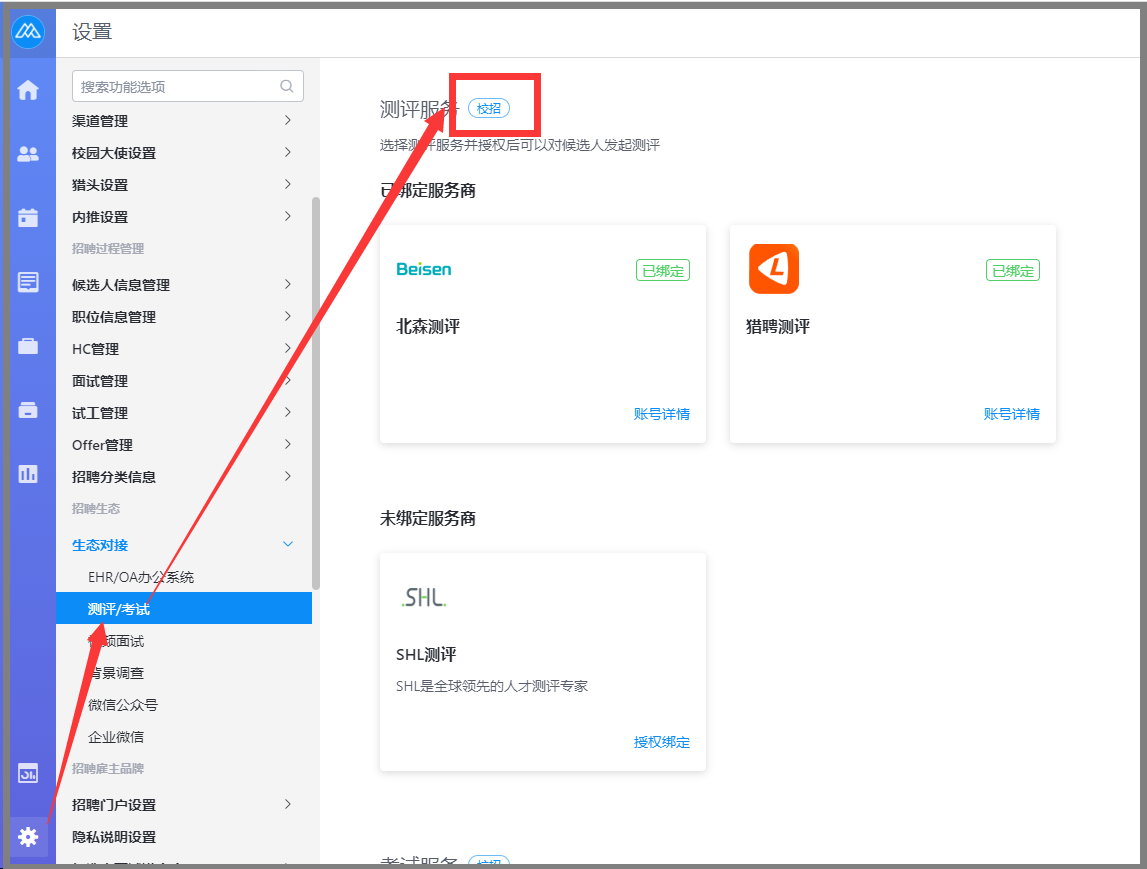
• If the evaluation stage is set and SHL evaluation is selected, the system supports batch initiation of SHL evaluation.
• The assessment account of campus recruitment/social recruitment can be divided into: examination assessment account of regional branch campus recruitment and social recruitment, and can be bound to multiple, such as subsequent assessment only need to be used in the campus recruitment, and can only be bound to the campus recruitment module.
• Automatic support for examination and evaluation function, such as the enterprise needs to set candidates to enter the evaluation stage, automatic examination and evaluation for candidates, saving labor operation cost. (You need to contact the relevant account manager to configure this function.)
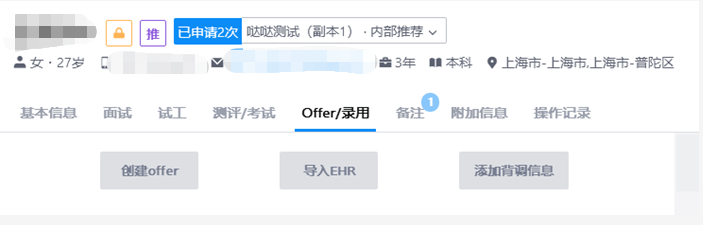
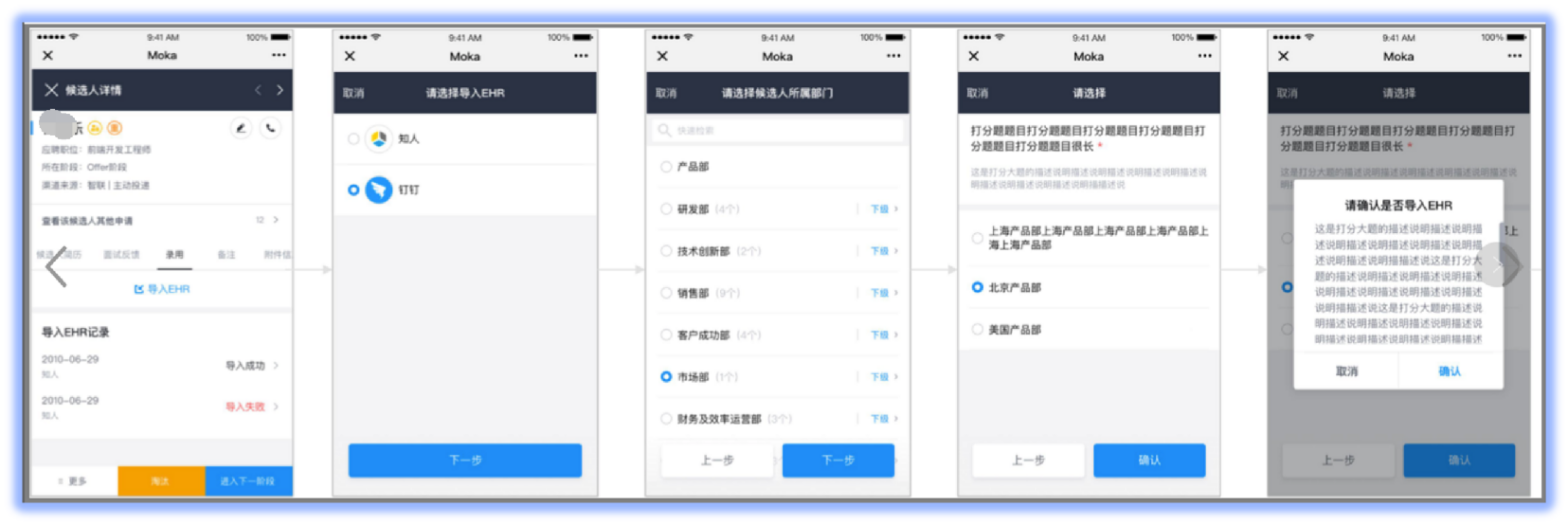
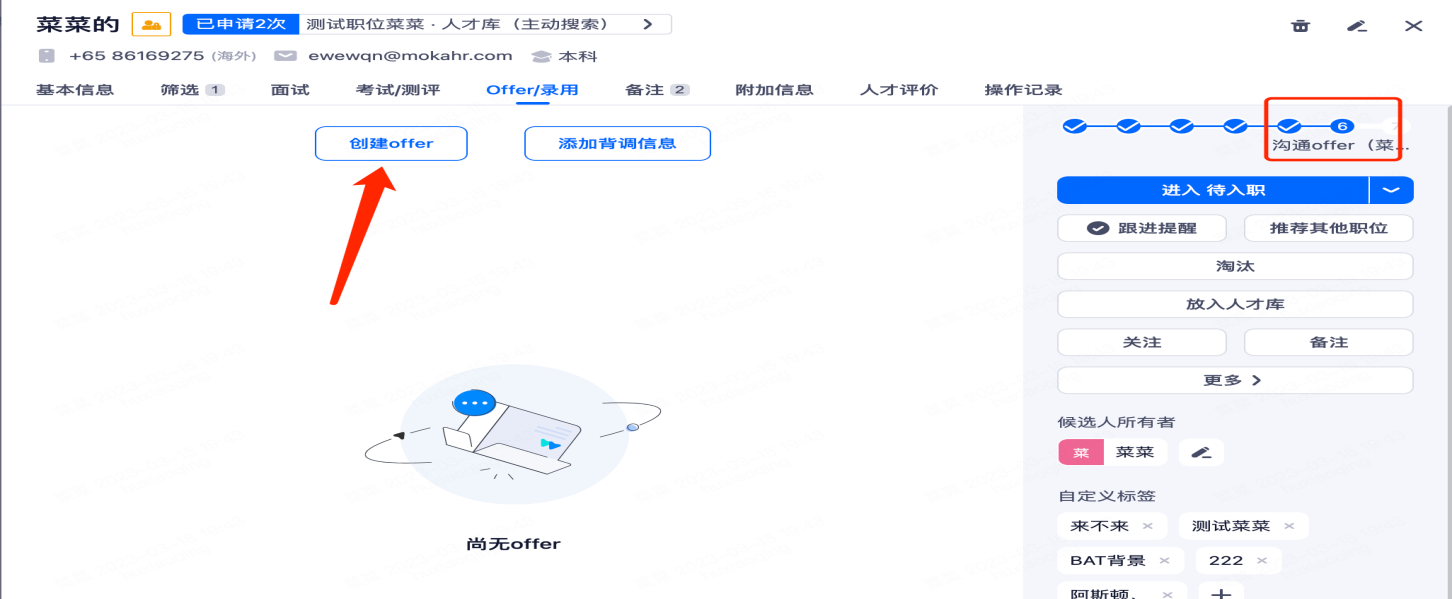
4.3.8Offer Communication stage
In the link of offer communication, you can add the back-tone information, create the offer, approve the offer and send it to the candidate. Importing an EHR requires an interface implementation.
The mobile terminal also supports EHR import: After the enterprise connects to the EHR function, the candidate operations can be imported to the EHR on the mobile terminal. Support to select multiple EHR services, support to select departments, convenient HR operation anytime and anywhere.
Offer stage
• Create an Offer: Fill in the corresponding Offer approval field. After saving, you can preview the Offer details and notice on this page. (The creation offer can only be created under the offer type stage, other stages are not supported.)
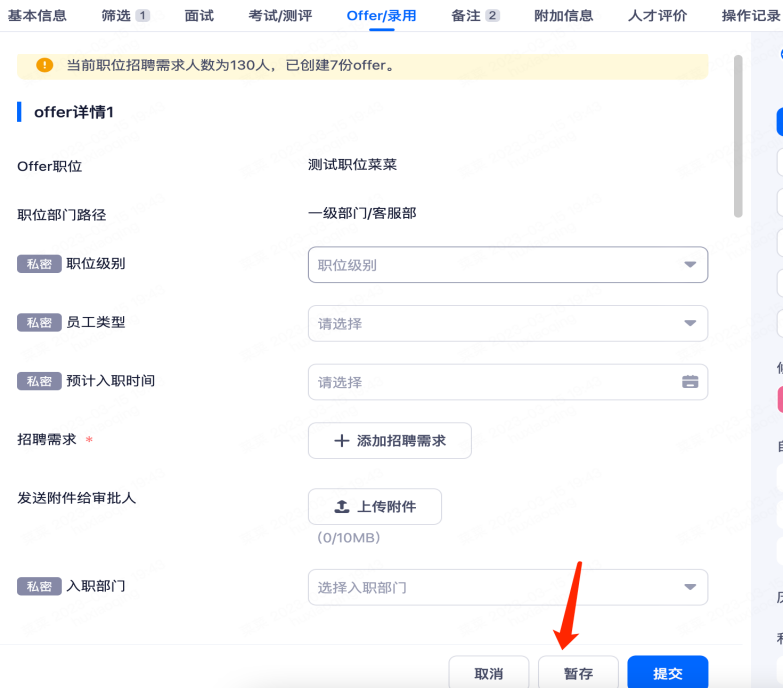
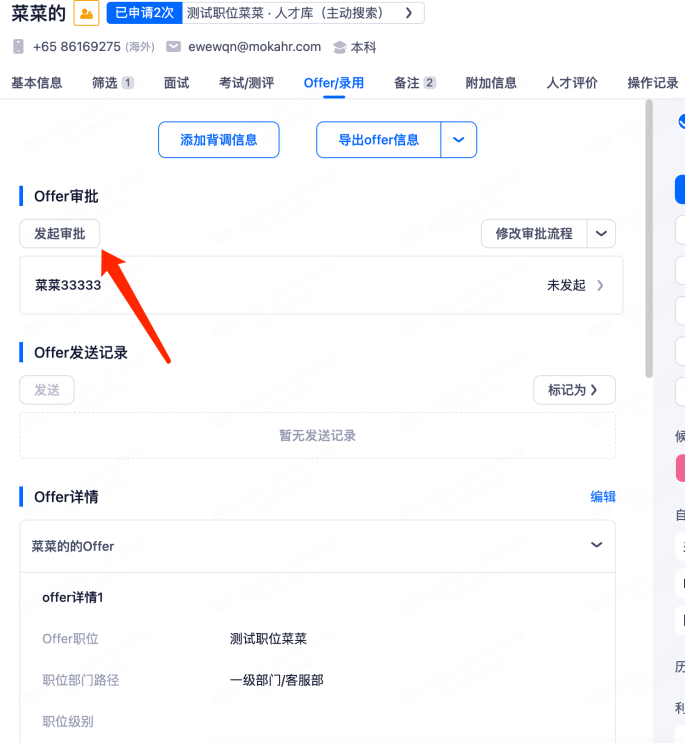

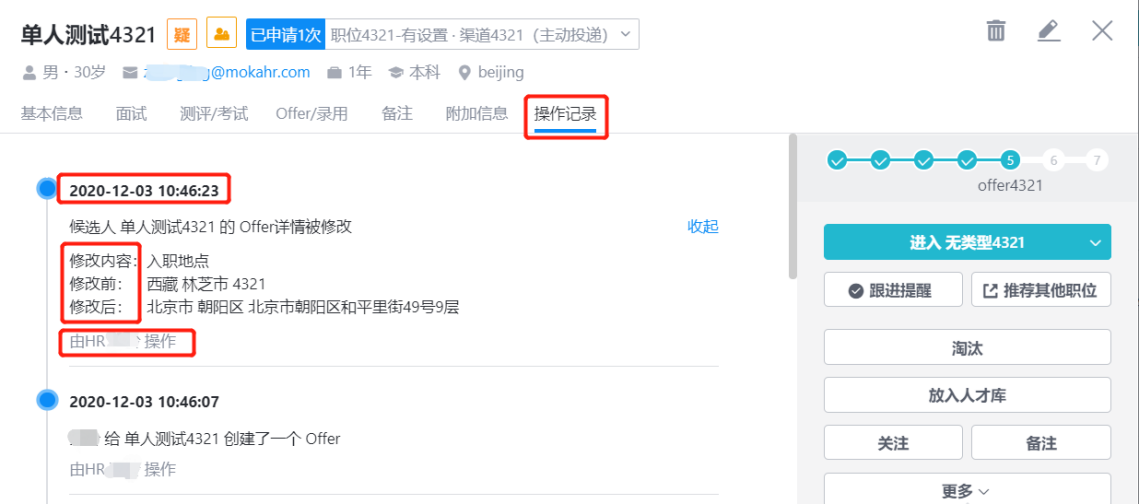
• Modify Offer: After HR modifies the Offer content, it can show the modification and the specific modification content in the operation record.
• Offer approval: Initiate the approval according to the approval process bound to the position, and you can modify the approval process temporarily.
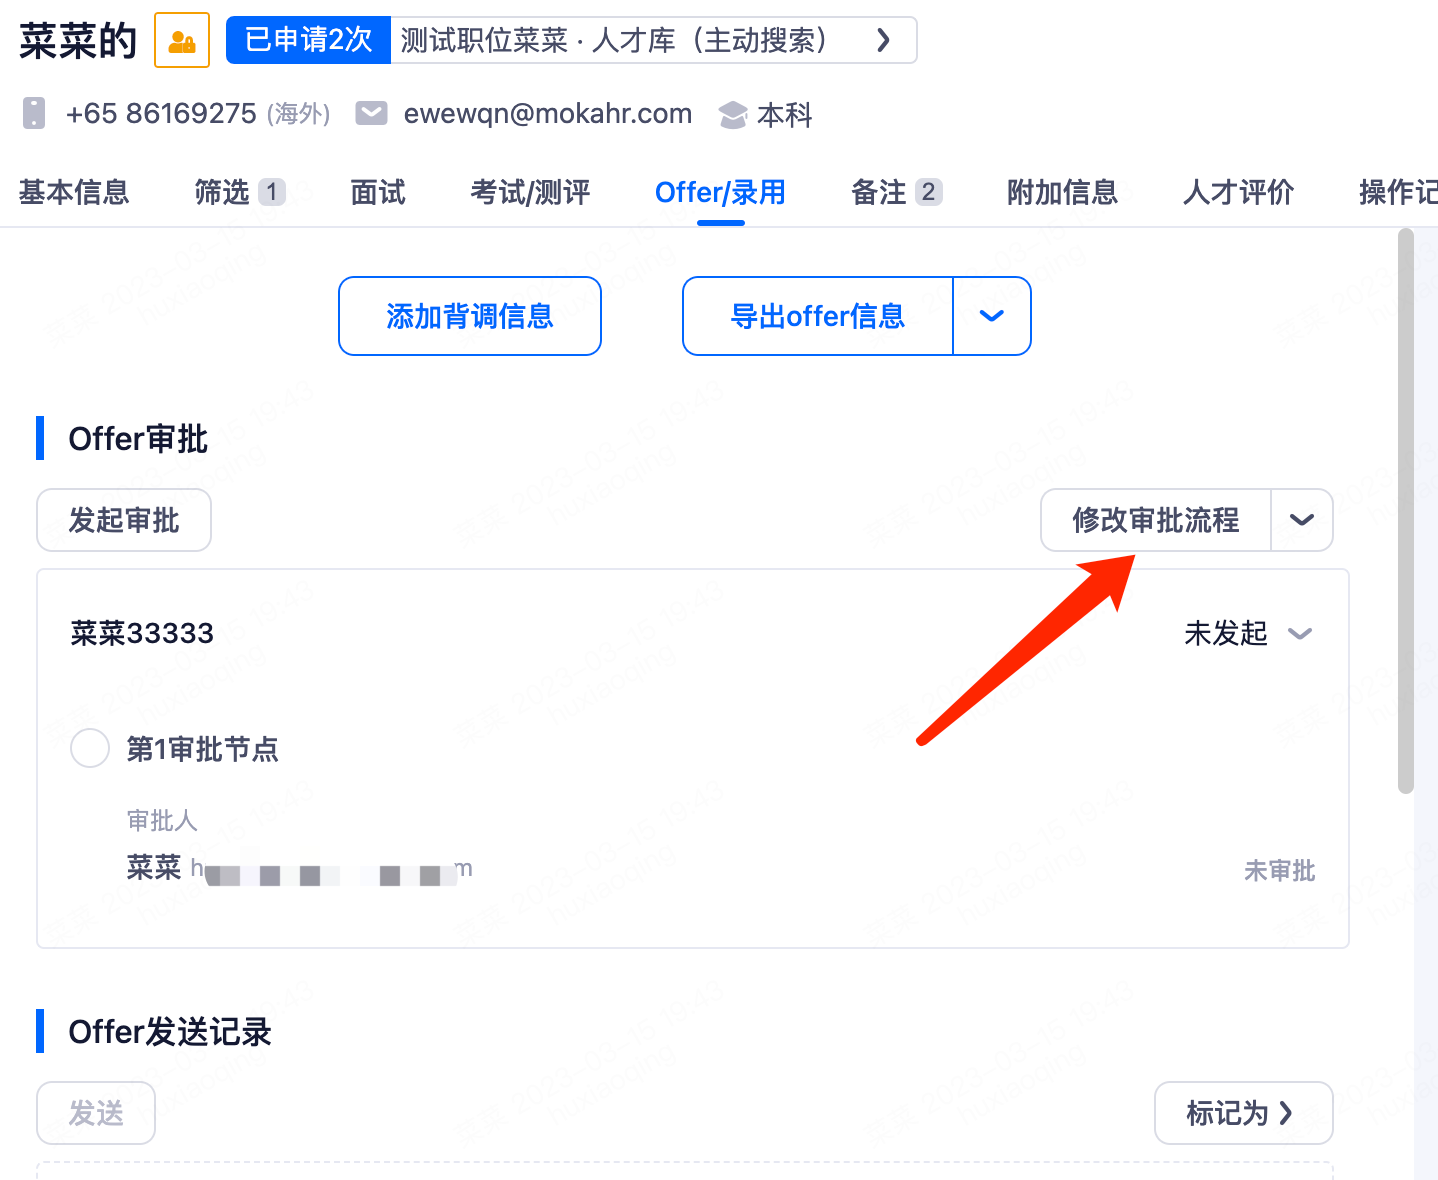
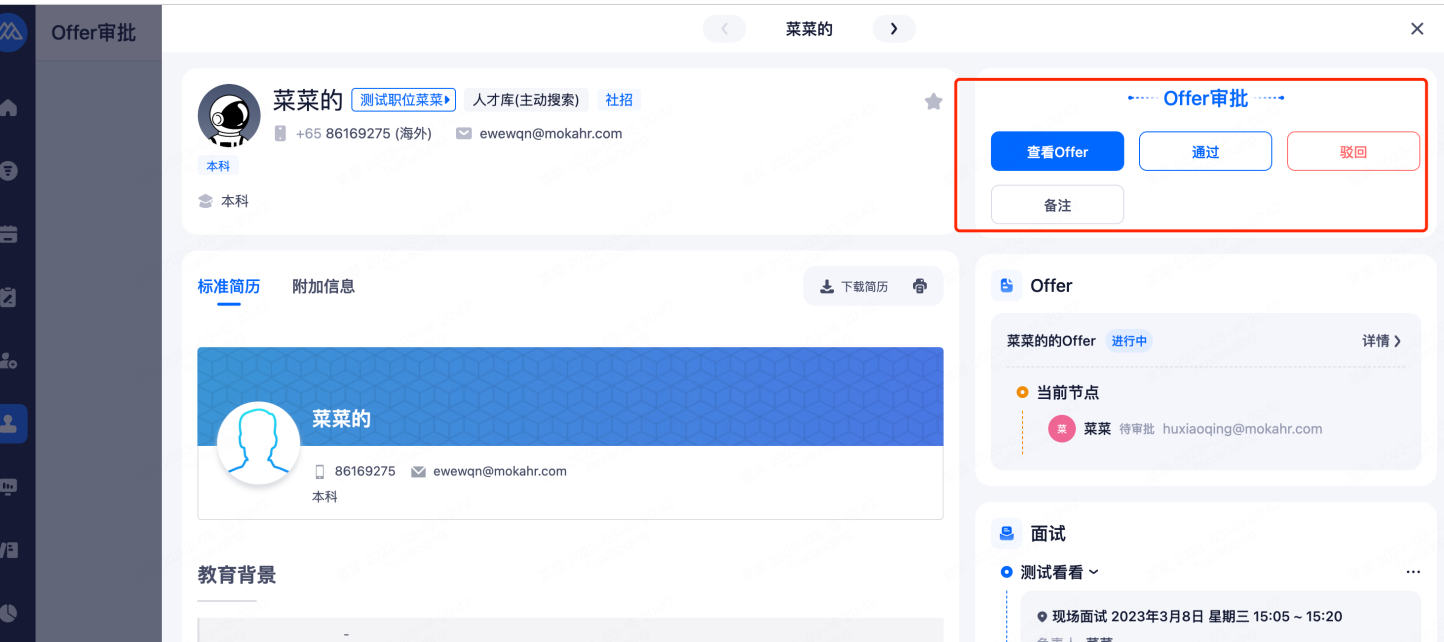
There are certain conditions on whether HR can check the Offer approval flow. If any of the following conditions are met, the approval flow can be seen:
①HR belongs to the node to be approved in the approval flow, and the status of the approval flow is "approval"/" withdrawal ";
②HR belongs to the approved node of the approval flow, and status of the approval flow is "approval in progress"/" withdrawn "/" Approved "/" rejected ".
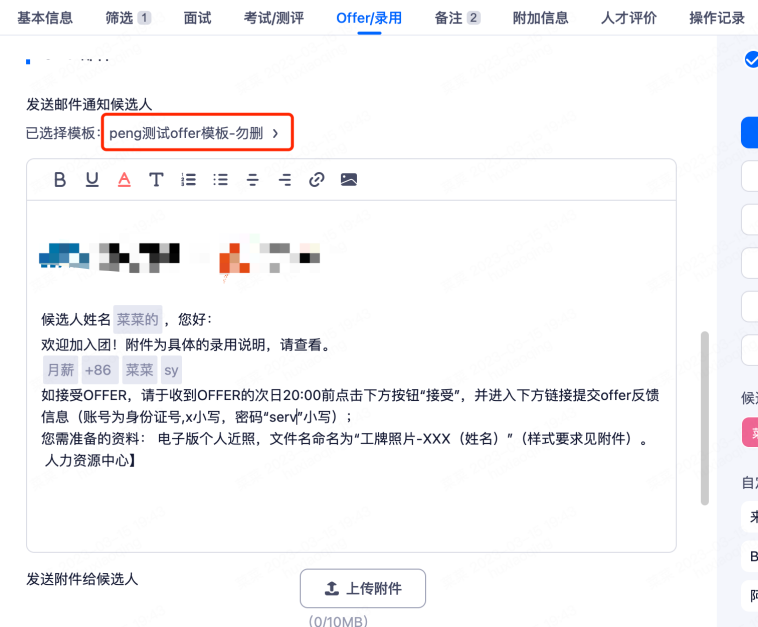
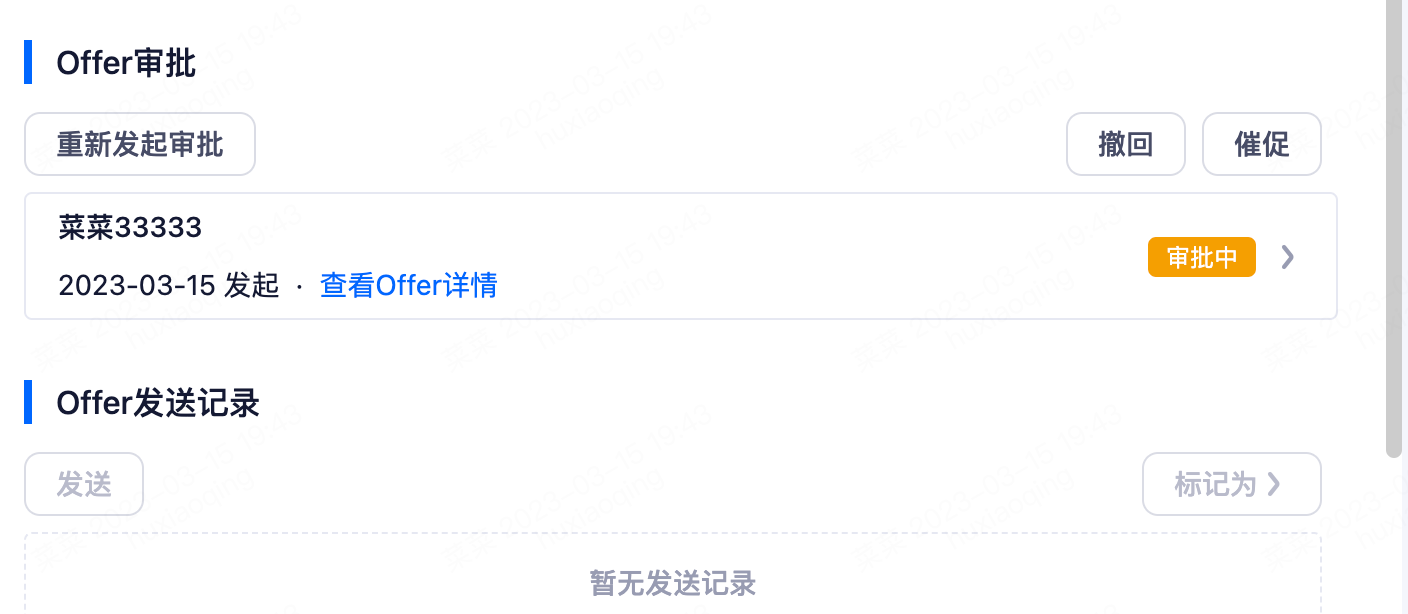
• Send Offer: After the Offer is approved, the send button will be unlocked and you can click to send Offer to the candidate. After sending the Offer to the candidate, HR can check the details of the Offer, the content of the email, the content of the text message, and the specific sending time.

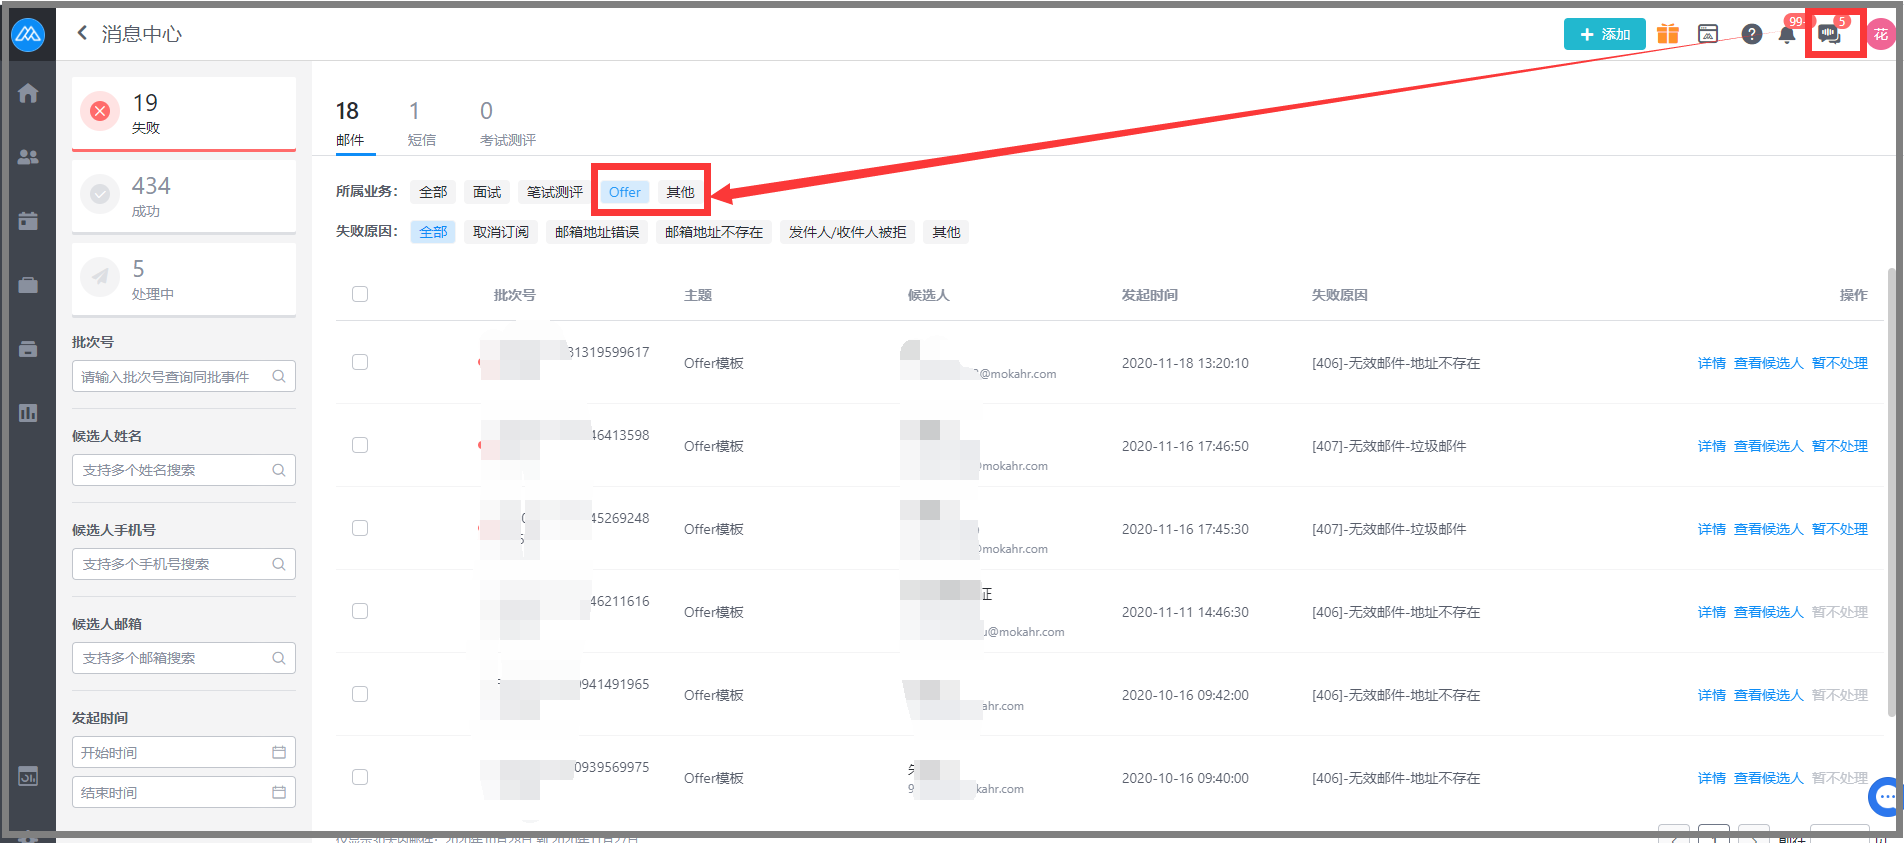
If the Offer fails to be sent, the message center will send a reminder of the Offer failure. If the email or short message related to the Offer is not sent successfully, HR can check the specific reason in the message center. (Contact the account manager to enable this function)
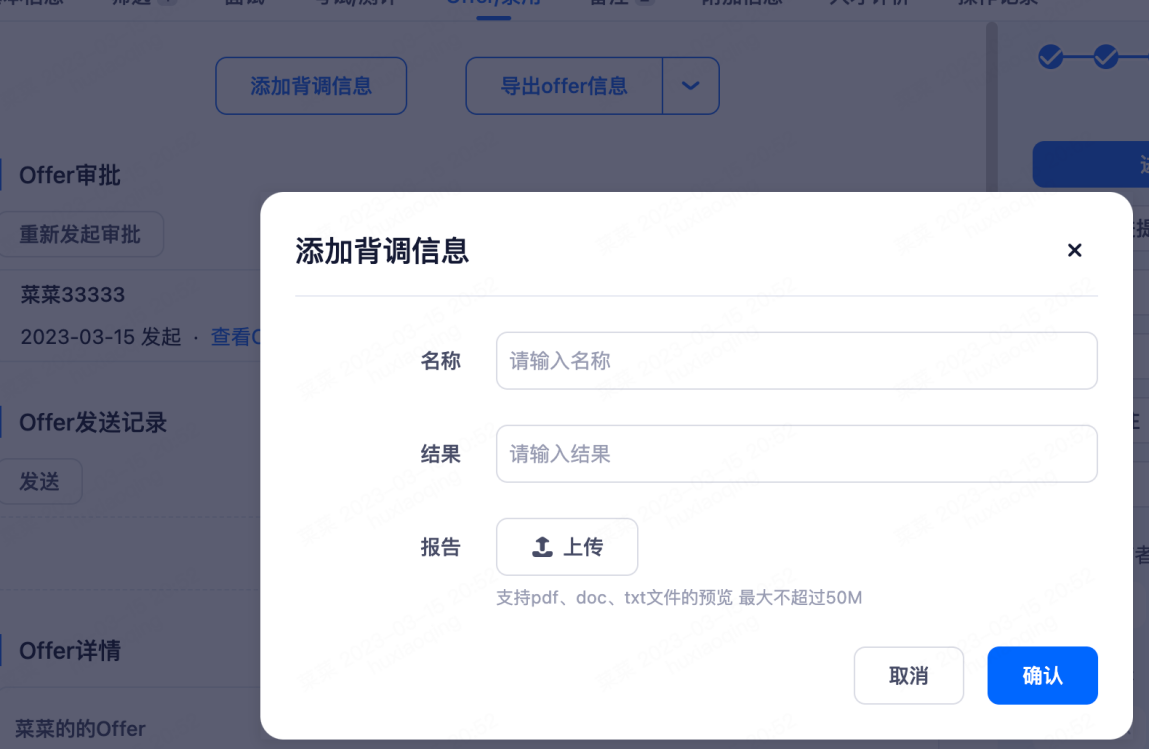
Add background
Add background information: The template can be directly uploaded in the format of pdf, doc, and txt. The size of the template cannot exceed 50M.
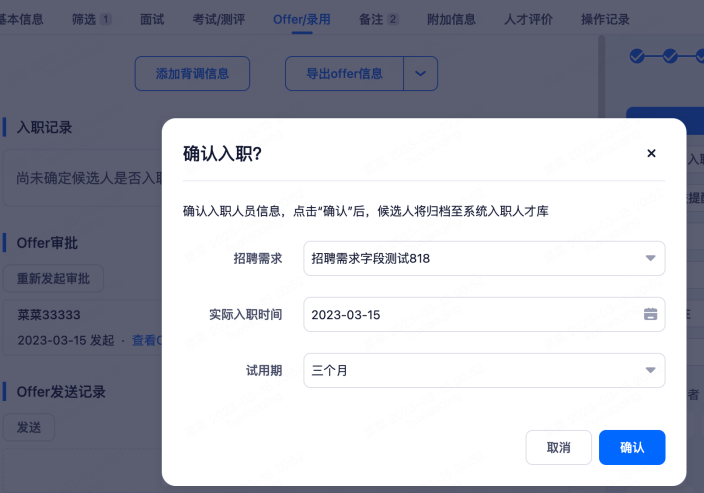
4.3.9Waiting for entry stage
After accepting the Offer, the candidate can automatically jump to the waiting link.(Set up in advance.)
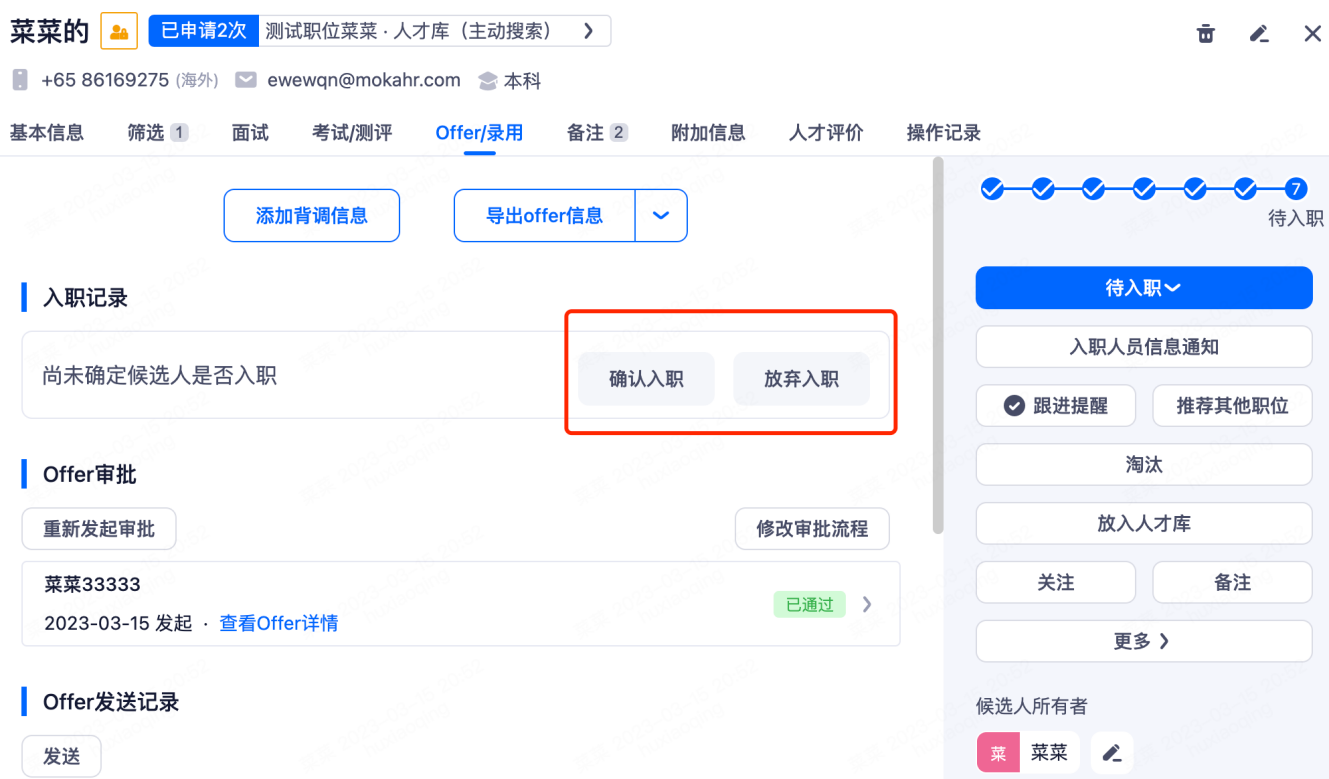
According to the actual situation of the candidate, choose to join or give up.
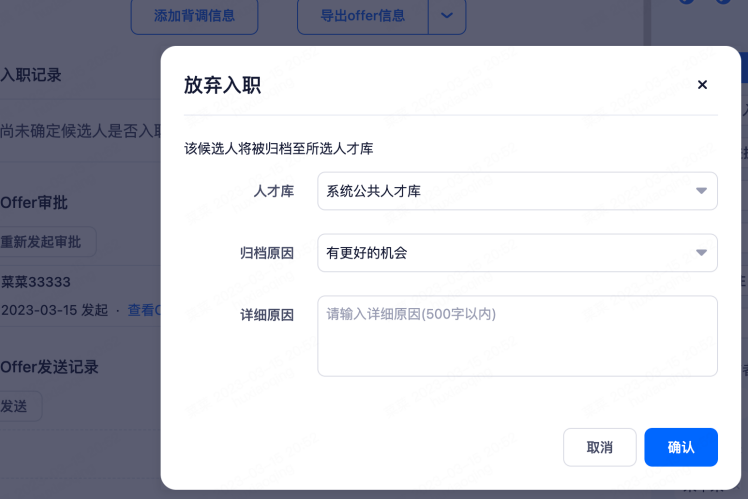
Candidates who give up entry: You can select the corresponding talent pool to reserve, and mark the file label.
Candidates already on board: they can choose the actual on-board time and probation period, and then automatically mark the on-board label and transfer to the on-board talent pool. When the probation period of the candidate is about to expire, the candidate will be reminded to the recruitment manager and transferred to the regular position.
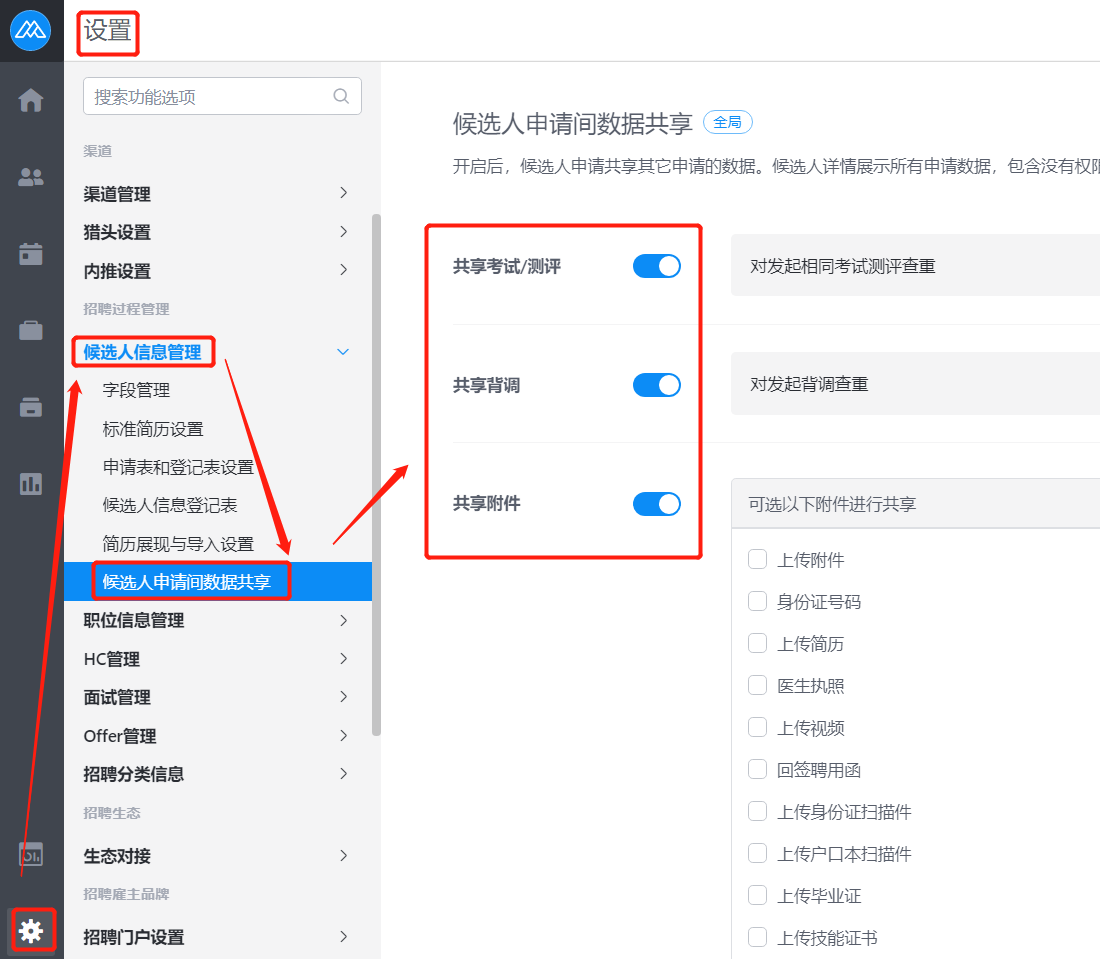
4.3.10Candidate information management
On the system Settings page, you can use the "Candidate Application Data Sharing" button on the Candidate information Management page. When candidates apply for multiple positions, the system supports the sharing of assessment/exam, recitation information, attachments, etc. HR without position authority can also share relevant information from this position
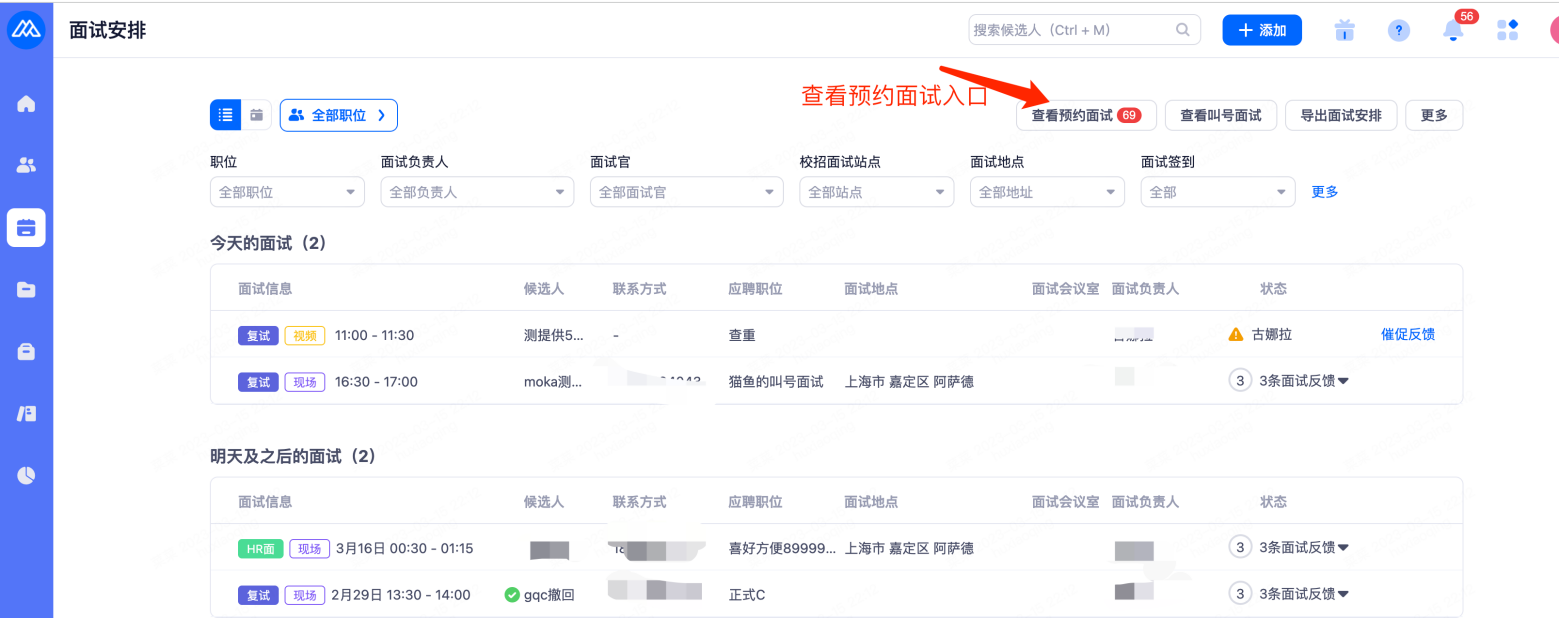
4.4Interview arrangement
Find the interview arrangement in the menu on the left and click to jump to the interview arrangement details page. You can view today's interview, past interview and future interview arrangement in the form of a list, and ask for the interview without feedback.
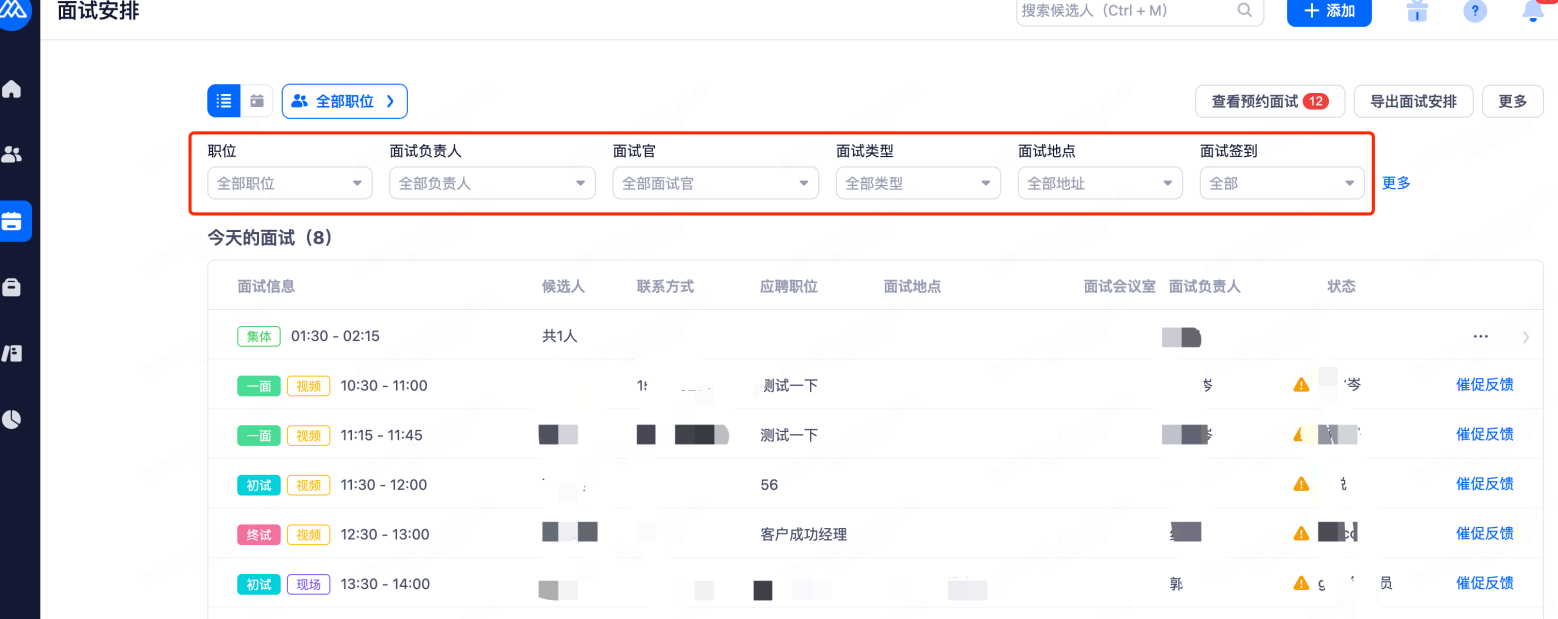
Can be filtered through the form of a monthly calendar/weekly calendar to view.
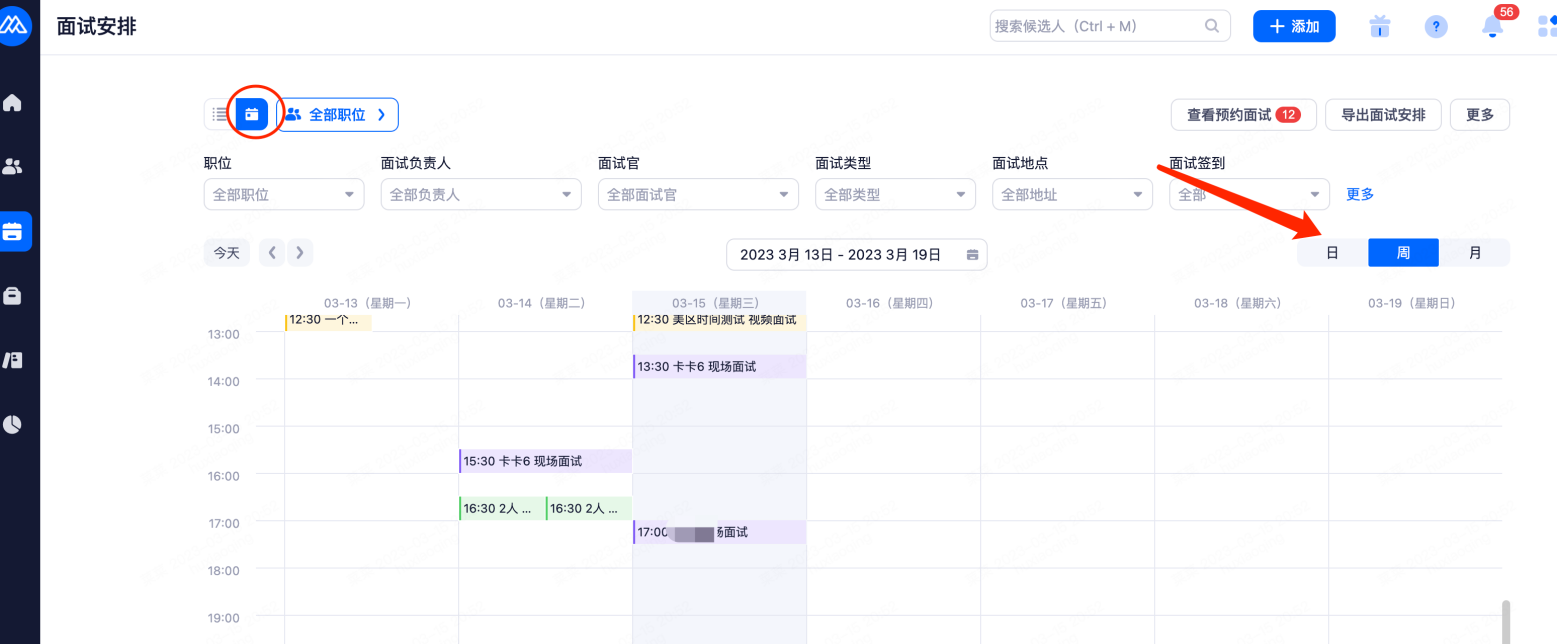
Click on a candidate to schedule an interview, view the interview, and track the interview process.
5.Pool of talent
5.1Build a talent pool
Click "Talent pool Management" in the system Settings to create and modify the talent pool, and can create a sub-talent pool; HR with authority can add sub-talent pool according to the outgoing talent pool, blacklist and custom talent pool, so as to facilitate HR to classify and manage different talent pool candidates.

5.2 Overview of the talent pool
Resumes filed into the talent pool can be searched according to a variety of criteria, or can be added to the talent activation criteria, select single batch activation or cycle activation.
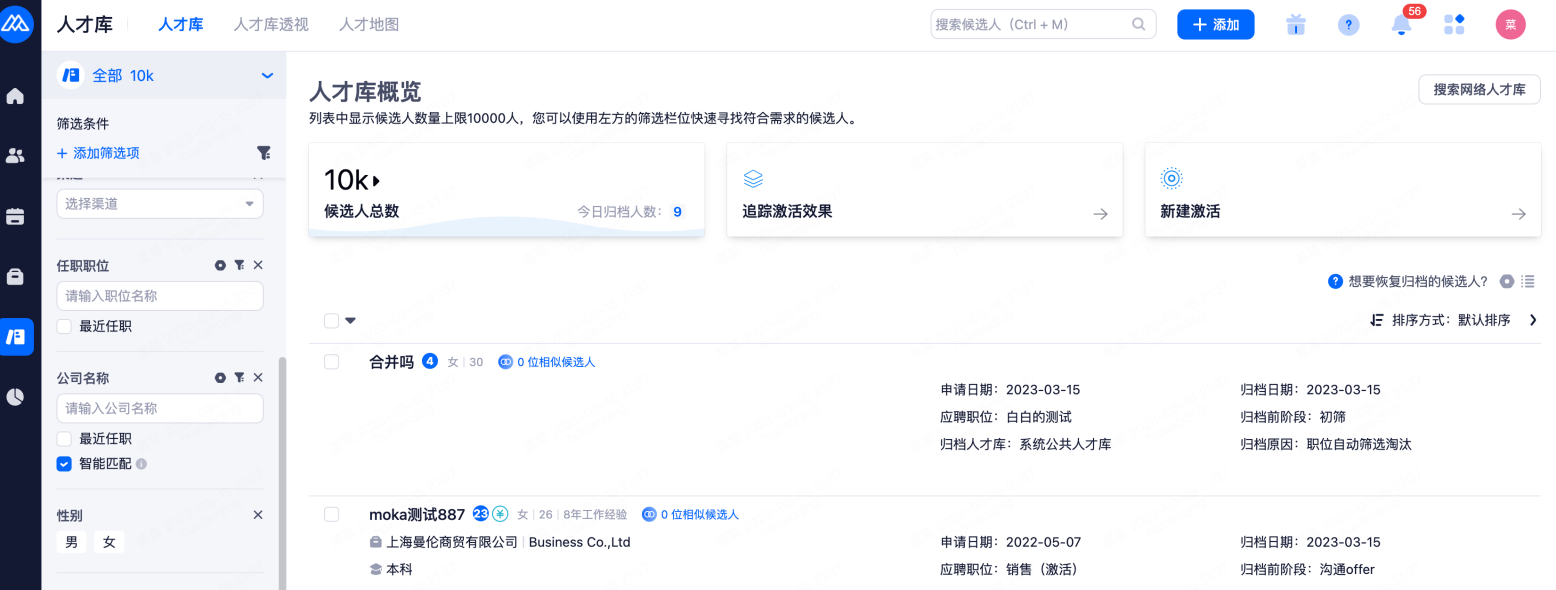
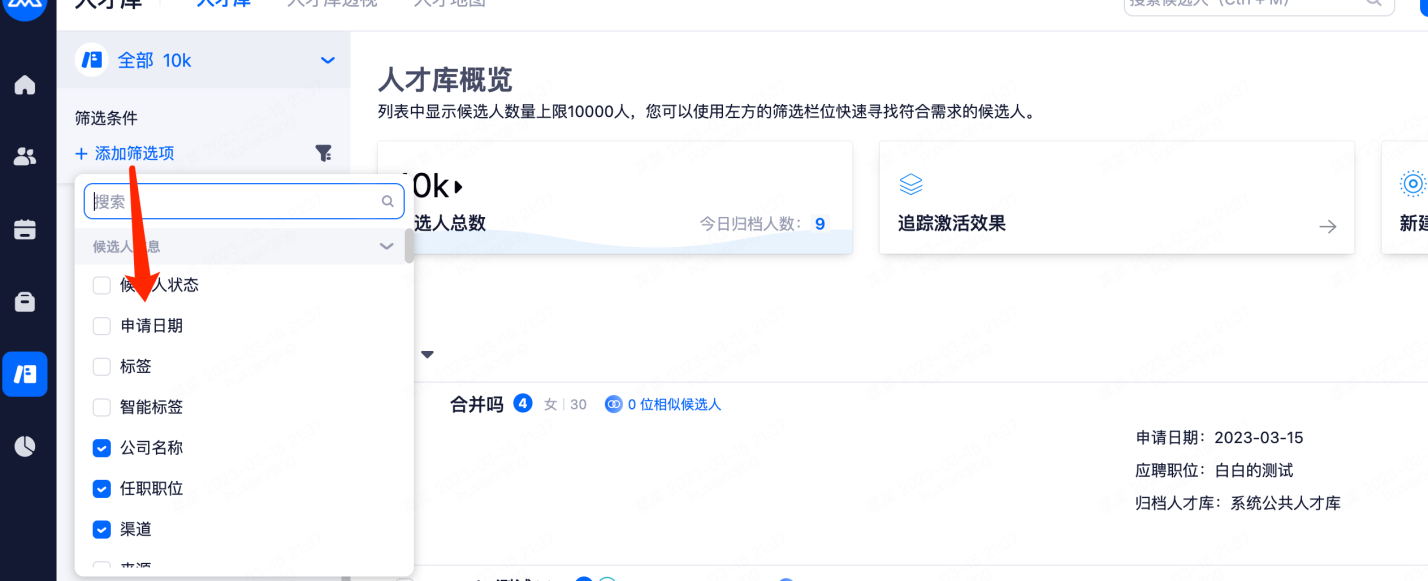
5.3Talent pool screening
Select the criteria in the left selection bar of the talent pool interface. You can customize the selection items. Fields that can be filtered include but are not limited to: position holder, candidate status, position category, position nature, native place, etc.
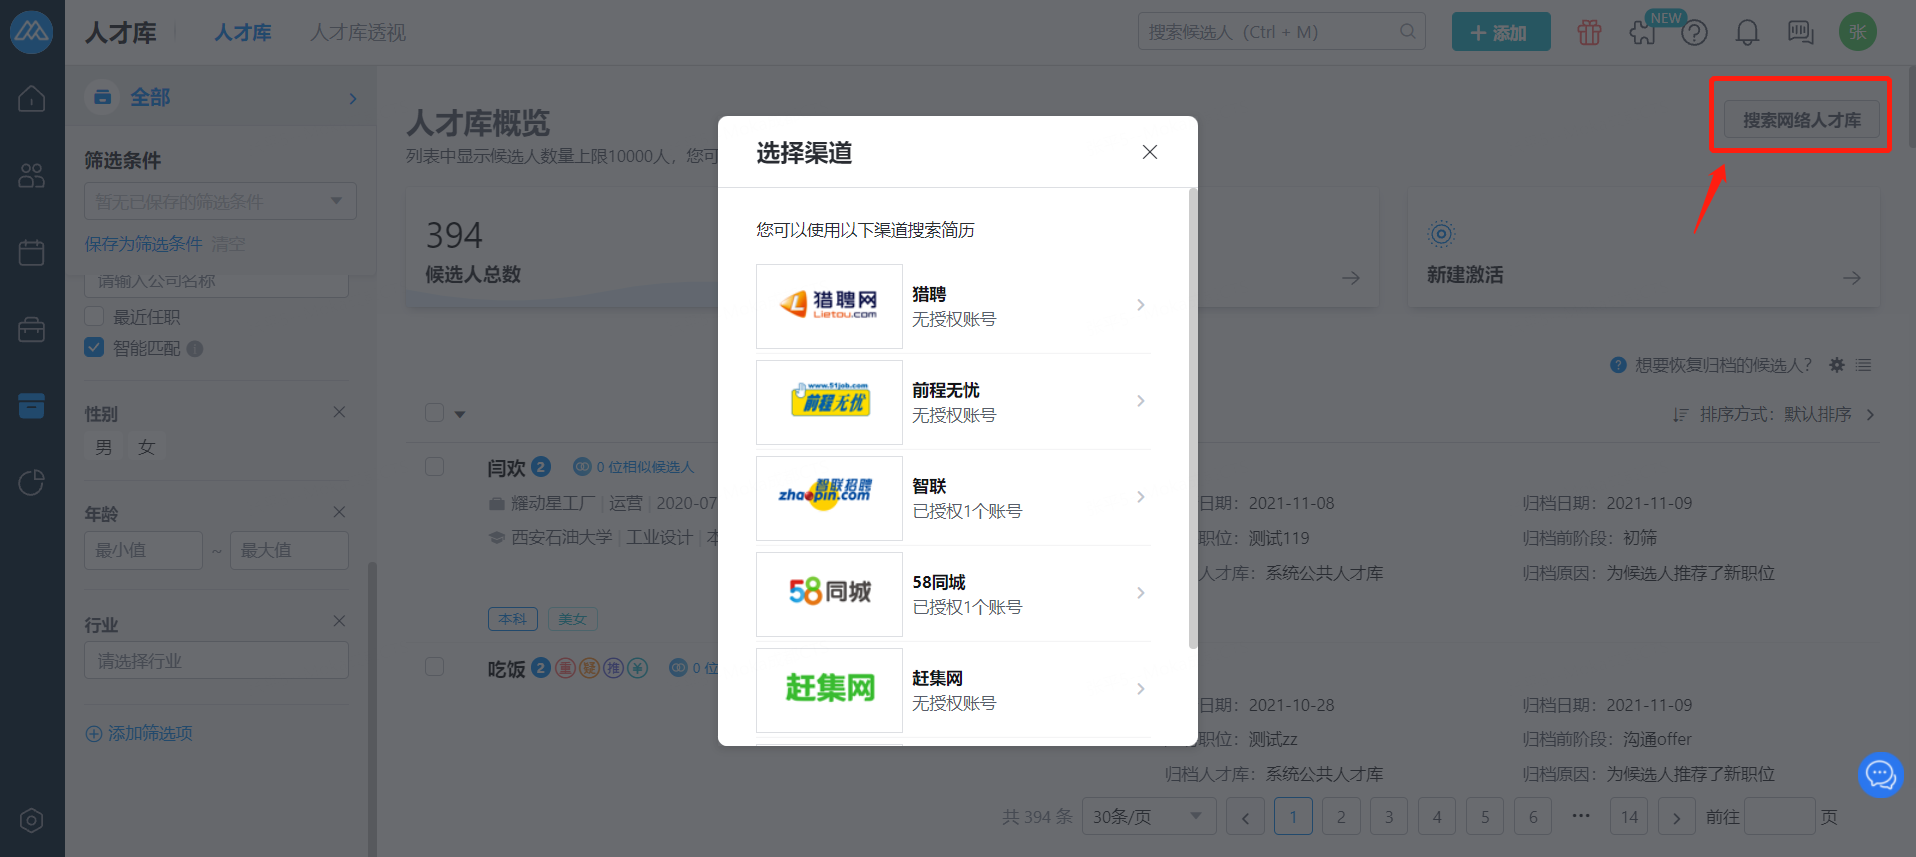
5.4Search for online talent
Active search: The search online talent pool in the upper right corner is the function of active search channel resume. By jumping to the corresponding channel to search resume through the plug-in, it will automatically determine whether the resume already exists in the system (avoid repeated downloading).
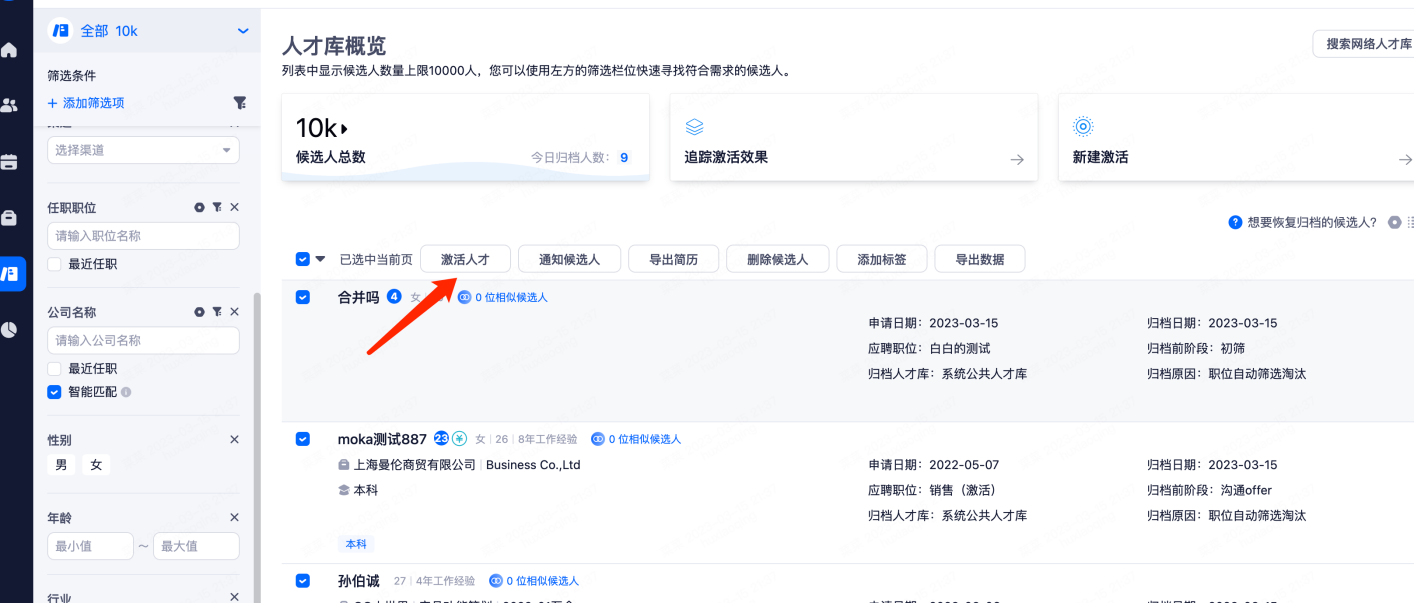
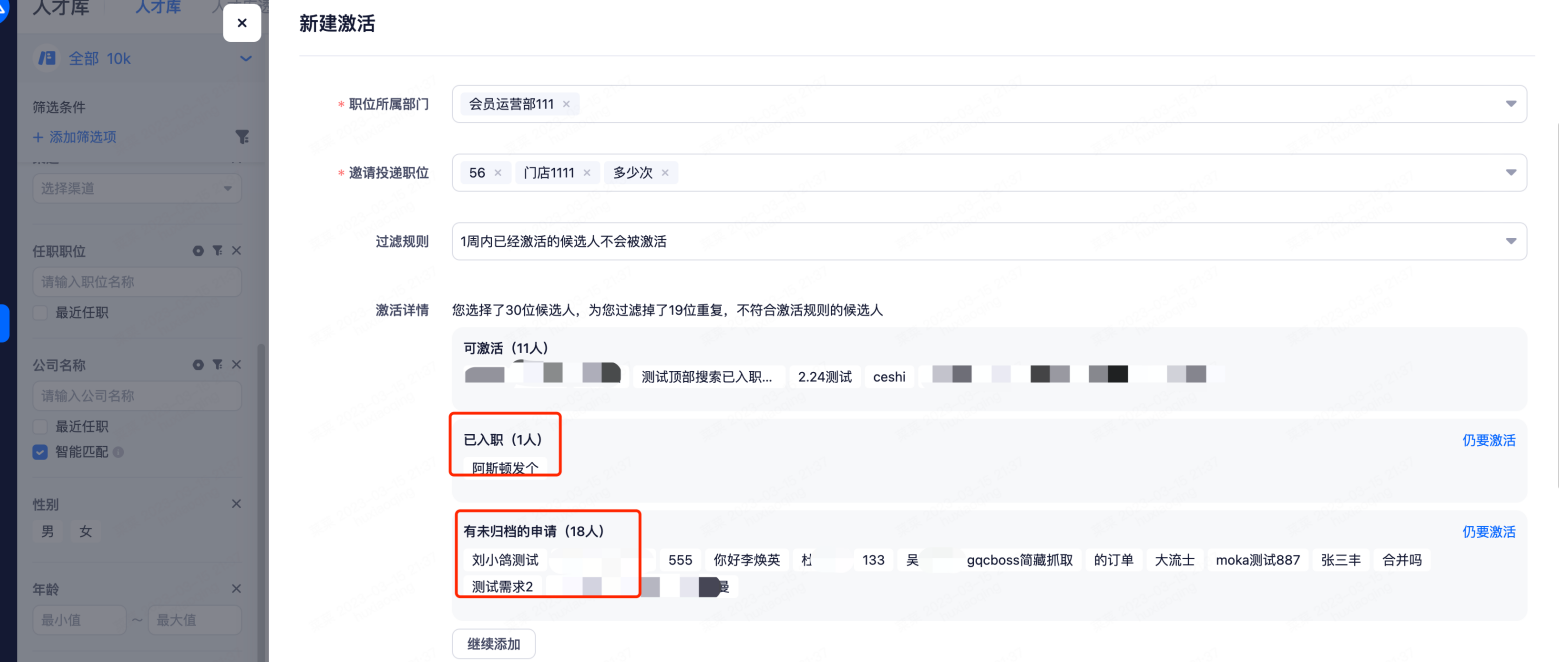
5.5Activate the talent pool
In the system talent pool interface, configure the screening criteria, filter the candidates you want to activate, and reconfirm according to the selected data.
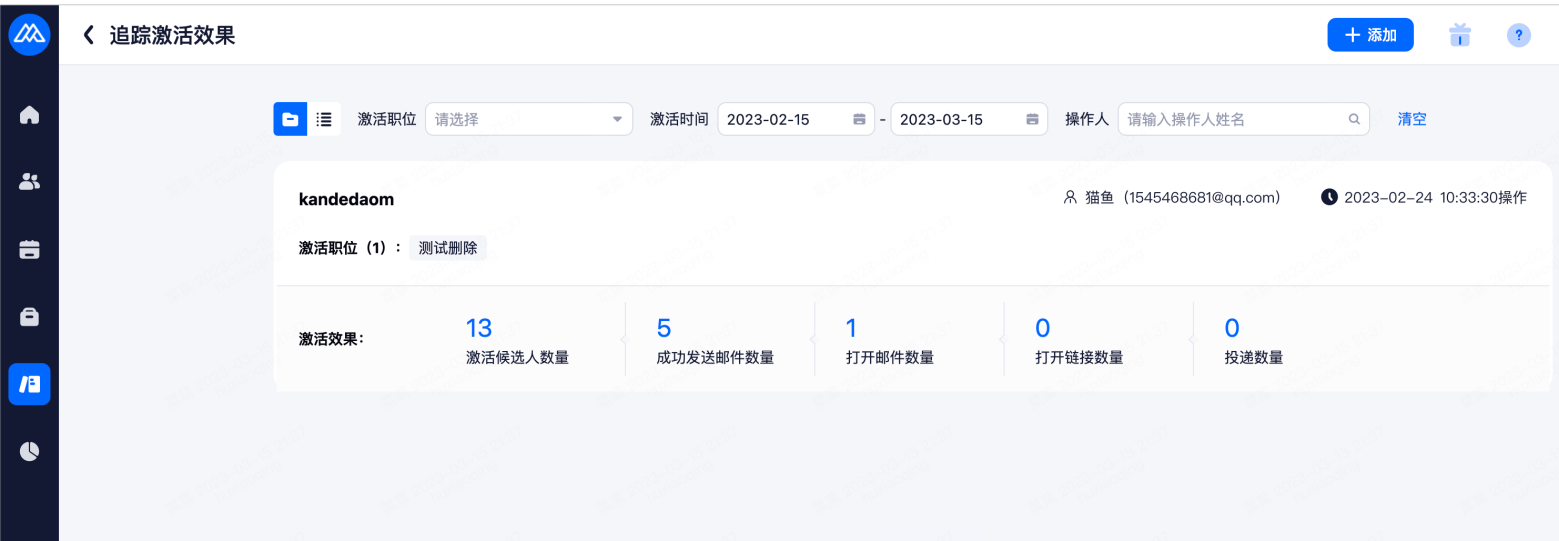
5.6Track activation effects
After activating candidates in the talent pool, support to track the activation effect in the form of items or lists, which can more directly see the relevant information of candidates.
5.7Talent pool resume allocation
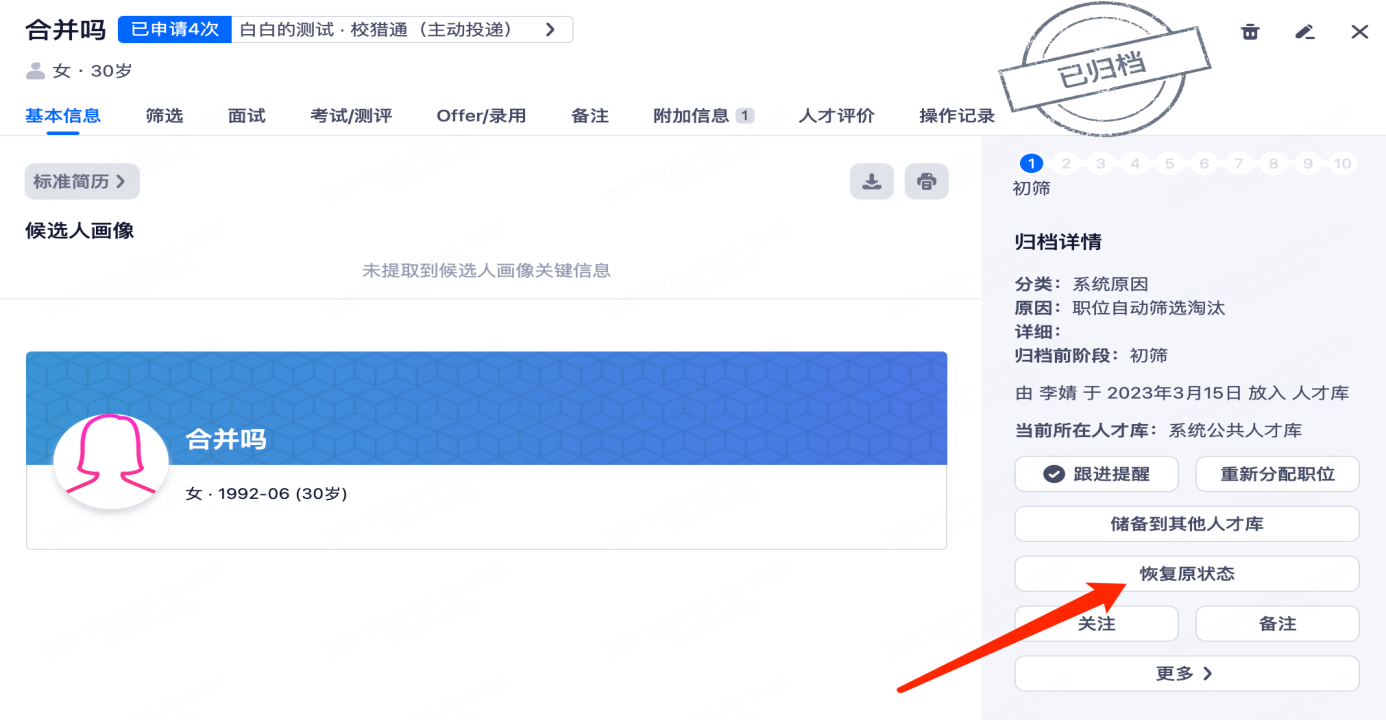
Talent pool resume assignment can work to restore the original state or reassign a position.
Restore the original state: the candidates directly recover to the then operation stage of the candidate management process, such as the candidates are filed in the post-interview stage, and directly displayed in the interview stage after the recovery.
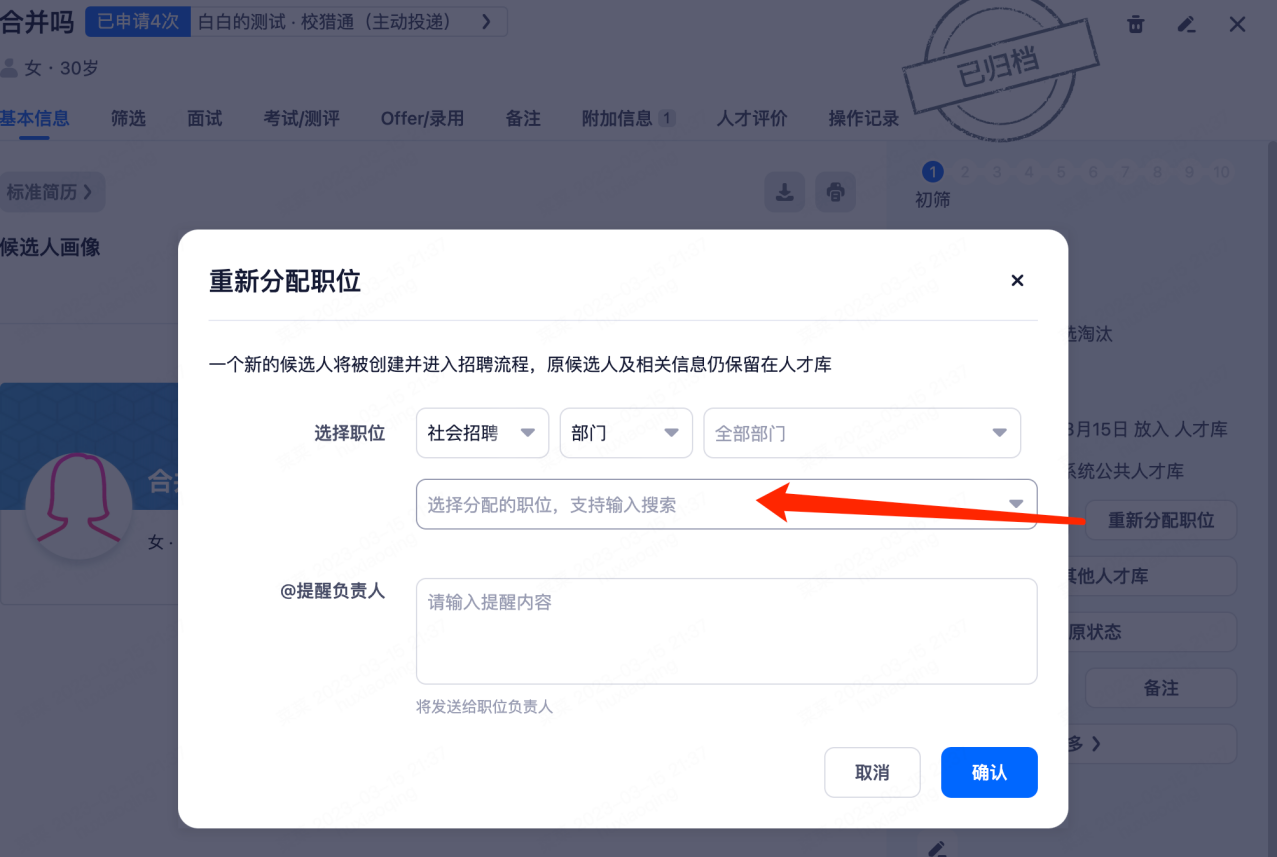
Relocation: Candidates enter the initial screening stage of the assigned position (the first stage of the recruitment process), and the channel will be displayed as the talent pool.
6.Report center
The report center can configure reports of different latitudes, create according to the actual requirements, and report statistics based on the candidates in the system.
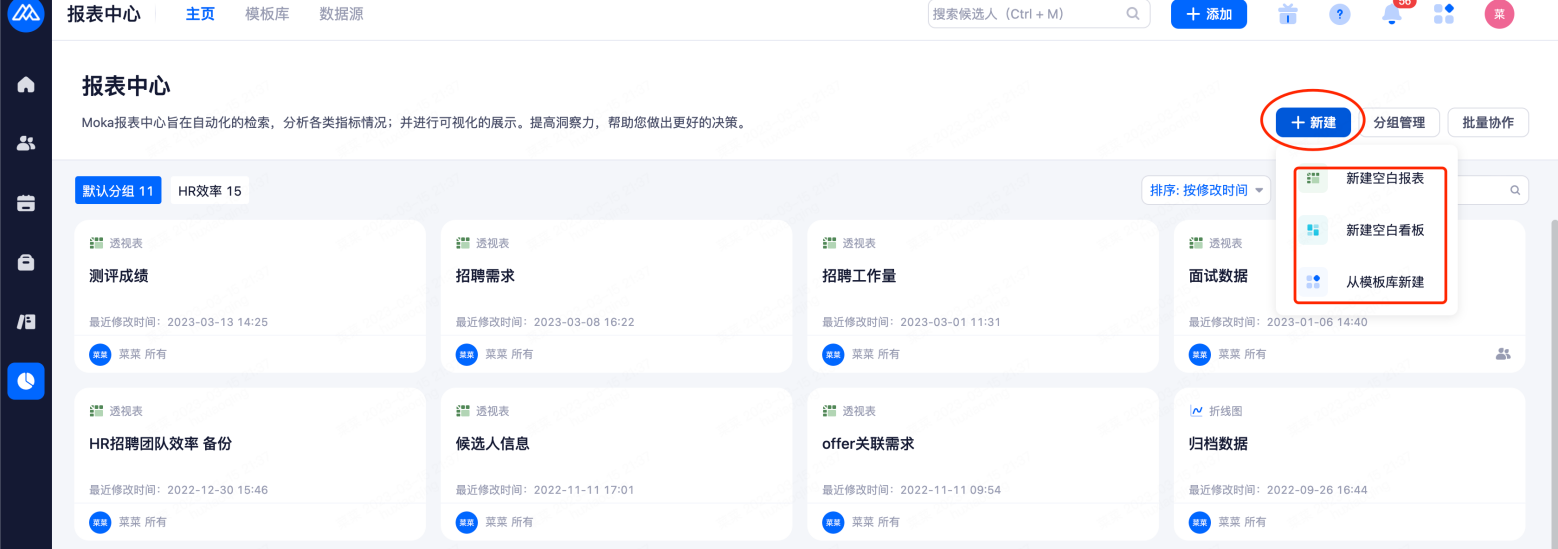
6.1Creating a report
Click "New Report" in the Report Center to create a blank report or select a report template from the template library.
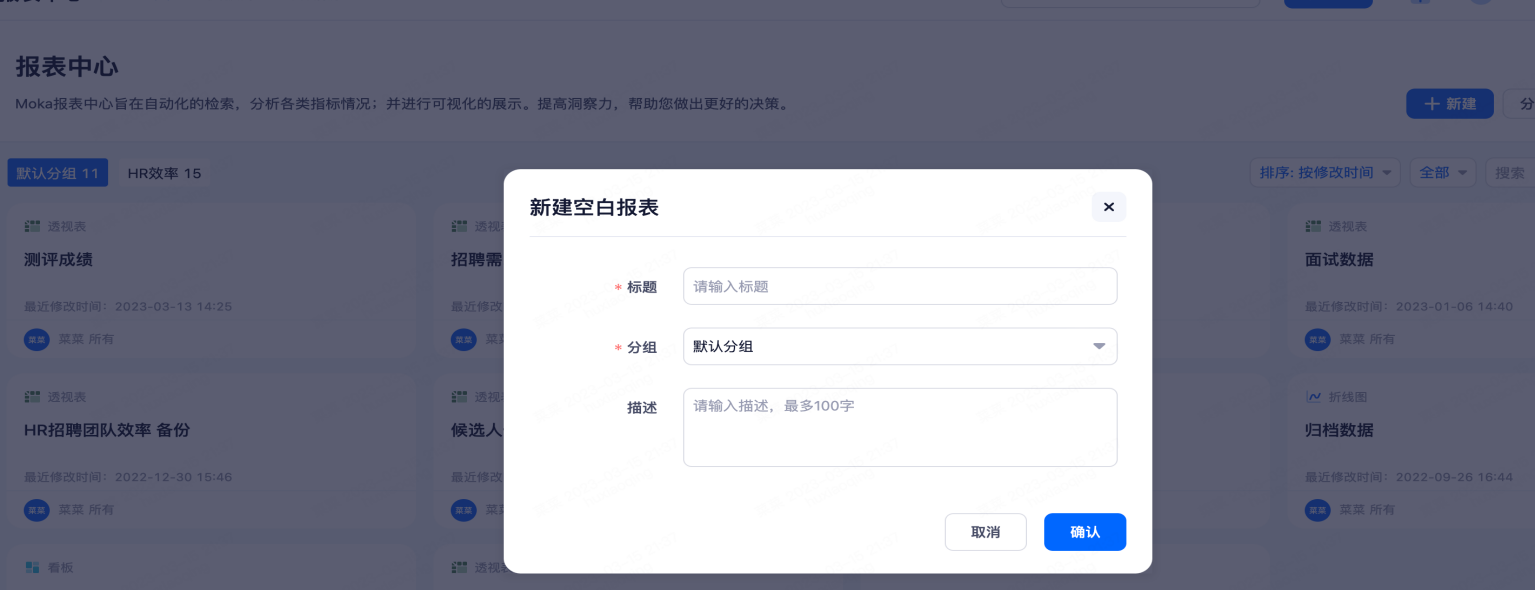
• Create a blank report:
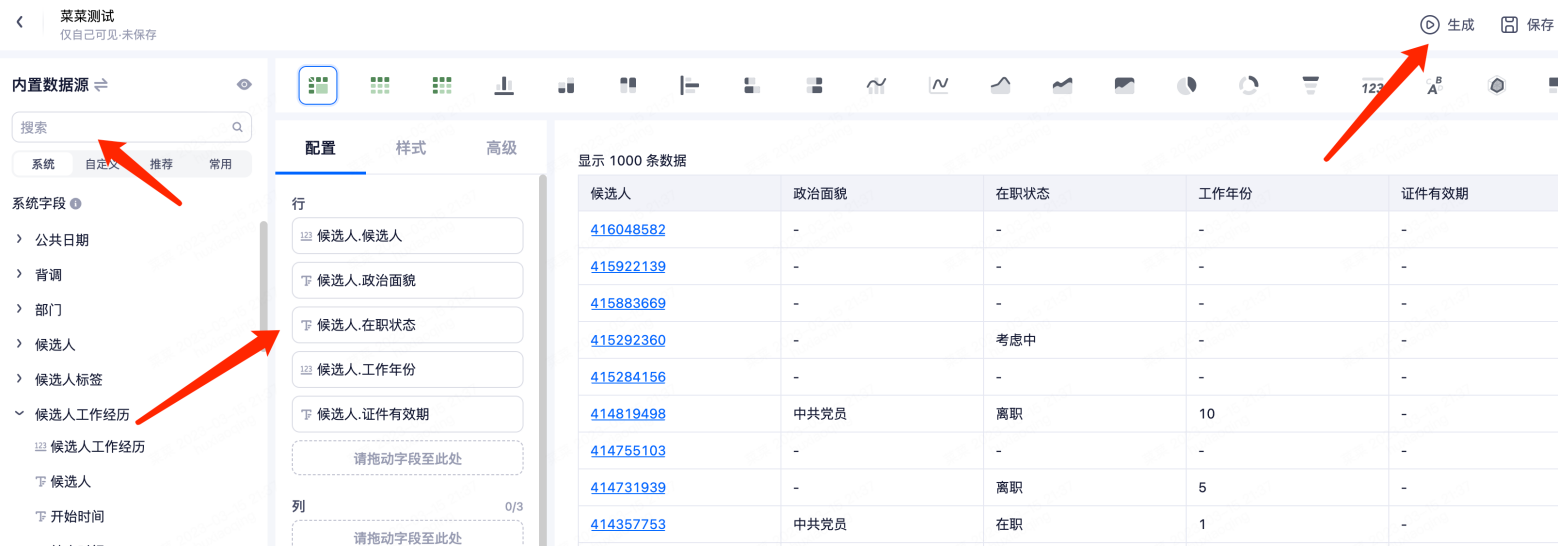
6.2configure a report
In the left system field, drag or double-click the required field in "line" and "column", click generate to confirm whether the data is needed, and finally click to save.The report center can configure reports of different latitudes, create according to the actual requirements, and report statistics based on the candidates in the system.
• After selecting the template library, you can jump to a new page. You can choose the report you need, support preview, and directly apply the template to the table to generate your own data. The generated report can also be edited and adjusted in fields.

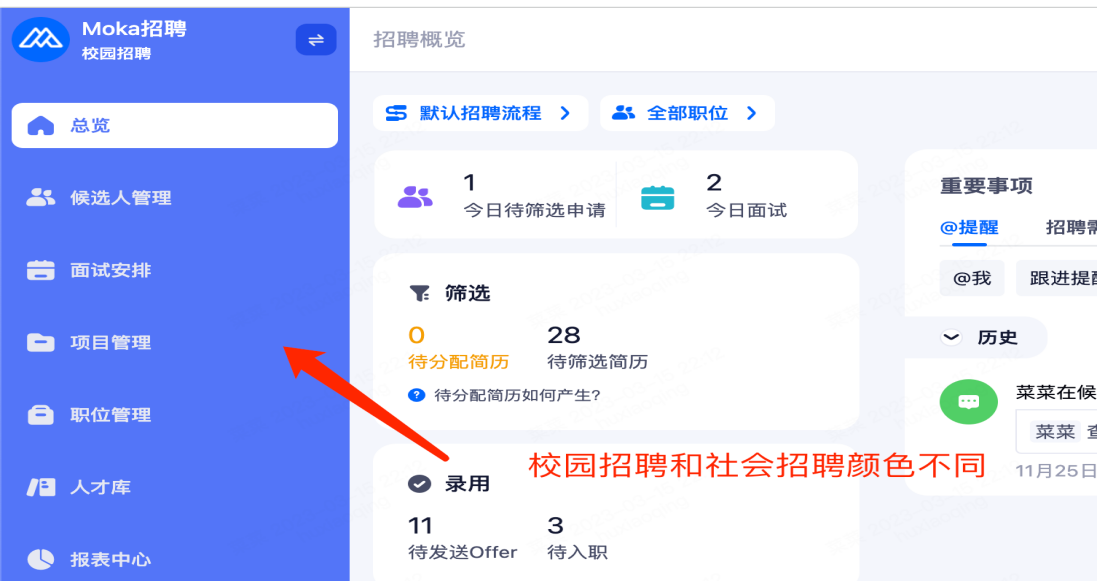
7.The overview
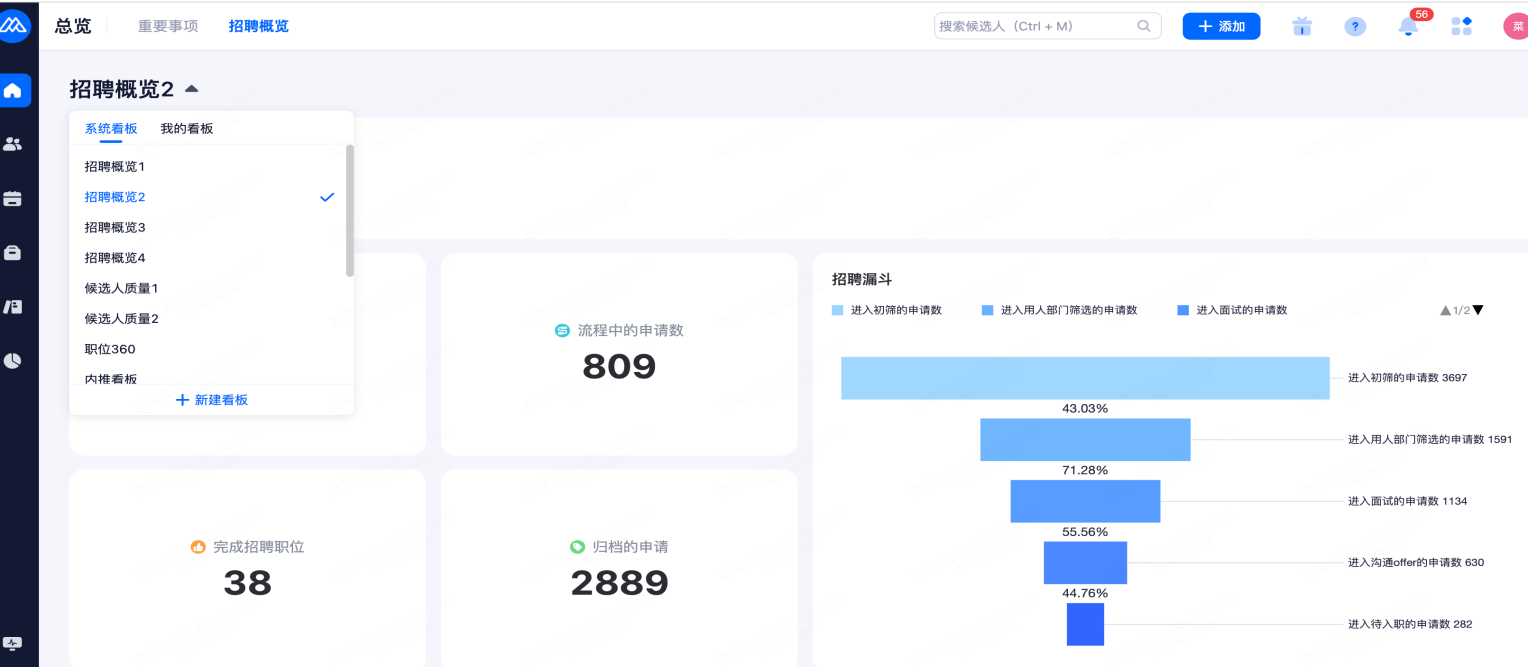
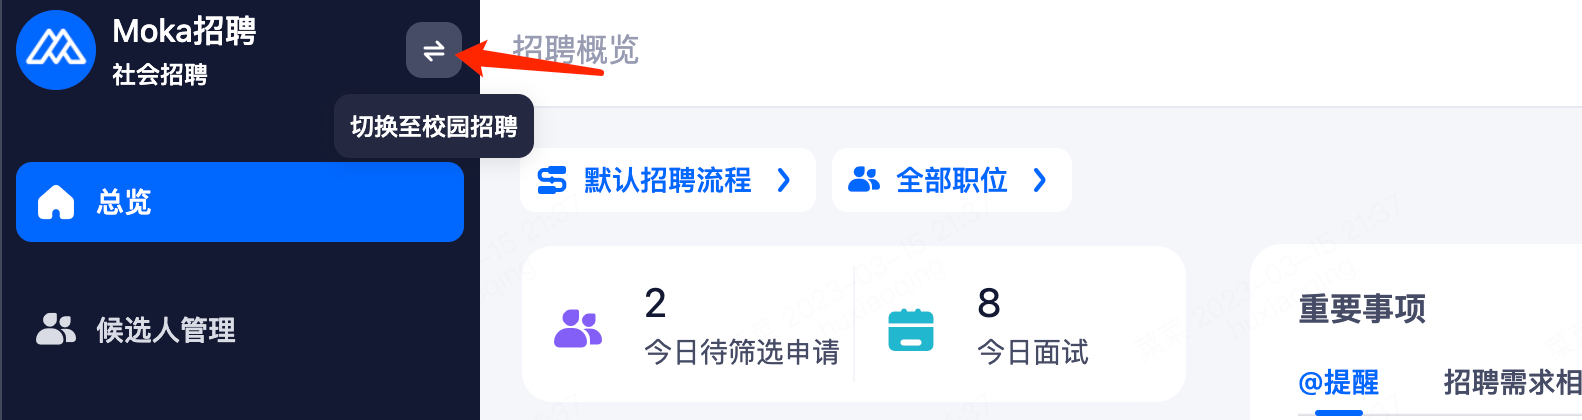
After login, you will enter the overview page by default. You can switch to the top left corner to view important matters/recruitment overview; You can choose the recruitment process and the selection of the recruitment position to view the details; If store sharing is enabled, the resume of store sharing will be displayed in the upper right corner. Online customer service can be accessed in the lower right corner.
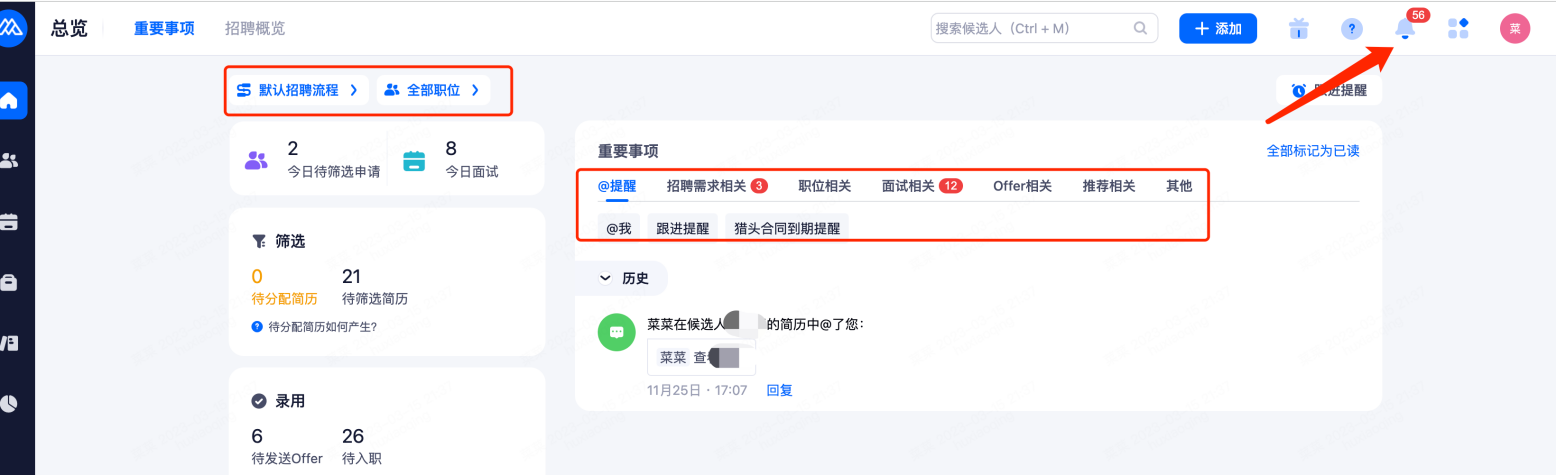
The recruitment overview is presented in the form of data and modules, with different overview charts, which can help you clearly see the current data distribution in the system.
8.Campus recruitment
The talent pool for campus recruitment and the talent pool for social recruitment are completely independent.
8.1 Management of candidates
When uploading candidates in the campus recruitment system, the source of candidates can choose the campus ambassador channel, which is convenient and faster to screen the candidates recommended by the campus ambassador.
8.2Types of interview
Campus recruitment can make an appointment for the interview arrangement and set the time. After the candidates choose their own time, HR will arrange an interview, which will help the interviewer to improve efficiency and time management.
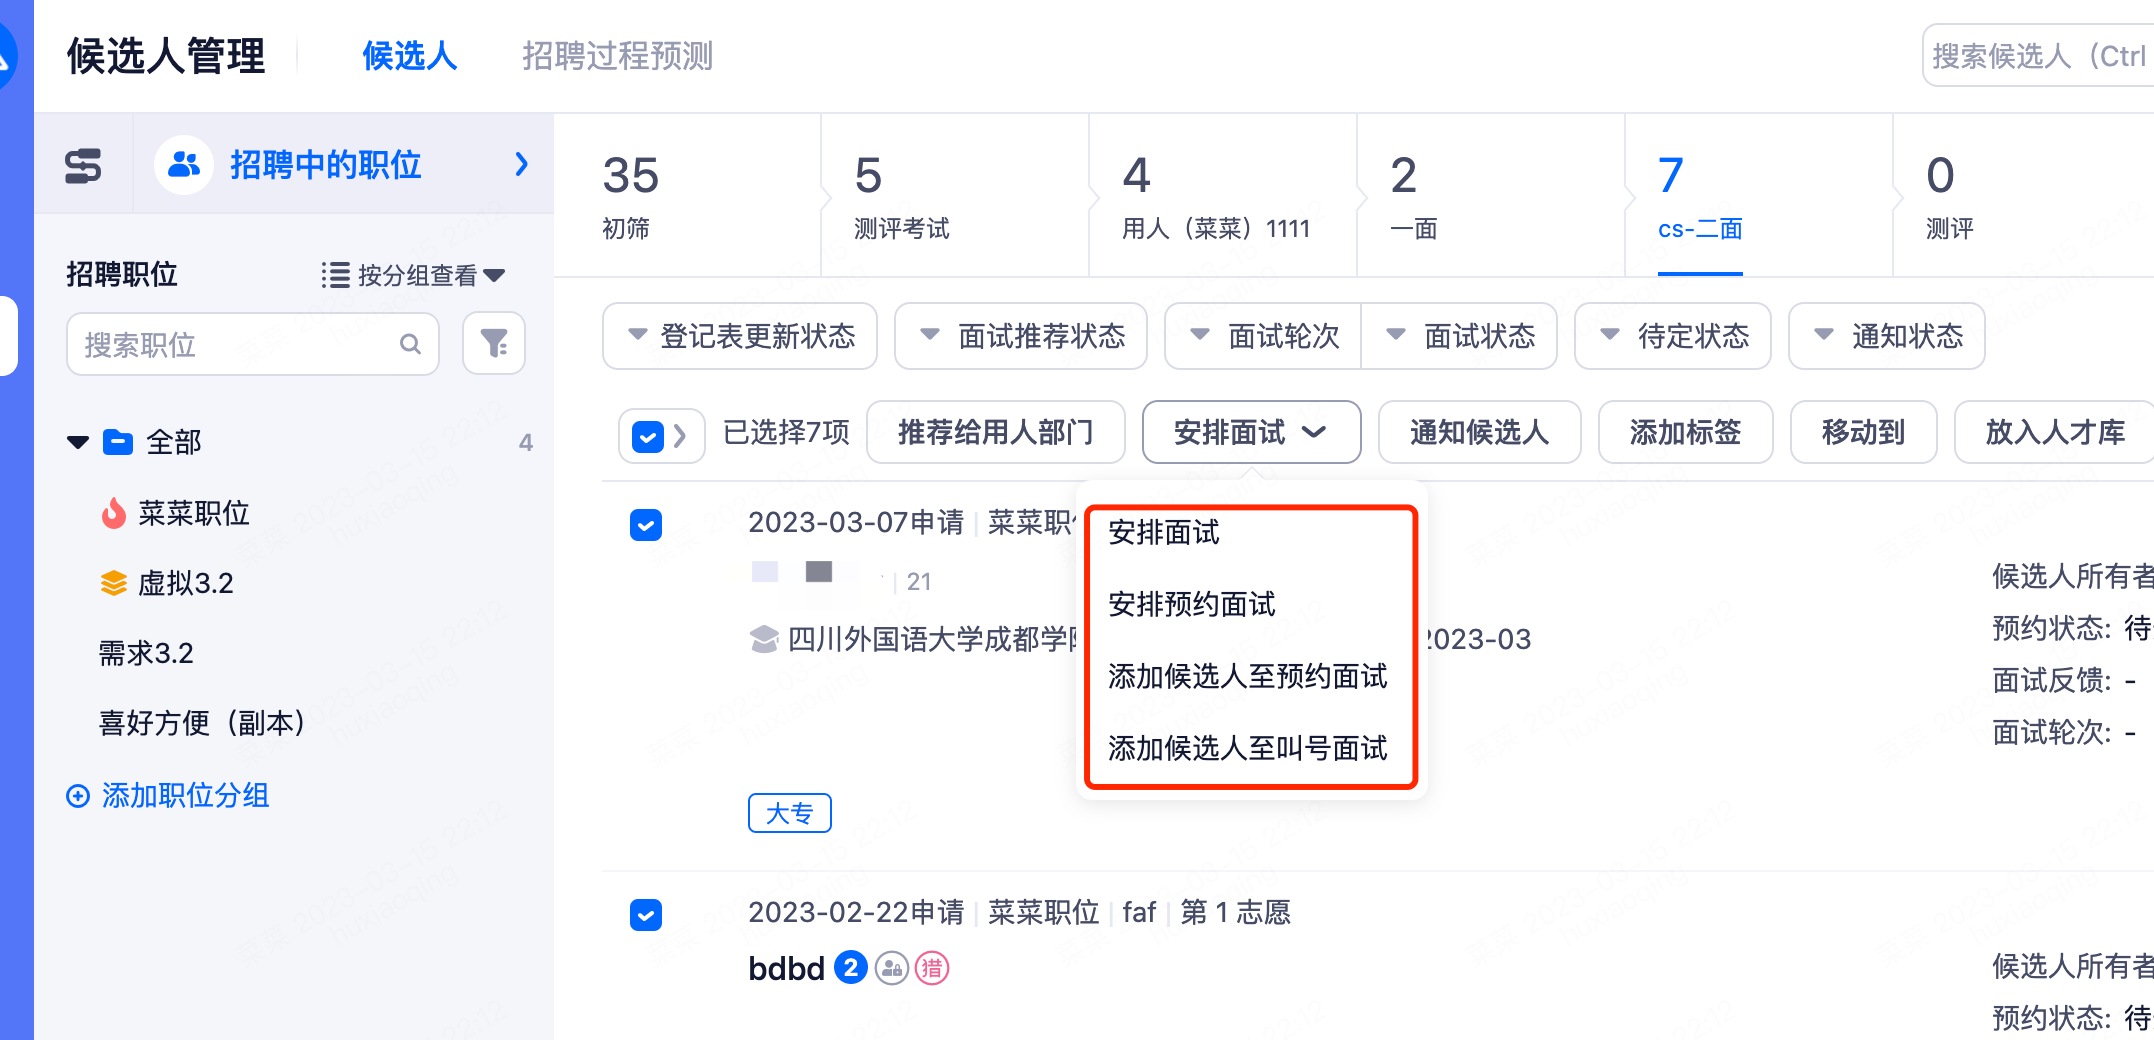
Interview types: call-to-number interview, appointment interview, group interview, group interview
Check the interview schedule: